Dinner · Part 2 of 3: Instructions
Creamy Cheesy Potato Gratin for the Perfect Comfort Side Step-by-step instructions
- Prep
- Cook
- Total
- Serves
- 6
Before you start
Before beginning the assembly, ensure the oven is fully preheated to 375°F (190°C) to ensure consistent cooking.
Prepare the baking dish by lightly greasing it with a small amount of butter to prevent sticking, which makes serving much easier. Wash and peel the potatoes thoroughly, then dry them completely to avoid excess moisture.
Have all ingredients measured and ready, and ensure the cheese is freshly shredded for optimal melting. Organize the workspace to allow for efficient layering of the potato slices, as this will help in achieving a uniform cooking time and a stable structure for the final dish.
Ingredients at a glance (2)
- 2 lb russet potatoes, thinly sliced
- 1 1/2 cups shredded gruyere cheese
Instructions
Potato Preparation
- Prepare the potatoesPreheat the oven to 375°F (190°C). Use a mandoline or a sharp knife to slice the potatoes into thin, uniform rounds about 1/8 inch thick. Arrange the potato slices in the fluted baking dish, overlapping them slightly to create even layers.Look for Potatoes are sliced thinly and evenly.Tip Keep potato slices in water until ready to layer to prevent oxidation, then pat them completely dry.
At the end of this phase, the potato slices should be uniform in thickness and arranged neatly in the baking dish. They should be dry and ready for baking. Check that your workspace is organized and the oven has reached the required temperature, as consistent heat is vital for the upcoming baking process.
Baking and Topping
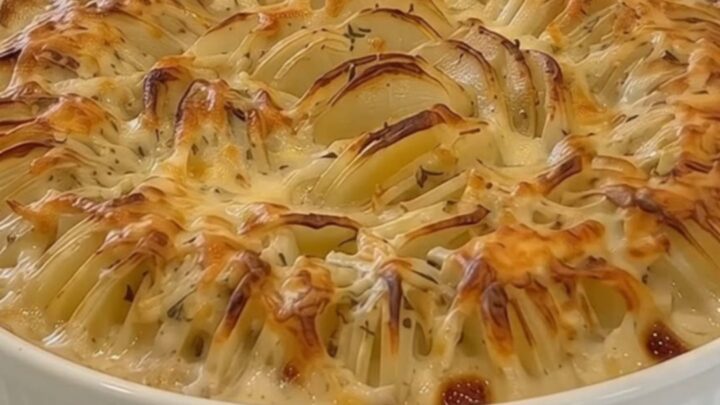
- Bake the gratinCover the dish tightly with aluminum foil and bake for 30 minutes. Remove the foil, sprinkle the shredded cheese over the top, and bake for an additional 15 minutes until the crust is golden brown and the cheese is melted.Look for Cheese is melted and bubbling.Tip Press down gently on the potatoes to ensure they are compact before adding the cheese.
The gratin is ready to move to the final stage when the potatoes have softened and the cheese has been added. The cheese should be evenly spread and have achieved a rich, golden-brown color, indicating the crust has formed properly and the flavors are fully developed.
Resting and Serving
- Rest and serveRemove the baking dish from the oven and let the gratin rest on a wire rack for 10 minutes before serving. This resting time allows the layers to set, making it easier to serve with a clean cheese pull using a metal server.Look for The dish is set and the crust is golden.Tip Use a sturdy metal server to scoop through the layers without breaking the crust.
The dish is ready to serve once it has rested for 10 minutes. The internal structure should have settled sufficiently to hold the layers together, and the crust should remain intact when scooped with a metal server. The gratin should be warm and aromatic, with a satisfying cheesy texture.
Common mistakes
A common mistake is slicing the potatoes too thickly, which prevents them from softening correctly and results in an uneven texture. Conversely, slicing them too thin can cause them to disintegrate completely during the baking process.
Another frequent error is failing to ensure the potatoes are evenly distributed, which leaves the dish cooking unevenly. Avoid rushing the resting time after taking the dish out of the oven; letting it sit for at least 10 minutes is crucial for the dish to set properly, preventing the layers from separating.
How to tell it’s done
The gratin is done when the potatoes are fork-tender throughout, which can be checked by inserting a paring knife into the center to ensure there is no resistance. The sauce should be thickened and bubbling around the edges of the dish.
The top layer of cheese must be a deep, golden brown and slightly crispy. Because there are no raw proteins in this dish, internal temperature monitoring is not required for safety, but serving the gratin while it is still warm and bubbling ensures the best texture for the cheese pull.
Up next · Part 3 of 3
2 variations · storage & make-ahead · 3 answers · printable card
Tips, FAQ & printable recipe (Part 3)← Back to the ingredients (Part 1)