Dinner · Part 2 of 3: Instructions
Creamy Cheese Tortellini Shrimp Alfredo Step-by-step instructions
- Prep
- Cook
- Total
- Serves
- 4
Before you start
Before starting the cooking process, ensure all ingredients are measured and prepped. Thaw the shrimp completely if using frozen, pat them dry thoroughly with paper towels, and keep them in the refrigerator until the exact moment of cooking.
Mince the garlic cloves finely and grate the parmesan cheese. Bring a large pot of water to a rolling boil for the tortellini. Having everything ready to go is crucial, as both the shrimp and the alfredo sauce cook very quickly and require constant attention.
Ingredients at a glance (7)
- 9 oz cheese tortellini
- 1 lb shrimp, peeled and deveined
- 2 tbsp butter
- 3 garlic cloves, minced
- 1 cup heavy cream
- 1/2 cup parmesan cheese, grated
- 2 tbsp fresh parsley, chopped
Instructions
Boiling the Tortellini and Prepping the Skillet
- Boil the TortelliniBring a large pot of water to a boiling point. Add the cheese tortellini and cook according to the package instructions until they are just al dente, which usually takes about two to three minutes. Drain the pasta thoroughly in a colander, shaking off any excess water, and set them aside while you prepare the remaining components of the dish.Look for The pasta floats to the top and is tender yet firm.Tip Do not overcook the pasta as it will soften further in the sauce.
At the end of this initial phase, the cheese tortellini should be cooked to a perfect al dente texture, meaning they are tender but still retain a slight firmness in the center. The pasta will smell faintly of wheat and savory cheese.
Once drained, the tortellini should look plump and moist, ready to absorb the rich sauce. The skillet should be clean, dry, and preheated on the stove, ready to receive the butter and aromatics for the next stage of cooking.
Searing the Shrimp in Garlic Butter
- Sear the ShrimpMelt the butter in a large skillet over medium-high heat. Add the minced garlic and sauté for about thirty seconds until fragrant. Add the raw shrimp to the skillet. Cook the shrimp for two to three minutes per side until they turn opaque pink and reach a safe internal temperature of 145°F (63°C). Transfer the cooked shrimp to a clean plate and set aside.Look for The shrimp are opaque and pink with a golden crust.Safe temperature 145°F (63°C) internal temperature (shellfish)Tip Pat the shrimp completely dry before cooking to get a better sear.
At this point, the kitchen will be filled with the rich, irresistible aroma of sizzling garlic and sweet butter. The shrimp should have transformed from translucent gray to an opaque, vibrant pink and white, with a light golden-brown crust on both sides. They should feel firm to the touch but still springy. It is essential to verify that the shrimp have reached a safe internal temperature of 145 degrees Fahrenheit before removing them from the heat.
Simmering the Alfredo and Tossing the Pasta
- Simmer the Alfredo SauceReduce the heat to medium-low and pour the heavy cream directly into the same skillet, scraping up any browned bits from the bottom. Bring the cream to a gentle simmer. Slowly whisk in the grated parmesan cheese until it is completely melted and the sauce becomes smooth and slightly thickened, which takes about three minutes.Look for The sauce coats the back of a spoon smoothly.Tip Whisk constantly to prevent the cheese from clumping or sticking.
- Toss and GarnishAdd the cooked cheese tortellini and seared shrimp back into the skillet with the simmering alfredo sauce. Toss gently for one minute until everything is thoroughly coated and heated through. Remove the skillet from the heat, garnish with the chopped fresh parsley, and serve immediately while hot.Look for The pasta and shrimp are evenly coated with velvety sauce.Tip Serve immediately as cream sauces thicken quickly as they cool.
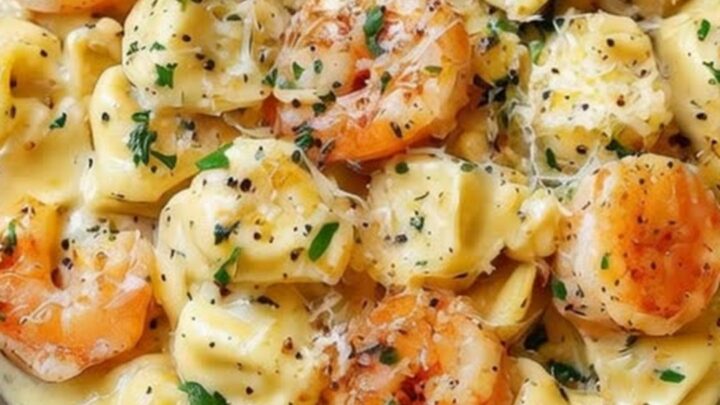
By the end of this final phase, the alfredo sauce should be thick, smooth, and bubbling gently, with a rich ivory color and a deep cheesy fragrance. When the tortellini and shrimp are tossed back in, the sauce should coat every piece evenly without pooling at the bottom. The fresh parsley adds a vibrant green contrast against the creamy white sauce. The entire dish should look highly appealing, steaming hot, and completely unified.
Common mistakes
One common mistake is overcooking the shrimp, which turns them rubbery and dry. To avoid this, sear them quickly over medium-high heat and remove them from the pan the moment they turn opaque and reach the safe temperature.
Another frequent error is boiling the alfredo sauce too vigorously after adding the parmesan cheese. High heat can cause the dairy to split, resulting in an oily, separated sauce. Always lower the heat to a gentle simmer when incorporating the cheese and cream.
How to tell it’s done
Determining perfect doneness relies on both visual cues and temperature checks. The tortellini are done when they float to the surface of the boiling water and are tender yet firm. The shrimp are fully cooked when they curl into a loose C-shape and their flesh becomes completely opaque.
To guarantee food safety, always use a digital meat thermometer to confirm the shrimp have reached an internal temperature of 145 degrees Fahrenheit (63 degrees Celsius) before combining them with the finished sauce.
- Shellfish: 145°F (63°C) in the thickest part
Up next · Part 3 of 3
2 variations · storage & make-ahead · 3 answers · printable card
Tips, FAQ & printable recipe (Part 3)← Back to the ingredients (Part 1)