Appetizers · Part 2 of 3: Instructions
Creamy Cheddar Ranch Bacon Dip for Every Occasion Step-by-step instructions
- Prep
- Cook
- Total
- Serves
- 8
Before you start
Before beginning, ensure all your ingredients are chilled, as cold ingredients will produce a firmer and more stable dip. Prepare your bacon by cooking it until it is dark golden brown and very crisp, then drain it thoroughly on paper towels to remove excess grease.
Once cooled, chop the bacon into uniform bits. If you are shredding your own cheese, do so just before assembly to ensure it is fresh and free-flowing. Have your serving bowl ready on your work surface so you can transfer the finished dip immediately.
Ingredients at a glance (4)
- 2 cups sour cream
- 1 packet ranch seasoning mix
- 1 cup shredded cheddar cheese
- 1/2 cup crispy bacon bits
Instructions
Seasoning the base
- Prepare the baseAdd the sour cream to a large mixing bowl. Sprinkle the ranch seasoning packet over the cream and stir thoroughly until the seasonings are fully incorporated and smooth.Look for The mixture should be completely uniform in color and consistency without any dry pockets of seasoning.Tip Using a chilled mixing bowl can help keep the sour cream firm while you mix in the seasonings.
The base is ready when the ranch seasoning is completely dissolved into the sour cream. The mixture should be smooth, thick, and have a uniform color. Check that there are no clumps of seasoning powder remaining at the bottom of the bowl, as these will create an unpleasant, gritty texture when you eventually serve the dip to your guests.
Incorporating inclusions
- Fold in extrasGently fold the shredded cheddar cheese and most of the crispy bacon bits into the seasoned sour cream base until evenly distributed throughout the mixture.Look for The dip will appear thick and textured with visible shreds of cheese and bits of bacon throughout.Tip Save a small amount of bacon bits to sprinkle on top for a professional, finished look before serving.
The dip is properly mixed when the bacon and cheese are evenly dispersed throughout the sour cream. You should see a consistent distribution of ingredients throughout the bowl. Ensure the mixture is not over-mixed; the cheese shreds should remain distinct and not mashed into the cream, providing the necessary texture that makes this dip so enjoyable.
Final presentation
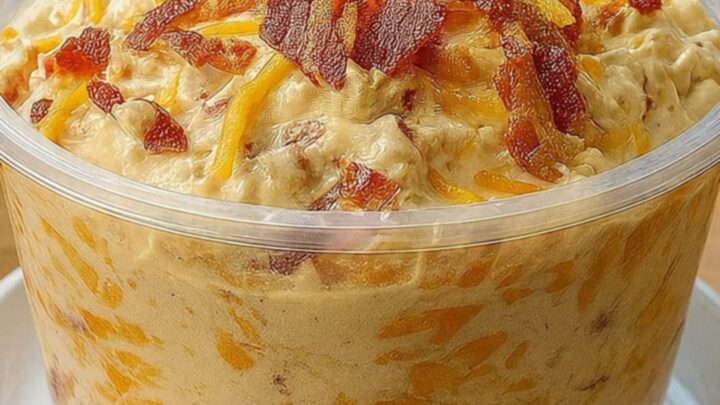
- Final assemblyTransfer the dip into a clean serving bowl or container. Top with the remaining bacon bits and serve immediately alongside your favorite crunchy potato chips or fresh vegetables.Look for The dip should be overflowing slightly from the container for a rustic, appetizing presentation.Tip If the dip becomes too soft, place it in the refrigerator for twenty minutes before serving to firm up the texture.
The final dip is ready when it is transferred to a clean serving vessel and topped with the reserved bacon. The dip should look inviting, with the bacon bits clearly visible on the surface.
Check that the edges of the serving container are clean to ensure a polished look. The dip should be stable, firm, and ready to be scooped with your favorite chips.
Common mistakes
A common mistake is over-mixing the dip, which can cause the sour cream to lose its body and become thin or watery. Gently fold the ingredients in using a soft spatula rather than a whisk, which incorporates too much air and breaks down the structure.
Another error is using bacon that is still warm; if the bacon is not fully cooled, it will cause the sour cream to soften and potentially melt the cheese prematurely, ruining the desired texture of the final dip.
How to tell it’s done
The dip is considered finished when all ingredients are evenly distributed and the mixture has reached a consistent, thick texture. There is no cooking involved, so you do not need to worry about internal temperatures.
Visually, the dip should be thick enough to hold the weight of the bacon and cheese without pooling at the bottom of the bowl. If you find the dip is too thick, a small tablespoon of milk can be stirred in to loosen it to your preferred consistency.
Up next · Part 3 of 3
2 variations · storage & make-ahead · 3 answers · printable card
Tips, FAQ & printable recipe (Part 3)← Back to the ingredients (Part 1)