Desserts · Part 2 of 3: Instructions
Creamy Baileys Chocolate Trifle Step-by-step instructions
- Prep
- Cook
- Total
- Serves
- 6
Before you start
Before beginning, ensure all ingredients are measured and ready to go. Place the heavy cream in the refrigerator until the very last second to ensure it whips properly. Prepare the piping bag with a star tip for those decorative rosettes.
Have a clean, dry trifle bowl on the counter, as the layers are best assembled in a stable environment. Gather all equipment, including a small saucepan for the ganache and a large mixing bowl for the cream, to keep the workflow smooth and efficient throughout the assembly process.
Ingredients at a glance (4)
- 1/2 cup Baileys Irish Cream
- 2 cups heavy cream, chilled
- 8 oz semi-sweet chocolate, chopped
- 1/2 cup toffee bits
Instructions
Cream and Ganache Preparation
- Prepare the componentsMelt the chopped chocolate in a small saucepan over low heat until smooth to create the ganache. In a separate large bowl, whip the chilled heavy cream until soft peaks form, then gently fold in the Baileys Irish Cream until combined and thick.Look for The ganache should be glossy and the cream should hold stiff peaks.Tip Ensure the cream is very cold before whipping to achieve the best volume.
The ganache should be smooth, glossy, and pourable, while the whipped cream should be airy and hold its shape. Check that the Baileys is fully incorporated into the cream without deflating it. The mixture must be at the correct consistency before assembly begins to ensure professional-looking layers throughout the final dessert.
Layering the Trifle
- Assemble the trifleTransfer the whipped Baileys cream into a piping bag fitted with a large nozzle. Pipe a layer of cream into the bottom of the trifle bowl. Drizzle a generous amount of the prepared chocolate ganache over the cream, then sprinkle a portion of the toffee bits on top.Look for The layers should be distinct and visually appealing through the glass.Tip Pipe the cream slowly to maintain clean lines against the sides of the bowl.
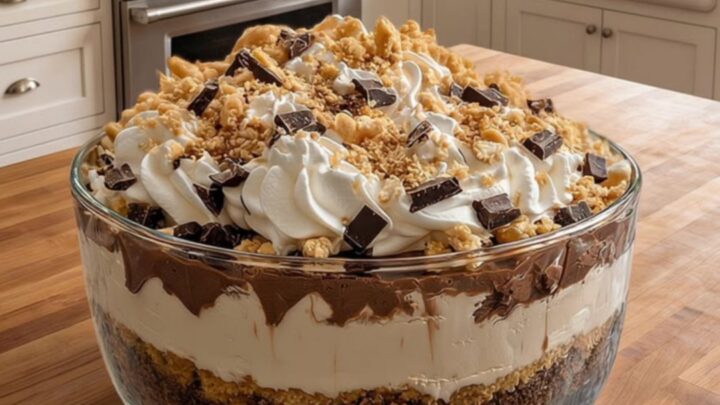
The layers should be evenly distributed, with the chocolate ganache drizzled in thin, deliberate lines to create a marbled effect.
Observe the sides of the bowl to ensure that the cream and ganache are alternating properly. The piping should be consistent, filling the gaps to prevent large air pockets from forming between the layers.
Final Chilling
- Layer and chillRepeat the piping, drizzling, and sprinkling process until the trifle bowl is filled to the top. Finish with a final flourish of piped rosettes and a dusting of remaining toffee bits. Place the bowl in the refrigerator for at least one hour to allow the flavors to meld and the structure to set.Look for The dessert looks firm and the ganache has cooled slightly.Tip Cover the bowl with plastic wrap if storing for longer than two hours.
The trifle should look completely set, with the piped rosettes maintaining their decorative shape. The surface should be free of any pooling ganache, and the toffee bits should be evenly scattered for a final crunch. Ensure the bowl is cold to the touch before removing it from the refrigerator to serve to your guests.
Common mistakes
A common mistake is over-whipping the cream, which can lead to a grainy texture or the separation of fat. Stop whipping as soon as soft peaks form. Another error is adding the ganache while it is too hot, which will melt the cream layers and destroy the visual presentation.
Always allow the ganache to reach room temperature before beginning the assembly. Finally, ensure the trifle is chilled for the full hour; skipping the resting time results in a loose dessert that lacks the necessary structural integrity for serving.
How to tell it’s done
The trifle is ready when the cream layers are stable and the ganache has cooled to a semi-solid state. When you plunge a spoon into the center, it should encounter resistance from the firm cream and the set chocolate ganache, indicating that the dessert has successfully chilled.
The layers should remain distinct and not slump or slide when the bowl is tilted slightly. The overall structure should feel cool and firm to the touch, ensuring a clean scoop for serving.
Up next · Part 3 of 3
2 variations · storage & make-ahead · 3 answers · printable card
Tips, FAQ & printable recipe (Part 3)← Back to the ingredients (Part 1)