Desserts · Part 1 of 3: Ingredients
Cookies and Cream Dark Chocolate Oreo Cheesecake
- Prep
- Cook
- Total
- Serves
- 12
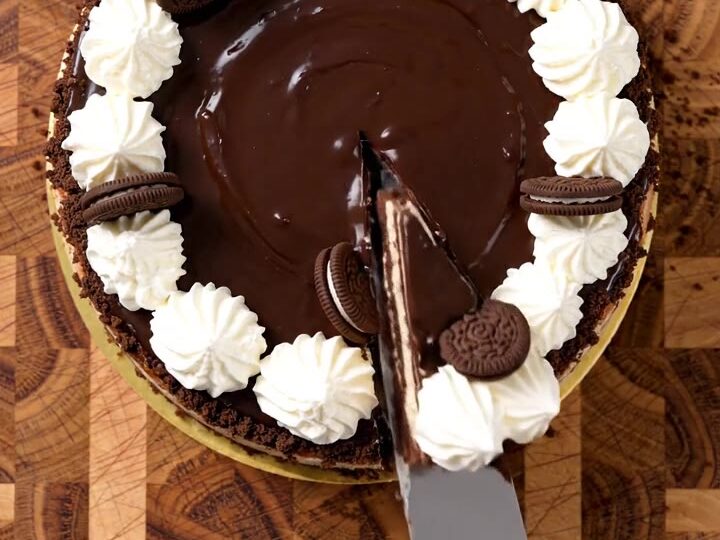
This cheesecake is a chocolate lover's dream. A velvety vanilla bean batter is studded with chunky dark chocolate cookie pieces, baked to a silky finish, then topped with a glossy dark chocolate ganache.
Piped whipped cream peaks and cookie halves around the edge make it as beautiful as it is delicious. Each slice reveals a tall, layered cross-section of crunchy cookie chunks, smooth cheesecake, and shiny ganache.
Cookies and cream meets dark chocolate in this indulgent cheesecake. The video shows a rich, layered dessert with chunky cookie pieces folded into a vanilla bean batter, a glossy ganache poured over the top, and whipped cream peaks piped around the edge.
This recipe recreates that showstopper at home. The combination of crunchy cookies, creamy filling, and shiny ganache is irresistible. Serve it as the centerpiece of a celebration or as a special weekend treat.
Ingredients
- 32 oz cream cheese, softened
- 1 cup granulated sugar
- 2 tsp vanilla bean paste
- 4 large eggs, at room temperature
- 1 cup sour cream
- 20 dark chocolate cream cookies (like Oreo), chopped
Ganache
- 8 oz 70% dark chocolate, finely chopped
- 1 cup heavy cream
Topping
- 1 1/2 cups heavy cream, cold
- 3 tbsp confectioners' sugar
- 1 tsp vanilla extract
- 12 dark chocolate cream cookies, halved
Why this recipe works
The vanilla bean batter provides a smooth, creamy base that contrasts beautifully with the crunchy cookie chunks. Folding the cookies in gently ensures they stay in distinct pieces rather than dissolving into the batter, so every bite has a satisfying texture. The dark chocolate ganache adds a rich, glossy finish that complements the sweetness of the cheesecake.
Baking the cheesecake in a water bath creates a gentle, even heat that prevents the top from cracking and keeps the texture silky. Cooling the cheesecake slowly in the oven helps it set without sinking. The result is a dense, creamy cheesecake that slices cleanly and holds its shape.
Notes and substitutions
Use full-fat cream cheese and sour cream for the best texture and flavor. The cream cheese should be softened to room temperature to ensure a smooth batter.
Vanilla bean paste gives an intense vanilla flavor with visible specks, but vanilla extract works as a substitute. The dark chocolate cookies should be chopped into chunky pieces, about 1/2-inch, so they remain visible in the finished cheesecake.
A 9-inch springform pan is essential for easy removal. The water bath requires a larger roasting pan; wrap the springform pan tightly in foil to prevent water from seeping in.
For the ganache, use high-quality 70% dark chocolate for a deep, bittersweet flavor. If you prefer a sweeter topping, semisweet chocolate can be used. The whipped cream should be made just before piping to hold its shape.
- vanilla bean paste: 1 tablespoon vanilla extract or the seeds from 1 vanilla bean
- sour cream: Plain Greek yogurt (full-fat) for a similar tang and texture
- 70% dark chocolate: Bittersweet or semisweet chocolate (60-70% cacao) works well
- dark chocolate cream cookies: Chocolate sandwich cookies with a cream filling, or gluten-free chocolate cookies for a gluten-free version
Equipment
- 9-inch springform pan
- Box grater
- Mixing bowls
- Electric mixer
- Rubber spatula
- Piping bag with star tip
- Metal cake server
Up next · Part 2 of 3
7 steps · 1 h of cooking · what to look for at each stage
Step-by-step instructions (Part 2)