Dinner · Part 2 of 3: Instructions
Coconut Crusted Mahi Mahi with Mango Salsa in One Skillet Step-by-step instructions
- Prep
- Cook
- Total
- Serves
- 2
Before you start
Gather everything before you turn on the stove, because the fish cooks quickly once it is in the pan. Keep the mahi mahi refrigerated until you are ready to coat it, and take out only what you need, since raw fish should stay cold and never sit at room temperature for more than 30 minutes.
Dice the mango, chop the red onion and dice the red bell pepper, then place them in a bowl. Shred the coconut over a box grater onto a plate or board and spread it into a fine, even pile. Set the lime on the board and have a spoon ready for basting. Pat the fillets dry with paper towels so the salt and coconut adhere well.
Ingredients at a glance (8)
- 2 mahi mahi fillets, about 6 oz each
- coarse salt, to taste
- 1 cup finely grated fresh coconut
- 3 tbsp unsalted butter
- 1 ripe mango, diced small
- 1/4 cup finely chopped red onion
- 1/4 red bell pepper, diced small
- 1/2 fresh lime, juiced
Instructions
Salsa and coating ready
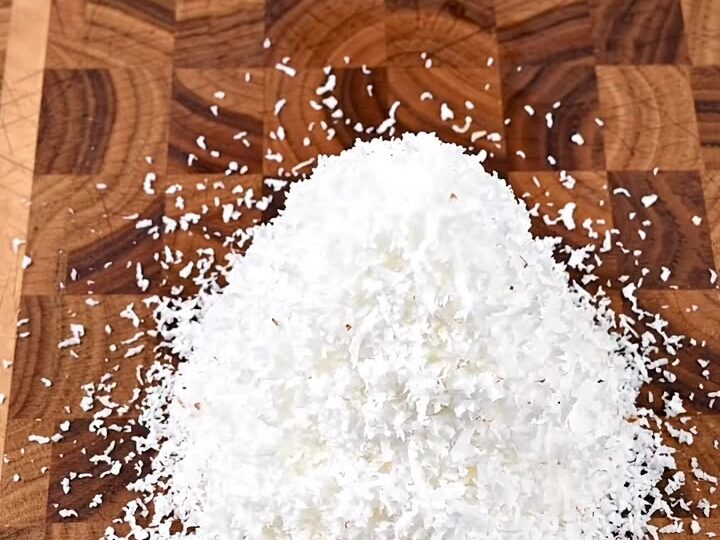
- Prepare the salsa and coconutDice the mango into small cubes and finely chop the red onion. Dice the red bell pepper and place everything in a bowl. Grate or shred the fresh coconut over a box grater onto a board or plate, spreading it into a fine pile.Look for Mango cubes are small and even, and the coconut forms a light, fluffy white pile.Tip Keep the salsa vegetables cut in similar small dice so each spoonful is balanced.
- Season and coat the filletsKeep the mahi mahi cold until you cook it, and take out only what you need. Season each fillet on both sides with coarse salt. Press each fillet firmly into the shredded coconut so an even, thick crust covers both sides.Look for The coconut clings to the fish in an even, thick layer on both sides.Tip Press the coconut in with your palm so it does not fall off in the pan.
The mango, red onion and red bell pepper are diced into small, even pieces in the bowl, and the coconut sits in a fine, fluffy pile. Each fillet is seasoned with coarse salt and pressed firmly into the coconut on both sides, forming a thick, even crust that clings without loose patches. Check that the coating covers every part of each fillet before you move on, and keep the coated fish chilled until the butter is ready. The salsa is not dressed yet; that happens at the end, so the mango stays bright and firm. A clean, organised station makes the pan work calm and fast when the fish goes in.
Golden crust in the skillet
- Pan-fry the crusted fishMelt the butter in the cast iron skillet over medium heat until it is foaming gently. Lay the coated fillets in the pan. Cook for about 4 minutes, spooning the bubbling butter over the fish, then flip and cook another 3 to 4 minutes until the coconut is golden and the flesh turns opaque and flaky.Look for The coconut crust turns golden brown and the fish looks opaque and flakes easily.Safe temperature 145°F (63°C) internal temperature (fish)Tip Baste the fish with the hot butter for even colour and a crisp crust.
The butter has melted in the cast iron skillet and is foaming gently, which tells you the heat is right for frying without burning. When the fillets are laid in, you should hear a soft, steady sizzle. Spoon the bubbling butter over the fish as it cooks, and watch the coconut turn a deep golden brown on the first side before flipping.
After flipping, the second side should colour evenly and the flesh should look opaque and separate easily into flakes when you press it gently with a fork. If the coconut darkens too fast, lower the heat slightly. Stop cooking when both sides are golden and the fish is fully opaque, and check the thickest part of the fillet before moving to the salsa stage.
Salsa spooned over the fish
- Top with mango salsa and serveToss the mango, red onion, red bell pepper and fresh lime juice together in the bowl. Spoon the salsa generously over the seared fillets in the skillet. Serve hot in the cast iron pan with the buttery pan juices spooned around the fish.Look for The salsa looks bright and glossy, and the pan juices pool around the golden fillets.Tip Add the lime juice just before serving so the mango stays fresh.
The mango, red onion, red bell pepper and fresh lime juice are tossed together in the bowl, and the salsa looks bright, juicy and glossy. Spoon it generously over the seared fillets in the skillet, so the warm fish and the cool topping meet on the plate. The buttery pan juices should be pooling around the fish, ready to be spooned over each portion. Before serving, check that the fish is opaque and flaky all the way through, and that the salsa is still firm and fresh. Serve immediately, while the crust is still crisp and the pan is hot.
Common mistakes
The most common mistake is rushing the crust. If the butter is too hot, the coconut browns before the fish is cooked through, leaving the centre undercooked. If the butter is not hot enough, the coating absorbs fat and turns soft instead of crisp.
Another frequent error is leaving the coating loose: when the coconut is not pressed firmly into the fish, it falls off in the pan and leaves bare patches. Also avoid dressing the salsa too early, because lime juice softens the mango and draws out its juice. Finally, do not move the fillets constantly; let them rest in the pan to build a proper crust before turning them.
How to tell it’s done
The fish is done when the flesh turns from translucent to opaque all the way through and separates into flakes when you press it gently with a fork at the thickest point. The coconut crust should be golden brown on both sides and feel crisp at the edges.
For food safety, the fish must reach an internal temperature of 145°F (63°C) when measured with an instant-read thermometer in the thickest part. If you are unsure, cut into one fillet and check the centre: it should look evenly opaque with no glassy, dark translucent area. Remove the fish from the pan as soon as it reaches this point so it stays moist and tender rather than dry.
- Fish: 145°F (63°C) in the thickest part
Up next · Part 3 of 3
4 variations · storage & make-ahead · 5 answers · printable card
Tips, FAQ & printable recipe (Part 3)← Back to the ingredients (Part 1)