Dinner · Part 1 of 3: Ingredients
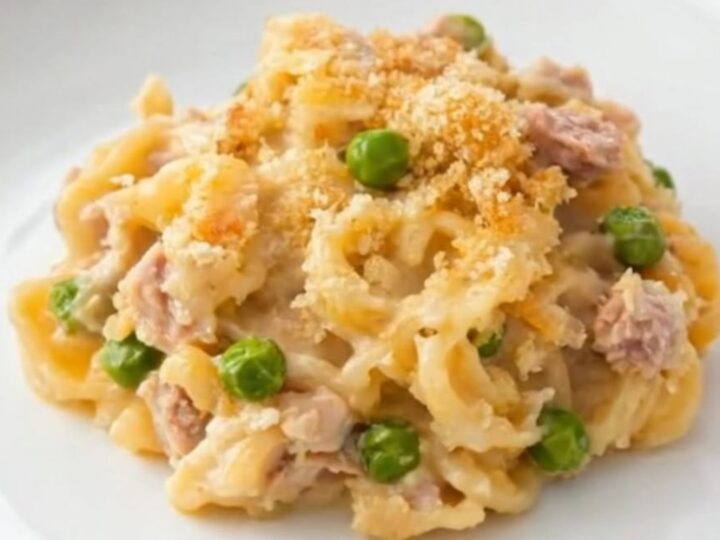
Classic Tuna Casserole with a Crispy Panko Topping
- Prep
- Cook
- Total
- Serves
- 6
Few dishes deliver the immediate comfort of a classic tuna casserole. This timeless recipe transforms simple ingredients into a luxurious, crowd-pleasing dinner. With its velvety cheese sauce, tender egg noodles, sweet peas, and a shattering golden panko crust, every bite offers a perfect balance of textures and savory flavors that will satisfy the whole family.
Creating a comforting dinner does not have to be complicated or time-consuming. By using a pre-made or store-bought velvety cheese sauce, you can assemble this classic tuna casserole in minutes. This approach ensures a consistently rich, creamy texture that beautifully coats the egg noodles, sweet peas, and flaked tuna. It is the ultimate shortcut to a hearty, warm meal on busy weeknights when you want maximum comfort with minimal effort.
Ingredients
Casserole
- 8 oz egg noodles
- 2 cups velvety cheese sauce, store-bought or made ahead
- 10 oz canned tuna, drained and flaked
- 1 cup sweet peas
Topping
- 1/2 cup buttery panko breadcrumbs
Why this recipe works
The method of folding the ingredients together before baking is key to the success of this casserole. By gently mixing the tender egg noodles, flaked tuna, and sweet peas directly with the velvety cheese sauce, you ensure that every single noodle is thoroughly coated.
This prevents the pasta from drying out in the oven and guarantees a cohesive, moist texture throughout the dish. The starch from the noodles also helps bind the cheese sauce, keeping it creamy and preventing it from separating during the baking process.
Baking the casserole at a moderate temperature allows the heat to penetrate evenly, warming the tuna and peas through without overcooking the delicate egg noodles. At the same time, the buttery panko breadcrumb topping undergoes a beautiful transformation.
The steam rising from the bubbling cheese sauce heats the crumbs from below, while the dry oven air toasts them from above. This dual action results in an incredibly crisp, golden crust that provides a satisfying contrast to the creamy interior.
Notes and substitutions
For the best results, choose high-quality canned tuna packed in water, which keeps the casserole light and prevents it from becoming greasy. Be sure to drain the tuna thoroughly and flake it gently with a fork before adding it to the bowl.
When selecting your cheese sauce, look for a high-quality, velvety store-bought version, or prepare your favorite homemade cheese sauce ahead of time. A rich cheddar or white cheese sauce works beautifully to complement the savory tuna and sweet peas.
Standard wide egg noodles are the traditional choice for this recipe because their flat, ridged shape holds onto the creamy cheese sauce exceptionally well. If egg noodles are unavailable, you can easily substitute other sturdy pasta shapes like rotini, medium shells, or penne.
For the topping, buttery panko breadcrumbs are highly recommended over regular breadcrumbs. Their larger, flakier structure creates a much lighter and crunchier crust that retains its crispness even after baking.
- buttery panko breadcrumbs: crushed buttery crackers mixed with a tablespoon of melted butter
- egg noodles: sturdy short pasta shapes like rotini or medium shells
Equipment
- large pot
- colander
- large mixing bowl
- baking dish
- spatula
Up next · Part 2 of 3
5 steps · 25 min of cooking · what to look for at each stage
Step-by-step instructions (Part 2)