Dinner · Part 2 of 3: Instructions
Classic Slow-Cooker Sourdough Stuffing for Easy Holiday Meals Step-by-step instructions
- Prep
- Cook
- Total
- Serves
- 8
Before you start
Before beginning, ensure that your bread is cubed into uniform, bite-sized pieces. If the bread is too fresh, toast the cubes in a 300°F oven for about fifteen minutes until they feel firm and dry to the touch.
Prepare your vegetables by dicing the celery and onion into consistent sizes to ensure they soften at the same rate as the bread. Have all ingredients measured and ready to go for quick assembly.
Ingredients at a glance (6)
- 12 cups sourdough bread cubes
- 2 sticks unsalted butter, melted
- 2 cups celery, diced
- 1 cup sweet onion, diced
- 1/4 cup fresh sage, chopped
- 2 cups chicken stock
Instructions
Layering and initial integration
- Layering the ingredientsPlace the dried sourdough bread cubes into the ceramic slow cooker. Add the diced celery, diced sweet onion, and fresh chopped sage. Pour the melted butter and chicken stock over the bread mixture, ensuring all pieces are evenly coated with the liquid.Look for The bread should look moist but not completely soaked or mushy.Tip Ensure the bread is slightly stale or toasted beforehand for the best texture.
At the start, the ingredients are layered in the ceramic pot. The bread should be well-coated with the butter and stock mixture. Ensure the herbs are distributed evenly throughout the bread cubes to prevent concentrated pockets of flavor. The vegetables should be nestled into the bread to ensure they cook thoroughly during the simmer.
High-heat activation
- Initial high-heat cookCover the slow cooker with the lid. Set the device to HIGH and cook for forty-five minutes. This initial burst of heat helps the bread absorb the butter and stock quickly while beginning to soften the vegetables.Look for A light aroma of sage and butter will begin to fill the kitchen.Tip Do not remove the lid during this phase to maintain consistent temperature.
After forty-five minutes on high, the stuffing begins to heat through. The butter will have melted into the bread, and the celery and onions should start to become translucent. The kitchen will begin to smell strongly of sage and savory chicken stock. This phase is crucial for establishing the base temperature for the long cook.
Slow-simmering to finish
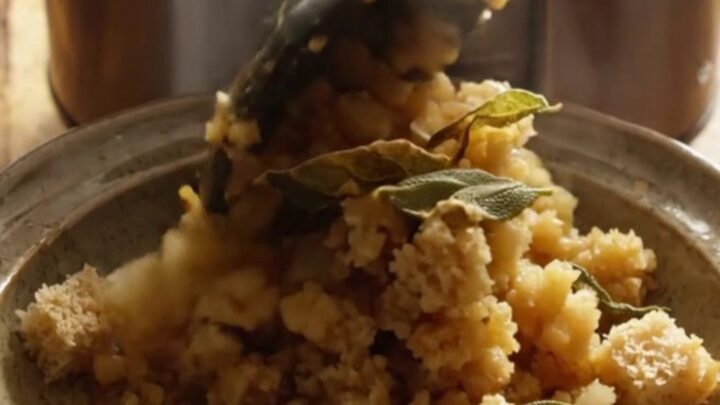
- Slow-simmer completionReduce the heat setting to LOW and continue cooking for three hours. This long, gentle simmer allows the aromatics to fully infuse the bread cubes, resulting in a fluffy and flavorful stuffing. Once finished, fluff the stuffing gently with a fork before serving.Look for The stuffing should be golden, fragrant, and tender throughout.Tip If the edges look dry, drizzle a tiny amount of extra stock over the top.
By the end of the three-hour low-heat phase, the stuffing will be fully integrated. The bread should be tender and fluffy, and the aromatics should be deeply infused.
The moisture should be evenly distributed, and the mixture should be fragrant and golden. Once this checkpoint is reached, the stuffing is ready to be gently fluffed and served immediately.
Common mistakes
A common mistake is using bread that is too soft or fresh, which leads to a gummy texture. Another error is neglecting to mix the butter and stock thoroughly before starting; taking a moment to ensure the bread is evenly coated prevents dry patches.
Avoid lifting the lid frequently, as this releases heat and steam, which are essential for the gentle cooking process.
How to tell it’s done
The stuffing is done when the vegetables are completely tender and the bread cubes have absorbed the liquid, becoming soft and fluffy.
The edges should be slightly set and golden, and the entire mixture should be steaming hot. There should be no pools of liquid at the bottom of the slow cooker, and the mixture should hold its shape when scooped into a bowl.
Up next · Part 3 of 3
2 variations · storage & make-ahead · 3 answers · printable card
Tips, FAQ & printable recipe (Part 3)← Back to the ingredients (Part 1)