Dinner · Part 2 of 3: Instructions
Classic Oven Roasted Chicken with Potatoes and Carrots Step-by-step instructions
- Prep
- Cook
- Total
- Serves
- 4
Before you start
Before beginning the roasting process, ensure the chicken is removed from any packaging and patted thoroughly dry with paper towels. The vegetables should be scrubbed clean and cut into uniform chunks to ensure they cook at the same rate.
Preheating the oven is crucial, so start the oven at least twenty minutes before placing the chicken inside to ensure an accurate, consistent roasting temperature throughout the entire duration of the cooking time.
Ingredients at a glance (3)
- 1 whole chicken, approximately 4 lbs
- 1 1/2 lbs potatoes, scrubbed and cut into chunks
- 3 large carrots, peeled and sliced into rounds
Instructions
Preparing the vegetable bed
- Prepare the vegetables and chickenPreheat the oven to 400°F (200°C). Place the potato chunks and carrot slices into the ceramic baking dish. Arrange the vegetables to create a bed in the dish.Look for The vegetables should be arranged to provide a stable base for the chicken.Tip Ensure the vegetables are cut into uniform pieces to promote even cooking throughout the roasting process.
At the end of this phase, the potatoes and carrots should be arranged in a single layer in the baking dish to provide a stable foundation for the chicken. The vegetables will look fresh and ready to absorb the savory drippings that will be released during the roasting process.
Roasting the chicken
- Roast the chickenPlace the chicken on top of the prepared vegetables in the baking dish. Roast until the internal temperature of the thickest part of the breast reaches 165°F (74°C).Look for The skin should turn a deep golden brown and the juices should run clear when the meat is pierced.Safe temperature 165°F (74°C) internal temperature (poultry)Tip Use a meat thermometer inserted into the thickest part of the breast to ensure it is cooked safely.
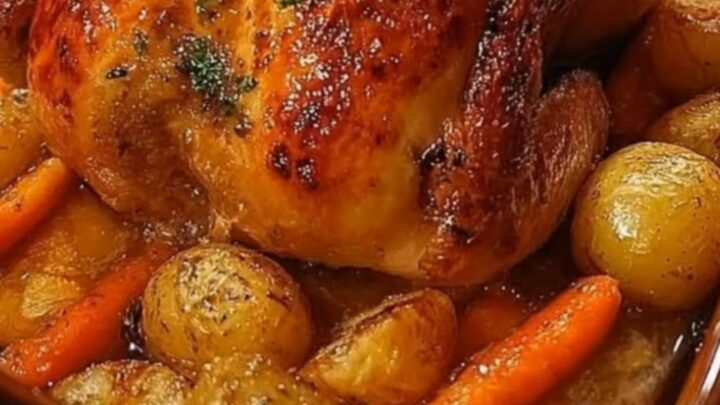
The chicken is ready when the skin is uniformly golden-brown and crispy. The aroma of roasted poultry and caramelized vegetables should be prominent in the kitchen. Using a thermometer to check the thickest part of the breast is essential here; once it hits 165°F (74°C), the chicken is thoroughly cooked and ready to be removed from the oven.
Resting and carving
- Rest and carveRemove the baking dish from the oven and transfer the chicken to a cutting board. Let the chicken rest for at least 15 minutes to allow the juices to redistribute. Carve the chicken into portions and serve immediately alongside the roasted vegetables.Look for The resting process allows the meat fibers to relax, ensuring every bite remains tender and juicy when carved.Tip Do not skip the resting time, as it is essential for maintaining the moisture of the roasted meat.
After resting, the chicken will look succulent and the meat will be firm yet tender. The vegetables underneath will be soft, golden, and coated in the flavorful pan juices.
The chicken should be easy to carve without falling apart, and the internal temperature will remain stable, ensuring that every slice is moist and ready to be served to the table.
Common mistakes
A common mistake is overcrowding the baking dish, which prevents hot air from circulating around the chicken and leads to soggy skin. Ensure there is enough space between the chicken and the edges of the dish.
Another error is neglecting to dry the chicken skin; wet skin will not crisp properly, resulting in a rubbery texture. Finally, failing to let the chicken rest after roasting causes the natural juices to escape immediately upon carving, resulting in dry meat.
How to tell it’s done
The chicken is perfectly cooked when a meat thermometer inserted into the thickest part of the breast registers 165°F (74°C). At this stage, the skin should be deep golden brown and crispy, and the juices should run clear.
If the meat appears pink or the juices are cloudy, continue roasting for an additional five to ten minutes before re-checking. Always allow the chicken to rest for at least 15 minutes before carving to ensure maximum juiciness.
- Poultry: 165°F (74°C) in the thickest part
Up next · Part 3 of 3
2 variations · storage & make-ahead · 3 answers · printable card
Tips, FAQ & printable recipe (Part 3)← Back to the ingredients (Part 1)