Dinner · Part 2 of 3: Instructions
Classic Italian Stromboli Roll with Stretchy Mozzarella Step-by-step instructions
- Prep
- Cook
- Total
- Serves
- 6
Before you start
Before beginning the assembly, ensure the oven is fully preheated to 400°F (200°C) to allow for an even bake. Have all ingredients measured and ready, keeping the meats and cheese chilled until the exact moment they are needed for layering.
Prepare a clean, floured workspace and ensure the baking sheet is lined with parchment paper to prevent sticking and simplify the cleanup process later. Gather the rolling pin and a sharp knife for slicing the final product once it has rested.
Ingredients at a glance (3)
- 1 lb crust dough, store-bought or made ahead
- 2 cups shredded mozzarella cheese
- 1/2 lb Italian meats, such as salami and pepperoni
Instructions
Crust Preparation
- Prepare the CrustPreheat the oven to 400°F (200°C). Roll out the crust dough on a lightly floured surface into a large rectangle, approximately 10 by 14 inches. Ensure the dough is even in thickness to promote consistent baking throughout the roll.Look for crust dough is rolled into an even rectangleTip Let the dough sit at room temperature for 15 minutes before rolling to make it more pliable.
The crust dough should be rolled out into a smooth, even rectangle without any thin spots or tears. It should be pliable enough to roll easily but firm enough to hold the weight of the fillings. Ensure the surface is lightly floured to prevent sticking, as a clean workspace is essential for successful rolling.
Assembly and Rolling
- Assemble the FillingLayer the Italian meats evenly over the dough, leaving a small border around the edges. Sprinkle the mozzarella cheese generously over the meat. Carefully roll the dough into a tight log, tucking in the ends to seal the filling inside.Look for meat and cheese are evenly distributedTip Do not overstuff the roll, or it may burst open while baking in the oven.
The meat and cheese should be distributed in a uniform layer, leaving enough space at the edges to create a secure seal. The roll should be tight and uniform in diameter from end to end. Check that the edges are tucked under and pinched firmly so the filling remains inside during the baking process.
Baking and Serving
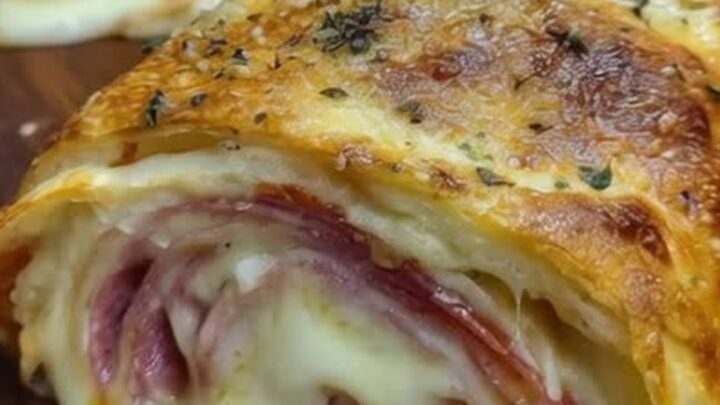
- Bake and ServePlace the stromboli on a baking sheet lined with parchment paper. Bake for 25 minutes until the crust is golden brown and the cheese is bubbly. Ensure the internal temperature of any meat reaches 160°F (71°C). Let it rest for 5 minutes before slicing.Look for crust is deep golden brownSafe temperature 160°F (71°C) internal temperature (ground meat)Tip Brush the top with a little olive oil or egg wash for a shinier, more golden finish.
The final product should have a uniform golden-brown crust that sounds hollow when tapped lightly. The aroma should be savory and toasted, and the cheese should be fully melted and integrated with the meats.
Once the internal temperature reaches 160°F (71°C), the stromboli is ready to be removed from the oven and set to rest.
Common mistakes
A common mistake is overloading the center, which can lead to a soggy bottom or an undercooked middle. Always maintain a consistent layer of ingredients and ensure the dough is sealed tightly at the seams to prevent leakage.
Another error is slicing the stromboli immediately after it leaves the oven; failing to let it rest causes the internal moisture to escape, resulting in a less satisfying texture. Follow the timing precisely to ensure the crust is crisp without burning the exterior.
How to tell it’s done
The stromboli is ready when the crust has achieved a deep, golden-brown color across the entire surface. The cheese should be bubbling through any small vents or seams, and the internal temperature of the filling must reach 160°F (71°C) to ensure the meat is fully cooked.
Always allow the stromboli to rest on a wire rack for at least 5 minutes before slicing; this cooling period helps the cheese set slightly, preventing it from running out when cut.
- Ground meat: 160°F (71°C) in the thickest part
Up next · Part 3 of 3
2 variations · storage & make-ahead · 3 answers · printable card
Tips, FAQ & printable recipe (Part 3)← Back to the ingredients (Part 1)