Dinner · Part 1 of 3: Ingredients
Italian Pizza Rustica: Meaty, Cheesy Easter Pie
- Prep
- Cook
- Total
- Serves
- 8
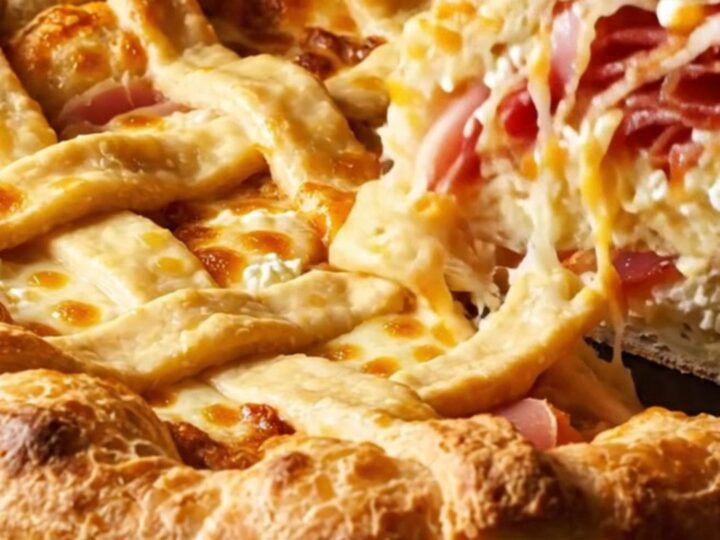
This Italian Pizza Rustica is a towering celebration pie that brings together creamy ricotta, salty prosciutto, spicy soppressata, and melty provolone, all encased in a golden lattice crust. It's a showstopper for Easter brunch or any festive gathering, and while it looks impressive, the steps are straightforward.
The rich, savory filling is balanced by the tender, flaky pastry, and each slice reveals beautiful ribbons of meat and cheese. Whether served warm or at room temperature, this pie is sure to become a family favorite.
Pizza Rustica, also known as Italian Easter Pie, is a traditional savory pie filled with a mixture of cheeses and cured meats. Unlike pizza, this pie is baked in a pastry crust and often features a lattice top. The combination of ricotta, soppressata, prosciutto, and provolone creates a rich, hearty filling that's perfect for special occasions.
This recipe simplifies the process with store-bought pastry, making it accessible for home cooks. The result is a beautifully golden, satisfying pie that can be served as a main course or sliced into appetizers.
Ingredients
- 2 lb store-bought or homemade pie dough
- 500 g ricotta cheese
- 200 g soppressata, diced
- 150 g prosciutto, chopped
- 200 g provolone cheese, diced
- 1 large egg, beaten for egg wash
Why this recipe works
The key to this recipe is the balance of flavors and textures. Ricotta provides a creamy, mild base that contrasts with the salty, savory cured meats. The provolone adds a sharp, melty richness that binds everything together.
The pastry crust, whether store-bought or homemade, offers a tender, flaky contrast to the dense filling, and the lattice top not only looks beautiful but also allows steam to escape, ensuring the filling sets properly.
Baking at 375°F (190°C) for 50 minutes allows the pie to cook evenly, developing a deep golden crust while the cheese melts and blisters. The resting period after baking is crucial; it lets the filling set, making the pie easier to slice and serve. This method yields a pie that is both visually impressive and delicious, with each bite offering a perfect ratio of pastry to filling.
Notes and substitutions
For the best flavor, use high-quality ricotta that is well-drained. If it seems watery, place it in a fine-mesh sieve over a bowl for 30 minutes before mixing. Soppressata is a dry-cured Italian salami; if unavailable, substitute with another dry-cured sausage like genoa salami or capicola. Prosciutto adds a delicate saltiness; cooked ham can be used in a pinch, though the flavor will be milder.
Provolone should be the sharp, aged variety for the most flavor, but young provolone or mozzarella will also work. Store-bought pie dough saves time, but if you prefer homemade, use a recipe for a savory pastry that can hold a moist filling.
Ensure the dough is cold when handling to prevent it from becoming sticky. The pie is best served the day it's made, but it also keeps well in the refrigerator for up to 4 days.
- soppressata: salami or capicola
- prosciutto: cooked ham
- provolone: mozzarella or fontina
- store-bought pie dough: homemade pasta frolla or rough puff pastry
Equipment
- 9-inch springform pan
- Rolling pin
- Pastry brush
- Sharp knife
- Cutting board
- Mixing bowl
- Measuring cups and spoons
Up next · Part 2 of 3
7 steps · 50 min of cooking · what to look for at each stage
Step-by-step instructions (Part 2)