Dinner · Part 2 of 3: Instructions
Classic Greek Pastitsio with Caramelized Béchamel Step-by-step instructions
- Prep
- Cook
- Total
- Serves
- 8
Before you start
Before you begin cooking, organize all your ingredients and equipment to ensure a smooth and efficient process. Measure out the tubular pasta, ground beef, tomato sauce, creamy white béchamel, and grated cheese. Preheat your oven to 375°F (190°C) so it is ready for baking.
Grease a nine-by-thirteen-inch baking dish thoroughly with butter or cooking spray. Having everything prepped and within reach will help you assemble the distinct layers of this classic Greek comfort dish with ease.
Ingredients at a glance (5)
- 1 lb tubular pasta
- 1 1/2 lb ground beef
- 2 cups tomato sauce
- 3 cups creamy white béchamel
- 1 cup grated cheese
Instructions
Pasta and Spiced Meat Sauce
- Boil the PastaBring a large pot of salted water to a boil. Add the tubular pasta and cook until al dente, about 8 to 10 minutes. Drain the pasta thoroughly and set aside.Look for The pasta should be tender but still slightly firm to the bite.Tip Do not rinse the pasta, as the natural starches help the layers hold together.
- Simmer the Meat SauceIn a large skillet over medium-high heat, add the ground beef and cook until browned, breaking it up with a spoon. Stir in the tomato sauce and simmer on low heat for 15 minutes until the sauce is thick and rich. Ensure the ground beef reaches a safe internal temperature of 160°F (71°C).Look for The meat sauce should be thick with very little excess liquid.Safe temperature 160°F (71°C) internal temperature (ground meat)Tip Simmering slowly allows the flavors to meld and prevents a watery sauce.
At the end of this phase, the tubular pasta should be cooked just until al dente, remaining slightly firm so it does not turn mushy during baking.
The ground beef should be thoroughly browned and simmered with the tomato sauce until it is thick, rich, and deeply savory. There should be no excess liquid pooling in the skillet, ensuring a concentrated meat layer that will support the creamy toppings.
Béchamel Sauce and Assembly
- Layer the Pasta and MeatPreheat the oven to 375°F (190°C). Grease a nine-by-thirteen-inch baking dish. Spread the cooked tubular pasta evenly across the bottom of the dish to form a solid base. Pour the thick spiced ground beef sauce over the pasta, smoothing it into an even, flat layer.Look for The pasta and meat layers should be level and reach all corners.Tip Press the layers down gently with a spatula to make the final slices sturdy.
- Spread the Béchamel and CheesePour the creamy white béchamel evenly over the ground beef layer, spreading it gently with a spatula to cover the entire surface. Sprinkle the grated cheese uniformly over the top of the béchamel to create the crust.Look for The béchamel should completely seal the meat layer beneath it.Tip Spread the sauce all the way to the edges to prevent the meat from drying out.
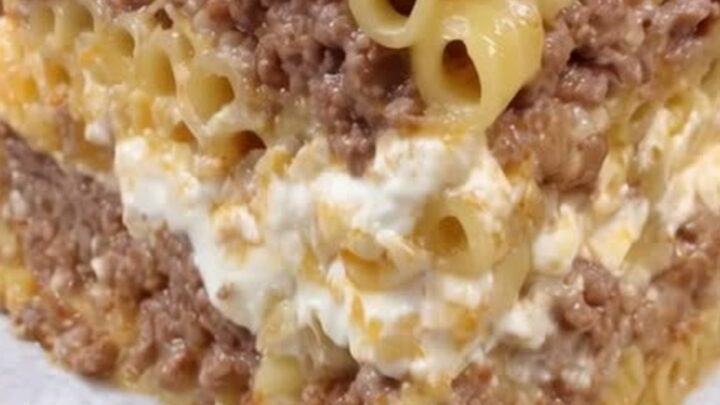
By the end of this phase, the pastitsio is fully assembled in the baking dish. The bottom layer of tubular pasta is covered by an even, flat layer of the rich ground beef sauce. The creamy white béchamel is spread smoothly over the meat, sealing it completely from edge to edge. A uniform layer of grated cheese covers the top, ready to melt and caramelize in the oven.
Baking and Resting
- Bake the PastitsioPlace the baking dish in the preheated oven. Bake at 375°F (190°C) for 40 to 45 minutes, or until the edges are bubbling and the cheese topping is deeply caramelized and golden brown.Look for The top should have a beautiful, deeply caramelized baked cheese crust.Tip Letting the edges bubble ensures the entire casserole is heated through.
- Rest and SliceRemove the pastitsio from the oven. Let the casserole rest at room temperature for 30 minutes before slicing. This allows the layers to set so you can cut clean, tall square slices. Do not let it sit out for more than 2 hours before refrigerating.Look for The casserole should feel firm and set when gently touched.Tip Use a sharp knife and wipe it clean between cuts for perfect squares.
After baking and resting, the top of the pastitsio should feature a beautiful, deeply caramelized baked cheese crust that releases a rich puff of steam when pressed with a fork. The edges should be golden and set, and the casserole should feel firm to the touch. Resting for thirty minutes allows the layers to solidify, ensuring you can slice clean, tall, beautiful squares.
Common mistakes
A common mistake is slicing the pastitsio immediately after removing it from the oven. Because the creamy béchamel and pasta layers are extremely hot, they need time to cool and set; cutting too early will cause the tall layers to collapse.
Another error is leaving too much liquid in the meat sauce. If the ground beef and tomato sauce mixture is watery, it will seep into the pasta layer, making the bottom of the casserole soggy and structurally weak.
How to tell it’s done
The pastitsio is perfectly cooked when the top béchamel layer has formed a deeply caramelized, golden-brown cheese crust with bubbling edges. To ensure food safety, insert a food thermometer into the center of the casserole to verify that the ground beef layer has reached a safe internal temperature of 160°F (71°C).
Once baked, the casserole must rest at room temperature for thirty minutes to allow the layers to set and firm up before slicing into clean, tall squares.
- Ground meat: 160°F (71°C) in the thickest part
Up next · Part 3 of 3
2 variations · storage & make-ahead · 3 answers · printable card
Tips, FAQ & printable recipe (Part 3)← Back to the ingredients (Part 1)