Dinner · Part 2 of 3: Instructions
Classic French Fondant Potatoes with Garlic and Thyme Step-by-step instructions
- Prep
- Cook
- Total
- Serves
- 4
Before you start
Before beginning, ensure the potatoes are scrubbed clean and peeled thoroughly. Have all ingredients measured and ready to use, as the searing process moves quickly. Preheat the oven to 400°F (200°C) before starting the sear on the stovetop to ensure a smooth transition to the oven.
A sharp paring knife is essential for beveling the edges, which helps the potatoes maintain their shape and presents a professional look. Prepare the chicken stock in a measuring cup so it can be poured into the cocotte without delay after the butter and aromatics are added.
Ingredients at a glance (8)
- 4 large Russet potatoes
- 1 tsp kosher salt
- 1/2 tsp black pepper
- 60 g butter
- 4 garlic cloves
- 4 sprigs thyme
- 2 tbsp oil
- 200 ml chicken stock
Instructions
Shaping and Seasoning
- Prep the PotatoesPeel the potatoes and cut them into 5cm tall cylinders with flat ends. Carefully use a paring knife to bevel the edges for a refined look. Season the potatoes generously with kosher salt and black pepper on all sides.Look for The potatoes should be uniform in height and have smooth, rounded edges.Tip Keep the potatoes in cold water until ready to sear to prevent oxidation.
The potatoes should be cut into uniform, flat-topped cylinders with neatly beveled edges. They should be seasoned evenly on all sides, ensuring the salt and pepper are distributed well. The potatoes should look clean and ready for the pan.
Developing the Crust
- Sear the PotatoesHeat the oil in a cast-iron cocotte over medium-high heat. Place the potato cylinders flat-side down. Sear for 6 minutes per side until a deep, dark mahogany crust forms on both flat faces.Look for A deep golden-brown, almost mahogany crust should form on the flat surfaces.Tip Do not move the potatoes while searing to ensure an even, crisp crust.
The flat faces of the potatoes should be seared to a deep, dark mahogany color. The edges should remain firm, and the potatoes should have a distinct, crisp texture on the seared sides. The smell of toasted potato should be evident.
Braising to Perfection
- Braise and FinishAdd the butter, garlic cloves, and thyme to the cocotte, letting the butter foam. Pour in the chicken stock. Transfer the cocotte to a preheated oven at 400°F (200°C) and braise for 25 minutes until the potatoes are tender and the liquid has reduced to a glossy jus.Look for The potatoes should be fork-tender and the liquid reduced to a thick, glossy glaze.Tip Baste the potatoes with the pan juices halfway through the braising process.
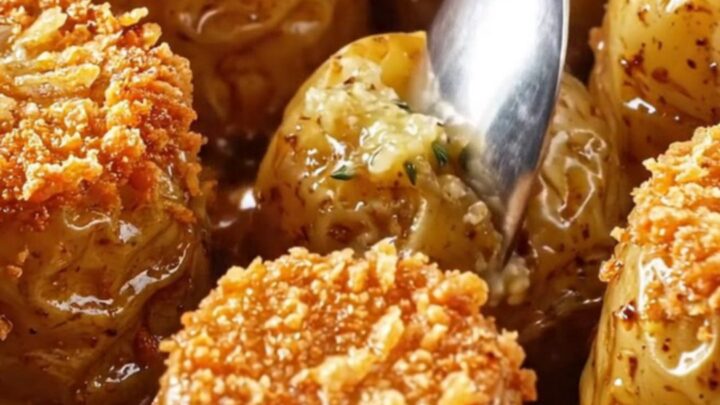
The potatoes should be tender throughout, and the braising liquid should have reduced into a thick, glossy jus. The garlic and thyme should be aromatic and soft. The potatoes should look perfectly glazed and ready to serve.
Common mistakes
A common mistake is overcrowding the pan during the searing phase. If the potatoes are too close together, they will steam rather than sear, preventing the formation of the necessary mahogany crust.
Another error is failing to use enough butter; the butter must foam and coat the potatoes to facilitate the braising and flavor infusion.
Finally, ensure the potatoes are cut to a uniform height; uneven sizes will result in some potatoes being overcooked or mushy while others remain raw and hard in the center.
How to tell it’s done
The potatoes are done when they reach a fork-tender consistency, meaning a knife or fork can pierce the center with zero resistance. The exterior should be deeply golden-brown and crispy, while the liquid in the pan should have reduced into a thick, glossy, and flavorful glaze.
The internal texture should be creamy and uniform. Ensure the potatoes have been braised for the full duration to allow the stock to fully penetrate the center of the potato cylinders, resulting in a rich, savory flavor profile throughout.
Up next · Part 3 of 3
2 variations · storage & make-ahead · 3 answers · printable card
Tips, FAQ & printable recipe (Part 3)← Back to the ingredients (Part 1)