Desserts · Part 2 of 3: Instructions
Classic 20-Layer Caramelized Vanilla Mille Crêpe Cake Step-by-step instructions
- Prep
- Cook
- Total
- Serves
- 8
Before you start
Before beginning, ensure all ingredients are at room temperature to facilitate smooth mixing. Prepare your workspace by gathering the skillet, whisk, mixing bowl, and offset spatula. Clear enough space in your refrigerator to accommodate the cake plate for the 3-hour chilling period.
Read through the instructions entirely and ensure you have enough caster sugar and pastry cream prepared before you start cooking the crêpes to maintain a steady workflow throughout the assembly process.
Ingredients at a glance (6)
- 4 large eggs
- 600 ml whole milk
- 240 g all-purpose flour
- 60 g browned butter
- 700 g whipped vanilla bean pastry cream
- 2 tbsp caster sugar for torching
Instructions
Batter and Crêpe Preparation
- Prepare the brown butter crêpe batterWhisk the eggs, milk, flour, and browned butter together in a large mixing bowl until the batter is perfectly smooth and free of lumps. Ensure the butter is slightly cooled before adding to prevent the eggs from scrambling prematurely. Let the batter rest for at least 30 minutes to allow the flour to hydrate fully for the best texture.Look for The batter should be thin, smooth, and pourable, with a consistency similar to heavy cream.Tip Straining the batter through a fine-mesh sieve ensures an exceptionally smooth, uniform texture.
- Cook the delicate crêpe layersHeat a non-stick skillet to 350°F (177°C). Pour a small amount of batter into the pan, swirling immediately to cover the surface in a paper-thin layer. Cook for exactly 45 seconds until the edges look set and just slightly golden. Carefully flip or lift the crêpe onto a plate to cool. Repeat until all twenty crêpes are finished and fully cooled. To ensure the eggs are cooked through, the internal temperature of the crêpes should reach 160°F (71°C).Look for Look for the edges of the crêpe to curl slightly and release from the pan surface.Safe temperature 160°F (71°C) internal temperature (egg dishes)Tip Maintain a consistent skillet temperature to ensure every crêpe cooks at the same uniform rate.
The batter should be perfectly smooth and thin, resembling heavy cream. As you cook the crêpes, look for them to be paper-thin and slightly golden around the edges. They should be pliable and not brittle. Ensure each crêpe is fully cooled before starting the assembly to prevent the pastry cream from melting and losing its structure.
Layering the Crêpes
- Assemble the cake layersPlace one cooled crêpe on a serving plate. Spread a thin, even layer of the whipped vanilla bean pastry cream over the surface using an offset spatula. Repeat this process by placing another crêpe on top and spreading cream until all twenty crêpes are stacked. Ensure the cream is spread to the very edges for a uniform appearance.Look for The stack should look level and stable as the layers are added one by one.Tip Use a cake ring to keep the stack perfectly aligned while layering the cream and crêpes.
Each layer should be spread with an even amount of pastry cream, ensuring the edges are covered for a uniform look. The stack should be level, without leaning to one side.
As you reach the final layers, verify the cake remains stable. The finished stack should feel slightly firm to the touch before it goes into the refrigerator for the crucial chilling phase.
Chilling and Caramelizing
- Chill and torch the finishPlace the assembled cake in the refrigerator to chill for at least 3 hours, allowing the structure to set firmly. Once chilled, sprinkle an even layer of caster sugar over the top surface. Use a kitchen torch to melt the sugar until it turns into a golden, caramelized crust. Serve immediately while the top is crisp and the interior is chilled.Look for The sugar should bubble and turn a deep amber color, forming a hard, glassy surface.Tip Torch the sugar just before serving to maintain the contrast between the cold cream and warm crunch.
After chilling for three hours, the cake should feel firm and set. When torching the sugar, the surface should transform from a powdery layer into a crisp, glassy, amber-colored crust. The contrast between the cold, creamy interior and the warm, crunchy top is the final indicator that the cake is ready to be sliced and served.
Common mistakes
A common mistake is cooking the crêpes on a skillet that is too hot, which results in dark spots and a rubbery texture. Ensure the heat is regulated to maintain a consistent 350°F (177°C).
Another error is adding too much cream between layers, which can cause the cake to slide or become unstable. Use a thin, consistent amount of cream. Finally, failing to chill the cake sufficiently will prevent the layers from bonding, making it difficult to slice cleanly.
How to tell it’s done
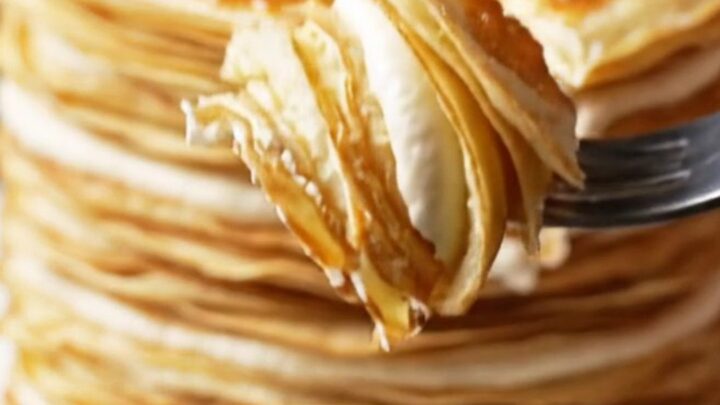
The cake is done when the layers are firmly set and the sugar on top is perfectly caramelized to a deep amber hue. The internal structure should be stable enough to slice cleanly, revealing the twenty distinct layers.
The crêpes themselves should be cooked through at 160°F (71°C), ensuring they are tender and pliable. Use a sharp knife for slicing to maintain the integrity of the layers, wiping the blade clean between each cut for the most professional appearance.
- Egg dishes: 160°F (71°C) in the thickest part
Up next · Part 3 of 3
2 variations · storage & make-ahead · 3 answers · printable card
Tips, FAQ & printable recipe (Part 3)← Back to the ingredients (Part 1)