Dinner · Part 2 of 3: Instructions
Christmas Herb Roasted Chicken and Potatoes Step-by-step instructions
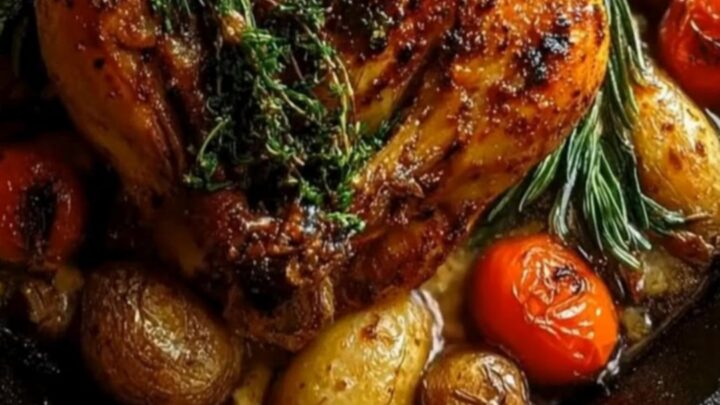
- Prep
- Cook
- Total
- Serves
- 4
Before you start
Before you begin cooking, ensure the whole chicken is completely thawed if it was previously frozen. Remove the chicken from the refrigerator about 20 to 30 minutes before roasting to take the chill off, which helps it cook more evenly.
Do not leave it out longer than 30 minutes for safety. Pat the chicken completely dry with paper towels; any moisture left on the skin will prevent it from crisping. Halve the baby potatoes and measure out the cherry tomatoes so everything is ready to go.
Ingredients at a glance (4)
- 1 whole chicken, about 4 to 5 pounds
- 1 1/2 lb baby potatoes, halved
- 1 cup cherry tomatoes
- 4 sprigs fresh rosemary
Instructions
Preparation and Arrangement
- Preheat the oven and prepare the skilletPreheat the oven to 425°F (220°C). Position an oven rack in the center. Prepare a large 12-inch cast-iron skillet to ensure it is clean and ready for roasting the chicken and vegetables.Look for The oven is fully preheated and the skillet is ready.Tip A heavy cast-iron skillet distributes heat evenly, helping the chicken and vegetables cook uniformly.
- Prepare the chickenPat the whole chicken completely dry inside and out with paper towels. Place the chicken in the center of the cast-iron skillet, ensuring it sits flat to promote even cooking throughout the roasting process.Look for The chicken is dried and positioned in the center of the skillet.Tip Drying the skin is the most critical step for achieving a shatteringly crisp texture; any surface moisture will cause the skin to steam instead of roast.
By the end of this phase, the whole chicken is thoroughly dried and positioned in the center of the cast-iron skillet. The baby potatoes, cherry tomatoes, and fresh rosemary sprigs are arranged neatly around the chicken, ready to enter the preheated oven.
Active Roasting and Basting
- Arrange the vegetablesArrange the halved baby potatoes, cherry tomatoes, and fresh rosemary sprigs in a single layer around the chicken in the cast-iron skillet, ensuring they are not piled too high to allow proper roasting.Look for The vegetables are arranged neatly around the chicken.Tip Spread the potatoes cut-side down in the skillet so they get maximum contact with the hot cast-iron surface for a crispy exterior.
- Roast and baste with pan juicesPlace the skillet in the preheated oven and roast for 50 minutes. Carefully pull the skillet out and spoon the hot, rendered pan juices over the chicken skin and vegetables, then return to the oven to finish cooking.Look for The chicken skin is turning golden and basted with juices.Tip Spooning the rendered chicken fat over the skin during roasting creates a beautiful, deep golden color and keeps the meat moist.
At this stage, the kitchen is filled with the rich aroma of roasting poultry and rosemary. The chicken skin has turned a light golden brown, and the potatoes are starting to sizzle in the hot pan juices.
Spooning the rendered pan juices over the skin creates a beautiful, glistening layer that will deepen into a rich mahogany color during the final roast.
Temperature Verification and Resting
- Verify safe temperatureContinue roasting for another 15 to 20 minutes. Insert an instant-read thermometer into the thickest part of the thigh, avoiding the bone. The chicken is fully cooked when the internal temperature reaches 165°F (74°C) and the juices run completely clear.Look for The thermometer registers 165°F (74°C) and the skin is crisp.Safe temperature 165°F (74°C) internal temperature (poultry)Tip Always test the temperature in the thickest part of the thigh, as it takes the longest time to cook through.
- Rest, carve, and serveRemove the cast-iron skillet from the oven. Let the chicken rest in the skillet for 15 minutes before carving to allow the juices to redistribute throughout the meat. Spoon the rich pan juices over the glistening skin and carve.Look for The chicken has rested, and the juices are locked in.Tip Do not skip the resting period, or the delicious juices will run out onto the cutting board, leaving the meat dry.
The roast chicken is now fully cooked, boasting a deeply golden, shatteringly crisp skin that cracks slightly when touched. The cherry tomatoes have blistered and released their sweet juices, blending with the savory pan drippings. The potatoes are tender and browned, and the chicken has rested to lock in all its juices.
Common mistakes
One of the most common mistakes when roasting a whole chicken is failing to dry the skin properly before roasting. Any surface moisture will create steam in the oven, resulting in soft, rubbery skin instead of a crispy texture.
Another error is overcrowding the skillet with too many vegetables; if the potatoes and tomatoes are piled on top of each other, they will boil in their own juices rather than roast and crisp up. Lastly, carving the chicken immediately after it comes out of the oven will cause all the delicious juices to run out, leaving the breast meat dry.
How to tell it’s done
To determine perfect doneness, always rely on an instant-read meat thermometer rather than visual cues alone. Insert the thermometer probe into the thickest part of the chicken thigh, taking care not to touch the bone.
The chicken is safely cooked and ready to be removed from the oven when the internal temperature registers 165°F (74°C). At this point, the juices from the thigh should run completely clear when pierced, and the leg joints should move easily when wiggled. Let the chicken rest for 15 minutes before carving.
- Poultry: 165°F (74°C) in the thickest part
Up next · Part 3 of 3
2 variations · storage & make-ahead · 3 answers · printable card
Tips, FAQ & printable recipe (Part 3)← Back to the ingredients (Part 1)