Dinner · Part 2 of 3: Instructions
Christmas Garlic Herb Chicken and Potatoes One-Pan Bake Step-by-step instructions
- Prep
- Cook
- Total
- Serves
- 4
Before you start
Before beginning, ensure all ingredients are at room temperature. Preheat the oven to 400°F (200°C) at least 20 minutes before placing the baking dish inside.
Clear a dedicated space on the counter for the baking dish and have your tongs and a meat thermometer ready. Ensure the green beans are washed and the ends are trimmed neatly to improve the presentation of the final dish.
Ingredients at a glance (4)
- 4 pieces chicken breasts, boneless and skinless
- 1.5 lb baby gold potatoes, halved
- 1 lb green beans, trimmed
- 2 tbsp garlic herb seasoning
Instructions
Seasoning and Preparation
- Prepare the ingredientsPreheat the oven to 400°F (200°C). Wash and trim the green beans. Halve the baby gold potatoes. Place the chicken breasts, potatoes, and green beans into a large baking dish. Sprinkle the garlic herb seasoning over everything and toss well until all ingredients are evenly coated.Look for The chicken and vegetables should be thoroughly coated with the herb mixture.Tip Ensure the potatoes are cut to a similar size to promote even cooking throughout the roasting process.
The ingredients should be tossed thoroughly in the baking dish. Every piece of chicken and vegetable must be lightly coated with the herb mixture. The appearance should be uniform, with herbs visible on all surfaces of the potatoes and green beans.
Roasting in the Oven
- Roast in the ovenSpread the seasoned chicken and vegetables into a single layer in the baking dish. Place the dish into the preheated oven and bake for 35 to 40 minutes, or until the vegetables are tender and the chicken is fully cooked through.Look for The chicken should be golden on the outside and the potatoes should be fork-tender.Tip Use a wide glass dish to allow for better heat circulation around the ingredients.
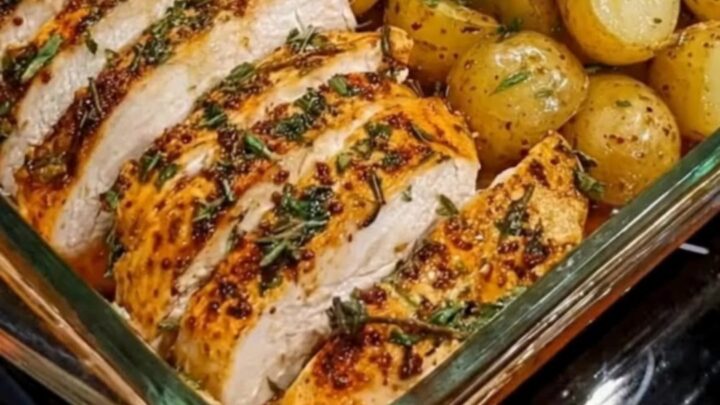
The kitchen should smell fragrant with the scent of roasted garlic and herbs. The potatoes will start to develop a golden crust, and the chicken will look plump and juicy.
If the green beans appear to be browning too quickly, they can be pushed slightly toward the center of the dish.
Resting and Serving
- Check doneness and serveVerify that the chicken has reached an internal temperature of 165°F (74°C) using a meat thermometer. Remove the dish from the oven and let the chicken rest for at least 5 minutes before slicing. Use tongs to transfer the chicken and roasted vegetables to plates. Serve immediately while hot.Look for The juices should run clear when the chicken is pierced with a fork.Safe temperature 165°F (74°C) internal temperature (poultry)Tip Resting the meat is essential for maintaining the juiciness of the chicken breasts.
The chicken must reach 165°F (74°C) before it is removed from the oven. After resting for 5 minutes, the chicken should be easy to slice. When plated, the dish should look vibrant, with the green beans adding a fresh color contrast to the golden potatoes and roasted chicken.
Common mistakes
A common mistake is overcrowding the baking dish, which causes the ingredients to steam in their own juices rather than roast. Arrange the chicken and vegetables in a single layer for the best results.
Another error is neglecting to rest the meat; resting the chicken for at least 5 minutes allows the juices to redistribute, ensuring every bite remains moist. Always check the temperature at the thickest part of the breast.
How to tell it’s done
The chicken is done when it reaches an internal temperature of 165°F (74°C). The meat should be opaque throughout with no signs of pink. The baby gold potatoes should be golden brown on the edges and soft enough to be pierced easily with a fork.
If the chicken is cooked but the potatoes need more time, remove the chicken to a plate and continue roasting the vegetables until they reach the desired level of crispness.
- Poultry: 165°F (74°C) in the thickest part
Up next · Part 3 of 3
2 variations · storage & make-ahead · 3 answers · printable card
Tips, FAQ & printable recipe (Part 3)← Back to the ingredients (Part 1)