Desserts · Part 2 of 3: Instructions
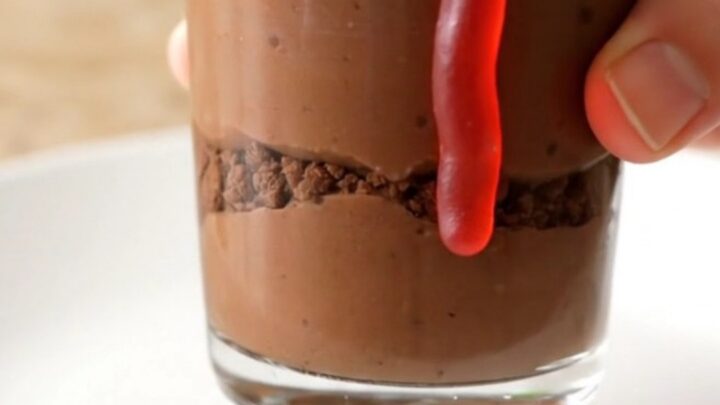
Easy Chocolate Pudding Worms in Dirt Dessert Cups Step-by-step instructions
- Prep
- Cook
- Total
- Serves
- 12
Before you start
Before you begin assembling the pudding cups, ensure that your chocolate pudding is thoroughly chilled in the refrigerator. If you are using homemade pudding, allow it to set for at least four hours before use.
Prepare your cookie crumbs by placing chocolate cookies in a sealed bag and crushing them with a rolling pin until they reach the desired consistency.
Have your serving cups lined up on a flat, stable surface like a baking sheet to make the assembly process organized and efficient.
Ingredients at a glance (3)
- 6 cups chocolate pudding, store-bought or made ahead
- 2 cups chocolate cookie crumbs
- 24 gummy worms
Instructions
Portioning the pudding
- Portion the puddingSpoon the chocolate pudding evenly into each of the twelve clear glass cups. Ensure the pudding is filled to about three-quarters of the way up the side of each glass to leave room for the toppings.Look for The pudding should look smooth and be evenly distributed across all serving cups.Tip Use a piping bag if you want to keep the edges of the glasses clean while filling.
The pudding should be smooth, consistent, and evenly divided between the glasses. Check that the surface of the pudding in each cup is relatively level before moving on to the next step, as this provides a stable foundation for the cookie crumb layer.
Applying the dirt
- Add the dirtSprinkle a generous layer of chocolate cookie crumbs over the top of the chocolate pudding in each cup. Use the back of a spoon to lightly press the crumbs into the surface so they adhere to the pudding.Look for The cookie crumbs should completely cover the surface of the pudding, creating the appearance of loose dirt.Tip If the crumbs are too large, pulse them in a food processor until they resemble fine soil.
The cookie crumbs should form a uniform layer that completely obscures the chocolate pudding underneath. Ensure the crumbs are pressed down slightly so they don't shift when you add the gummy worms. The surface should look like dark, loose soil.
Adding the final touch
- Tuck in the wormsArrange two gummy worms on top of the cookie crumbs in each cup. Tuck one end of each worm slightly into the pudding so that it looks like the worm is emerging from the dirt.Look for The worms should be positioned securely so they do not slide off the pudding.Tip Add a few extra worms if you want a more crowded look for the dessert.
The gummy worms should be placed so that they appear to be crawling out of the dirt. Check that each cup has an equal number of worms and that they are securely tucked into the pudding layer so they do not fall out when the cups are moved.
Common mistakes
A common mistake is using pudding that is too thin, which can cause the cookie crumbs to sink or the layers to blend together. Ensure your pudding has a thick, custard-like consistency.
Another error is overfilling the cups, which leaves no room for the cookie topping. Aim to leave at least half an inch of space at the top of each glass to prevent spills and ensure the gummy worms sit comfortably on the surface.
How to tell it’s done
This dessert does not require any cooking, so doneness is determined by the texture and presentation. The pudding should be firm enough to hold the weight of the cookie crumbs without them sinking to the bottom.
Once assembled, the dessert is ready to serve immediately, though it can also be held in the refrigerator for up to an hour before guests arrive to ensure it stays chilled and refreshing.
Up next · Part 3 of 3
2 variations · storage & make-ahead · 3 answers · printable card
Tips, FAQ & printable recipe (Part 3)← Back to the ingredients (Part 1)