Desserts · Part 2 of 3: Instructions
Chocolate Almond Kringle: Flaky Braided Danish Ring with Dark and Milk Chocolate Step-by-step instructions
- Prep
- Cook
- Total
- Serves
- 10
Before you start
Set the oven rack in the center position and preheat the oven to 375°F (190°C). Line a baking sheet with parchment paper. Dust a wooden board lightly with flour and have a chef's knife, a box grater and a pastry brush within reach. Cut the dark chocolate into chunks and grate the milk chocolate bar.
Beat the egg with water in a small bowl. Warm the apricot jam in a saucepan and strain it so it is ready to brush. Keep the laminated dough refrigerated until you are ready to roll it out, and have the sliced almonds measured into separate bowls. Organizing these items first keeps the dough cool and makes the shaping steps smoother.
Ingredients at a glance (11)
- 1 lb laminated pastry dough (store-bought or made ahead), rolled into a long rectangle
- 2 tbsp all-purpose flour, for dusting the board
- 4 oz dark chocolate, cut into chunks
- 2 oz milk chocolate bar, for grating
- 1/3 cup sliced almonds, for the filling side of the dough
- 1 large egg, beaten with 1 tbsp water for egg wash
- 1/4 cup sliced almonds, for scattering on top
- 1/3 cup apricot jam, warmed and strained for brushing
- 2 tbsp sliced almonds, for sprinkling after glazing
- 1/2 cup confectioners' sugar mixed with 1 to 2 tbsp milk, for a drizzle
- 1 oz dark chocolate, melted, for drizzling
Instructions
Filling and braiding the dough
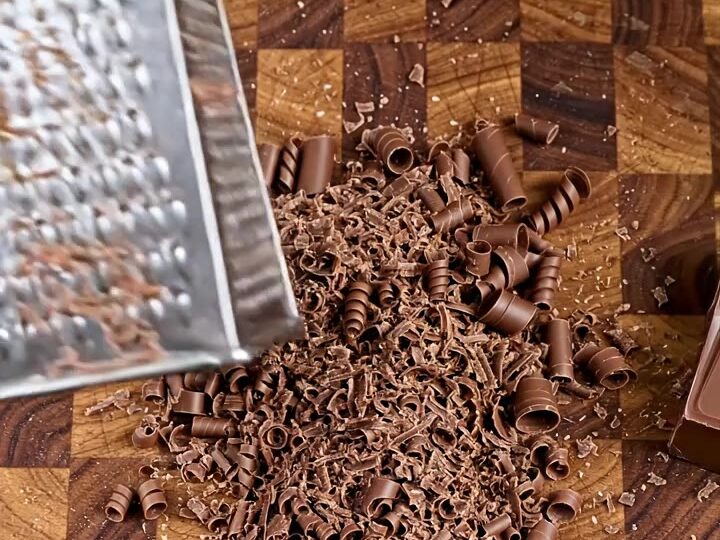
- Prepare the pastry and fillingsDust a wooden board lightly with all-purpose flour and lay the laminated pastry dough on it as a long rectangle. Cut the dark chocolate into chunks, then grate the milk chocolate bar over the center of the dough with a box grater so fine shavings fall across the board.Look for Milk chocolate shavings scatter across the board and the dough is still cool and firm to the touch.Tip Chill the dough for a few minutes if it softens while you grate the chocolate.
- Add the almond and chocolate fillingScatter the dark chocolate chunks and the sliced almonds over the center of the dough, spreading the almonds along the right side. Keep the filling in a neat line so it stays contained when the dough is folded.Look for Chocolate chunks and almonds sit in a tidy line along the center and right side.Tip Leave a clean border of dough at both ends so the edges seal well.
At the end of this phase the dough should be a long rectangle with chocolate chunks, grated milk chocolate and sliced almonds spread along the center and right side, and the folded strands should be braided into a closed ring.
The dough should feel cool and firm, with the layers still distinct at the cut edges. Check that the filling is enclosed and the ends are pinched together so nothing leaks out during baking. If the dough feels soft or greasy, refrigerate it for 10 minutes before brushing the egg wash and moving on to the oven.
Baking the golden kringle
- Fold, cut and braid the doughFold the dough around the filling to enclose it. Using a chef's knife, cut the folded dough lengthwise into strands, leaving the top attached at one end. Braid the strands over one another, then bring the braid into a ring and transfer it to a parchment-lined baking sheet, pinching the ends together.Look for The strands form a neat braid that closes into a continuous ring.Tip Work with cold dough so the layers stay distinct and the braid holds its shape.
- Brush with egg wash and top with almondsBeat the egg with 1 tablespoon of water. Brush the top of the braid evenly with the egg wash, then scatter the sliced almonds over the surface. Brush gently so the layers are not pressed together.Look for The braid looks evenly glossy and the almonds sit on top.Safe temperature 160°F (71°C) internal temperature (egg dishes)Tip Brush only once so the pastry rises freely and keeps its flaky layers.
- Bake until deep goldenBake the kringle in a preheated oven at 375°F (190°C) for about 25 to 30 minutes, until the pastry is deep golden and flaky and the chocolate filling is melted. Let the kringle cool on the baking sheet for 20 minutes.Look for The pastry is deep golden and the surface sounds hollow when tapped lightly.Tip Rotate the sheet halfway through baking for even color.
After baking, the pastry should be deep golden on top and bottom, puffed and flaky at the edges, and the chocolate filling should look melted and glossy where it shows through the braid. Listen for a light, hollow sound when you tap the surface, and smell the toasted almonds and warm butter in the pastry. Before you glaze, let the ring cool on the sheet for about 20 minutes so the glaze does not soak in and soften the layers. If the top is pale, return the kringle to the oven for a few extra minutes and watch it closely.
Glazing and finishing the ring
- Glaze the ringWarm the apricot jam in a small saucepan, then strain it. Brush the warm apricot glaze over the ring and sprinkle the remaining sliced almonds on top while the glaze is still tacky.Look for The glaze is smooth and spreads easily, and the almonds stick to the surface.Tip Strain the jam so the glaze is smooth and brushes on evenly.
- Finish with icing and chocolateMix the confectioners' sugar with milk until it drizzles smoothly, then drizzle it over the kringle. Melt the dark chocolate and drizzle it over the icing. Let the icing set for about 10 minutes before slicing.Look for The white icing is thick enough to hold a line and the chocolate drizzle is glossy.Tip Add the milk slowly so the icing stays thick enough to drizzle.
At this point the apricot glaze should be smooth and warm, the sliced almonds should be stuck to the surface, the white icing should hold a thin drizzle, and the dark chocolate should look glossy when it is set. Check that the icing has begun to firm before you slice the ring, which takes about 10 minutes. The kringle should look evenly glazed with no bare patches of pastry. If the icing runs too thin, add a little more confectioners' sugar until the drizzle holds its line.
Common mistakes
The most common mistake is working with warm dough. When laminated layers soften, they lose their structure, the braid spreads, and the chocolate can escape into the pan. Keep the dough cold during shaping and refrigerate it briefly if it becomes sticky. Another frequent error is brushing the egg wash too heavily, which can glue the layers together and reduce the flaky texture.
Apply a thin, even coat. Overfilling the braid also causes leaks, so spread the chocolate in a single line rather than piling it up. Finally, glazing a hot kringle softens the pastry, so wait about 20 minutes after baking before brushing the apricot glaze.
How to tell it’s done
The kringle is done when the pastry is deep golden all over, the layers look puffed and separated, and the chocolate inside has melted into a glossy filling. Look at the base of the ring as well as the top, since a pale bottom means the pastry is not fully baked.
The egg wash on the braid should look set and lightly browned. The almond topping should be toasted and golden. Because the filling is chocolate and the pastry is fully baked, no meat thermometer is needed. Let the ring cool before glazing and slicing so the layers set and hold their shape when cut.
- Egg dishes: 160°F (71°C) in the thickest part
Up next · Part 3 of 3
4 variations · storage & make-ahead · 5 answers · printable card
Tips, FAQ & printable recipe (Part 3)← Back to the ingredients (Part 1)