Desserts · Part 2 of 3: Instructions
Chocolate Almond Kringle Braided Danish Ring Step-by-step instructions
- Prep
- Cook
- Total
- Serves
- 10
Before you start
Before starting, ensure the laminated puff pastry is thawed if frozen, but still cold. Prepare the dark chocolate almond frangipane if making from scratch, and have the chocolate bars and espresso coverture ready.
Chop the dark chocolate bars into small pieces and grate the espresso chocolate. Make the egg wash by beating one egg with a tablespoon of water. Line a baking sheet with parchment paper. Have a rolling pin, sharp knife, and pastry brush on hand.
Ingredients at a glance (8)
- 1 sheet laminated puff pastry (store-bought or made ahead)
- 6 oz dark chocolate bars, chopped
- 4 oz dark espresso coverture chocolate block
- 1 1/2 cups dark chocolate almond frangipane
- 1 large egg, beaten with 1 tbsp water
- 1/2 cup sliced almonds
- 1/2 cup vanilla icing (confectioners' sugar, milk, vanilla)
- 1/4 cup melted dark chocolate
Instructions
Prepare and Shape
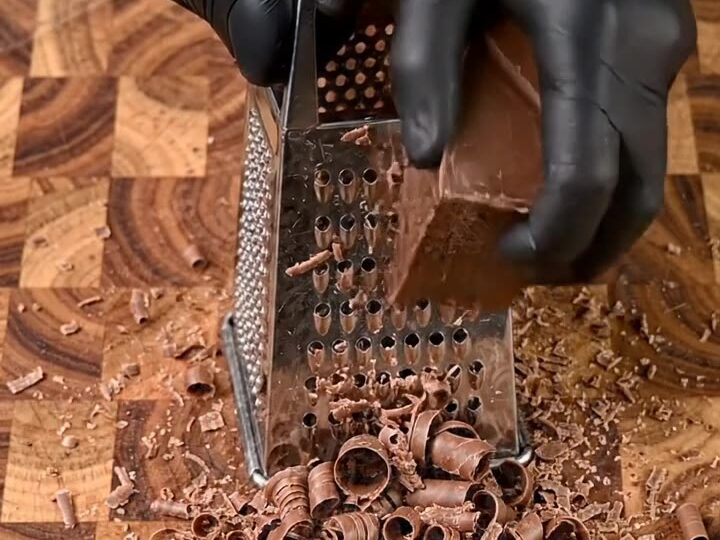
- Prepare the Chocolate and PastryChop the dark chocolate bars into small pieces and set aside. Grate the dark espresso coverture chocolate block on a box grater into a fresh pile of dark chocolate curls. On a lightly floured surface, roll the laminated puff pastry into a rectangle about 1/4 inch thick. Spread the dark chocolate almond frangipane evenly over the pastry, leaving a 1-inch border along one long edge. Scatter the chopped dark chocolate bars over the frangipane, then sprinkle the grated espresso chocolate curls on top.Look for The pastry is rolled thin and the filling is evenly spread with visible chocolate pieces.Tip Keep the pastry chilled if it becomes too soft to handle; a cold pastry is easier to braid.
- Shape the RingStarting from the long edge with the filling, roll the pastry into a tight log. Carefully transfer the log to a parchment-lined baking sheet. Shape the log into an oval ring, pressing the ends together to seal. Using a sharp knife, make cuts along the top of the ring at 1-inch intervals, being careful not to cut all the way through. Gently twist and fold each cut piece to create a braided appearance over the filling.Look for The ring holds its oval shape and the braided top shows the filling through the cuts.Tip If the pastry tears, simply press it back together; the braid will hide imperfections.
- Chill the RingPlace the shaped ring in the refrigerator and chill for at least 30 minutes. This step is essential to relax the gluten and firm the butter, which helps the pastry hold its shape during baking and creates flakier layers.Look for The ring is firm to the touch and holds its braided shape when gently pressed.Tip Chilling also prevents the filling from leaking out during baking.
At the end of this phase, you should have a neatly rolled pastry log shaped into an oval ring, with a braided top that reveals the chocolate filling. The pastry should be cold and firm after chilling, holding its shape when touched. The filling should be evenly distributed, and the braid cuts should be clean and uniform. This is the foundation for a beautiful kringle.
Bake to Golden
- Egg Wash and AlmondsHeat the oven to 375°F (190°C). Brush the chilled ring evenly with the egg wash, making sure to get into the crevices of the braid. Sprinkle the sliced almonds generously over the top, pressing lightly so they stick to the egg wash.Look for The ring is glossy with egg wash and covered with almonds.Tip Use a gentle hand when brushing to avoid deflating the pastry.
- Bake the KringleBake the ring in the preheated oven for 30 to 35 minutes, until the pastry is deep golden brown and puffed. The filling should be bubbling slightly at the edges. If the top browns too quickly, cover loosely with foil. The internal temperature of the pastry should reach at least 160°F (71°C) to ensure the egg in the frangipane and egg wash is fully cooked.Look for The pastry is golden, puffed, and the filling is visibly set.Safe temperature 160°F (71°C) internal temperature (egg dishes)Tip Rotate the baking sheet halfway through for even browning.
- Cool SlightlyRemove the kringle from the oven and let it cool on the baking sheet for 10 minutes. Then transfer to a wire rack to cool slightly, about 15 minutes more. The ring should still be warm but not hot when glazing.Look for The kringle is set and the pastry layers are visibly flaky.Tip Cooling slightly prevents the glaze from melting completely.
After baking, the kringle should be puffed and deep golden brown, with visible flaky layers. The filling should be set and slightly bubbling at the edges.
The aroma of chocolate and toasted almonds will fill the kitchen. Let it cool slightly on a wire rack; it should be firm enough to hold its shape when moved. The internal temperature should have reached 160°F (71°C).
Glaze and Serve
- Glaze with Vanilla IcingDrizzle the vanilla icing over the warm kringle in a zigzag pattern, allowing it to cascade down the sides. Use a spoon or a piping bag for control. The icing will set as it cools, creating a glossy finish.Look for The icing is evenly drizzled and starting to set.Tip If the icing is too thick, add a few drops of milk to thin it.
- Finish with Melted ChocolateDrizzle the melted dark chocolate over the icing in a contrasting pattern. Use a fork or a small piping bag to create fine lines. Allow the chocolate to set for a few minutes before serving.Look for The chocolate contrasts beautifully with the white icing.Tip For a neater look, let the icing set for 5 minutes before adding the chocolate.
- Serve WarmLift a warm flaky portion from the ring using a serrated knife or a spatula. Serve immediately while the pastry is crisp and the chocolate is slightly melted. This kringle is best enjoyed fresh from the oven.Look for The layers pull apart easily, showing the chocolate frangipane filling.Tip Reheat leftovers in a 350°F oven for 5 minutes to restore crispness.
The finished kringle is drizzled with vanilla icing and melted chocolate, creating a glossy, marbled appearance. The icing should be set but not hard, and the chocolate should be slightly firm. When you lift a portion, the layers should separate easily, showing the soft frangipane and melted chocolate. Serve warm for the best texture and flavor.
Common mistakes
One common mistake is overfilling the pastry, which can cause the filling to leak out during baking. Keep the frangipane layer even and leave a border when rolling.
Another mistake is skipping the chilling step, which makes the pastry hard to handle and less flaky. If the pastry tears, don’t panic — press it back together; the braid will hide imperfections. Also, avoid over-browning the top by covering with foil if needed.
How to tell it’s done
The kringle is done when the pastry is deep golden brown and puffed, and the filling is bubbling slightly at the edges. The internal temperature of the pastry should reach at least 160°F (71°C) to ensure the egg in the frangipane and egg wash is fully cooked.
If you insert a skewer into the center, it should come out clean. Let it cool slightly before glazing to prevent the icing from melting completely.
- Egg dishes: 160°F (71°C) in the thickest part
Up next · Part 3 of 3
4 variations · storage & make-ahead · 5 answers · printable card
Tips, FAQ & printable recipe (Part 3)← Back to the ingredients (Part 1)