Desserts · Part 1 of 3: Ingredients
Chocolate Almond Braided Danish Ring with Puff Pastry
- Prep
- Cook
- Total
- Serves
- 8
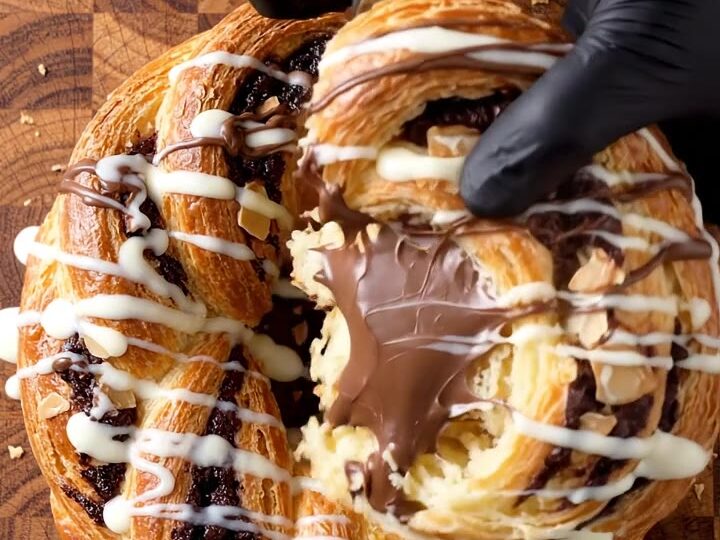
Imagine tearing into a golden, glossy ring of flaky puff pastry, with a rich dark chocolate center and crisp layered edges.
This braided danish looks like a bakery specialty, yet it comes together with one sheet of pastry, a box grater and a short list of ingredients. Finish it with a sweet white icing drizzle and a scatter of almonds for a dessert that feels special.
This chocolate almond braided danish ring is built around a single sheet of puff pastry. The pastry is laid on a wooden board, scattered with sliced almonds and chopped dark chocolate, and finished with fine chocolate shavings grated from a bar. Cut lengthwise and braided into a ring, the pastry forms a central well for the chocolate almond filling.
A brush of beaten egg gives the edges their shine, and the baked danish is finished with a white icing drizzle across the braids. The method is simple, the pastry does most of the work, and the result is a golden, layered dessert ready to slice and share with coffee or tea.
Ingredients
- 1 sheet puff pastry, store-bought or made ahead, rolled into a long rectangle
- 1/2 cup sliced almonds, divided
- 3 oz dark chocolate bar, plus extra chopped pieces for the filling
- 1 large egg, beaten, for egg wash
Icing
- 1 cup confectioners' sugar
- 1 tbsp to 2 whole milk, for the white icing
Why this recipe works
Puff pastry is made of many thin layers of dough and butter. In the oven the butter releases steam, which pushes the layers apart and makes the pastry puff and flake.
Cutting the sheet into two strands and braiding them keeps those layers exposed along the edges, so they bake into crisp, shattered ridges rather than a flat, dense crust. The braid also creates a natural well that holds the filling in the center without spilling during baking.
Grating the dark chocolate is what gives the filling its even texture. Fine shavings melt quickly and spread through the almond layer, so the chocolate center becomes rich and soft while the surrounding pastry stays crisp.
Sliced almonds add a toasted crunch that contrasts with the chocolate, and pressing them onto the top helps them stay in place as the pastry rises. Brushing only the braided edges with egg wash gives a deep golden color without weighing down the layers.
Notes and substitutions
Use a store-bought or homemade puff pastry sheet that is cold and firm when you start. If the pastry softens while you work, return it to the refrigerator for a few minutes so the butter layers stay intact and the braid holds its shape in the oven.
A wooden board is useful for the filling step because it stays cool and gives you a stable surface for grating. Use a box grater with fine holes for the chocolate, a sharp knife for clean cuts, and a parchment-lined baking sheet so the ring releases easily and the bottom browns evenly. A pastry brush keeps the egg wash thin and even.
- dark chocolate bar: dark chocolate chips, vegan or regular, for a faster filling
- sliced almonds: chopped toasted hazelnuts for a different nutty note
- whole milk: heavy cream for a thicker, richer icing
Equipment
- wooden cutting board
- box grater
- sharp knife
- parchment-lined baking sheet
- pastry brush
- small bowl
- fork or whisk
Up next · Part 2 of 3
6 steps · 25 min of cooking · what to look for at each stage
Step-by-step instructions (Part 2)