Dinner · Part 1 of 3: Ingredients
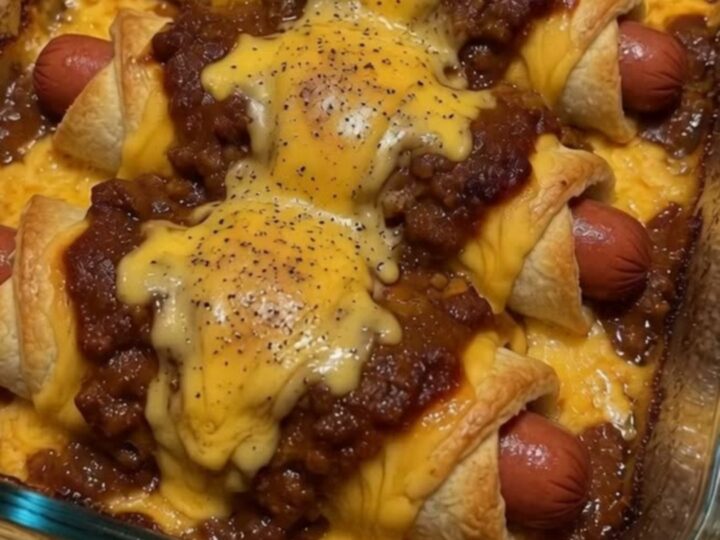
Easy Chili Cheese Dog Crescent Rolls for Quick Comfort
- Prep
- Cook
- Total
- Serves
- 6
Elevate a classic weeknight dinner staple by transforming simple hot dogs into a gourmet-style comfort bake. These chili cheese dog crescent rolls combine the buttery, flaky texture of baked pastry with the savory, hearty punch of chili and melted cheddar cheese.
This dish delivers a satisfying crunch followed by a gooey, flavorful center, making it an ideal choice for busy evenings when a warm and comforting meal is required without spending hours in the kitchen.
This recipe takes the humble hot dog and elevates it into a sophisticated, family-friendly dinner. By wrapping hot dogs in crescent roll dough and smothering them in chili and sharp cheddar cheese, you create a cohesive, delicious meal that feels like a treat. The baking process transforms the dough into a crisp, golden vessel that perfectly holds the savory filling.
This method is incredibly efficient, requiring minimal active preparation time, and it results in a dish that looks as good as it tastes. Whether serving for a casual dinner or a hungry crowd, these chili cheese dog rolls provide a reliable and consistent result every single time they are placed in the oven.
Ingredients
Filling
- 6 hot dogs
- 1 can crescent rolls
- 1 cup canned chili
Topping
- 1 cup shredded cheddar cheese
- black pepper, to taste
Why this recipe works
The method of wrapping the hot dogs in crescent dough works because it creates a protective, buttery crust that keeps the meat juicy while providing a delightful contrast to the soft interior.
The dough absorbs just enough of the chili moisture to remain tender without becoming soggy, creating a perfect balance of textures. Baking in a casserole dish allows the cheese to melt uniformly across the entire surface, ensuring every bite is equally cheesy and flavorful.
Baking these rolls as a group in a single dish encourages the chili to bubble and integrate with the pastry, which deepens the overall flavor profile. The high heat of the oven ensures that the crescent dough browns evenly while the internal ingredients reach the proper temperature simultaneously.
This technique is highly effective for home cooks because it minimizes the cleanup associated with frying or stovetop preparations while delivering a restaurant-quality presentation with very little effort.
Notes and substitutions
When selecting ingredients, opt for a canned chili that is thicker in consistency, as this prevents the dish from becoming overly liquid during the baking process. If using a thinner chili, simmer it on the stove for a few minutes first to reduce the excess liquid. Any brand of refrigerated crescent roll dough works well, provided it is kept chilled until the moment of assembly to ensure the best puffing and texture.
For the cheese, a freshly shredded cheddar provides the best melt and flavor compared to pre-shredded varieties, which often contain anti-caking agents that inhibit melting. If desired, you can use a combination of cheddar and Monterey Jack for a milder, creamier finish. The glass casserole dish is ideal for this recipe as it allows for even heat distribution and provides a clear view of the browning process at the bottom of the rolls.
- canned chili: homemade meat sauce or leftover chili with limited liquid
- cheddar cheese: shredded Monterey Jack or a Mexican cheese blend
Equipment
- 9x13 inch glass casserole dish
- baking sheet
- spoon
- knife
Up next · Part 2 of 3
3 steps · 20 min of cooking · what to look for at each stage
Step-by-step instructions (Part 2)