Breakfast · Part 2 of 3: Instructions
Chewy Seed-Crusted Bagels with Cream Cheese Step-by-step instructions
- Prep
- Cook
- Total
- Serves
- 8
Before you start
Before you start, make sure your yeast is fresh and active by proofing it in warm water with a bit of sugar. Measure all your ingredients accurately, especially the flour, as too much can make the dough dry. Have a large pot of water ready for boiling, and line a baking sheet with parchment paper.
Set out the mixed seeds in a shallow dish for easy coating. Soften the butter and cream cheese ahead of time so they incorporate smoothly. Clear a clean surface for kneading and have a kitchen towel ready for covering the dough during the rise. This prep ensures a smooth, enjoyable baking experience.
Ingredients at a glance (9)
- 1 1/2 cups warm water
- 1/2 cup milk
- 2 1/4 tsp active dry yeast
- 2 tbsp sugar
- 2 tsp salt
- 1 tbsp unsalted butter, softened
- 4 1/2 cups all-purpose flour
- 1/2 cup mixed seeds (such as sesame, poppy, sunflower)
- cream cheese, softened, for serving
Instructions
Make the Dough
- Make the DoughIn a large bowl, combine the warm water, milk, yeast, and sugar. Let stand for 5 minutes until foamy. Add the salt, butter, and 2 cups of flour. Stir until smooth. Gradually add the remaining flour, 1/2 cup at a time, until a stiff dough forms.Look for The dough should be smooth and stiff, not sticky.Tip If the dough is too sticky, add a little more flour, a tablespoon at a time.
- Knead the DoughTurn the dough out onto a lightly floured surface and knead for 8-10 minutes, until smooth and elastic. The dough should feel firm and spring back when pressed.Look for The dough becomes smooth and elastic, no longer sticky.Tip Kneading develops the gluten, giving the bagels their chewy texture.
- First ProofPlace the dough in a lightly oiled bowl, cover with a clean towel, and let rise in a warm place for 45 minutes, or until doubled in size.Look for The dough doubles in volume and feels airy.Tip A warm spot, like near a sunny window, speeds up the rise.
After kneading, the dough should be smooth, elastic, and slightly firm to the touch. It should not stick to your hands or the work surface. When you press a finger into the dough, it should spring back slowly, indicating good gluten development.
After the 45-minute rise, the dough will have doubled in volume and feel airy and light. Punch it down gently before shaping. This is the foundation for the chewy texture you're after, so take your time with the kneading—it's worth it.
Boil and Coat
- Shape the BagelsPunch down the dough and divide it into 8 equal pieces. Roll each piece into a ball, then poke a hole through the center with your finger and gently stretch to form a bagel shape with a 1-2 inch hole.Look for Each bagel is uniform and the hole is about 1-2 inches wide.Tip Keep the hole larger than you think—it will shrink during proofing and boiling.
- Boil the BagelsBring a large pot of water to a boil. Carefully drop 2-3 bagels at a time into the boiling water. Boil for 1 minute per side, turning once, until they puff slightly.Look for The bagels float and look slightly puffed; the surface becomes shiny.Tip Boiling sets the crust and gives the bagels their signature chew.
- Coat with SeedsUsing a slotted spoon, remove the bagels from the water and let them drain briefly. While still wet, press both sides into the mixed seeds, coating generously.Look for The seeds stick to the wet surface and cover the bagels evenly.Tip Work quickly while the bagels are still wet so the seeds adhere well.
The bagels should float in the boiling water and puff up slightly. After boiling for a minute per side, they'll look shiny and slightly blistered. When you lift them out with a slotted spoon, they should hold their shape and feel slightly firm. Coating them with seeds while still wet ensures the seeds stick well. You'll see a generous, even layer of seeds covering both sides. The bagels are now ready for the oven—they should look plump and inviting.
Bake to Golden
- Bake the BagelsPlace the seed-coated bagels on a parchment-lined baking sheet. Bake at 350°F (175°C) for 20 minutes, until deep golden brown and shiny.Look for The crust is deep golden brown and the bagels feel firm when tapped.Tip Rotate the baking sheet halfway through for even browning.
- Cool and ServeRemove the bagels from the oven and let them cool on a wire rack for at least 10 minutes. Slather with cream cheese and enjoy warm.Look for The bagels are cool enough to handle and the crust is crisp.Tip Warm bagels are best, but they toast beautifully the next day.
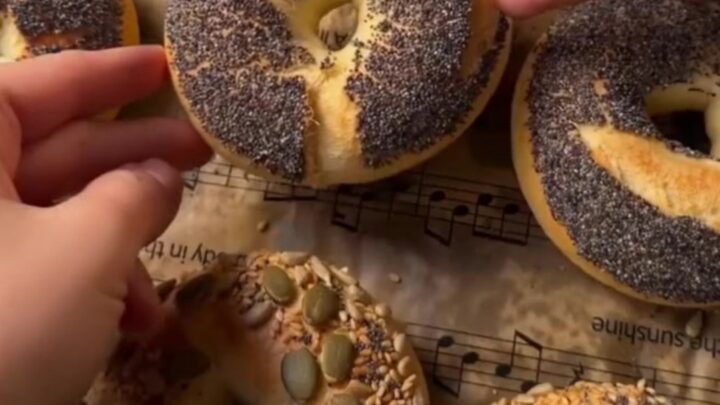
After 20 minutes in the oven, the bagels should be deep golden brown, with the seeds toasted and fragrant. The crust will look shiny and slightly blistered, and the bagels will feel firm when tapped. They should release easily from the parchment paper. The smell of toasted seeds and fresh bread will fill your kitchen. Let them cool on a wire rack for at least 10 minutes before serving—the crumb will be tender and chewy, with a satisfying crunch from the crust.
Common mistakes
One common mistake is not boiling the bagels long enough—a quick 30-second dip won't create that glossy, chewy crust. Another is over-flouring the dough, which makes it dry and tough. If the dough is too sticky, add flour gradually, but if it's too dry, add a teaspoon of water at a time.
Shaping the bagels too small or with a tiny hole can cause them to close up during proofing, so make the hole generously. Finally, don't skip the cooling step—cutting into a hot bagel can make the crumb gummy and misshapen.
How to tell it’s done
The bagels are done when they are deep golden brown on top and feel firm when tapped on the bottom—they should sound hollow. The crust will look shiny and slightly blistered, and the seeds will be toasted and fragrant.
If you have an instant-read thermometer, the internal temperature should read around 200°F (93°C) for a fully baked crumb. Let them cool on a wire rack for at least 10 minutes before slicing; this allows the crumb to set and makes them easier to cut. They are best enjoyed warm, but they also toast beautifully the next day.
Up next · Part 3 of 3
4 variations · storage & make-ahead · 5 answers · printable card
Tips, FAQ & printable recipe (Part 3)← Back to the ingredients (Part 1)