Desserts · Part 2 of 3: Instructions
Easy Cherry Cream Cheese Delight for Simple Entertaining Step-by-step instructions
- Prep
- Cook
- Total
- Serves
- 12
Before you start
Before beginning, ensure all ingredients are measured and ready. Bring the cream cheese to room temperature to ensure it spreads smoothly without leaving clumps.
Verify that the whipped topping is completely thawed, as frozen or icy chunks will affect the consistency of the cream filling. Have the 9x13 inch glass casserole dish cleaned and dried, and ensure there is sufficient space in the refrigerator for the dish to sit level while it sets.
Ingredients at a glance (5)
- 2 cups graham crust
- 16 oz cream cheese
- 8 oz whipped topping
- 21 oz cherry filling
- 1/2 cup pecans
Instructions
Crust formation
- Prepare the baseSpread the graham crust mixture across the bottom of a 9x13 inch glass casserole dish. Press the crust down firmly with a spatula to create an even, compact foundation for the dessert.Look for The crust should be level and firmly packed into the dish.Tip Ensure the corners are well-covered for a clean look.
The crust should be tightly packed and uniform across the bottom of the dish. Check that there are no loose crumbs and that the layer is solid. A well-prepared crust provides the necessary foundation for the remaining layers and prevents the filling from slipping during the serving process.
Filling preparation
- Layer the fillingSpread the smooth cream cheese over the graham crust in an even layer. Use a spatula to ensure the cream cheese reaches the edges of the dish, creating a clean, flat surface.Look for The cream cheese should be smooth and spread edge-to-edge.Tip Work gently to avoid disturbing the graham crust base.
The filling must be smooth, creamy, and free of lumps. The whipped topping should be evenly distributed so that the mixture is uniform in color and texture. When spread over the crust, it should create a flat, even surface that is ready to accept the cherry topping.
Final assembly
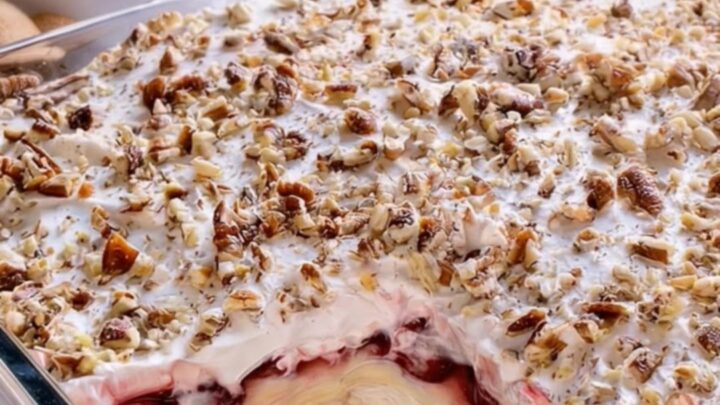
- Add topping and finishSpoon the cherry filling over the cream cheese layer, spreading it to create a glossy finish. Scatter the pecans over the whipped topping to complete the assembly. Refrigerate until set.Look for The cherries should be glossy and the pecans evenly scattered.Tip Chill thoroughly to ensure the layers remain distinct when slicing.
The cherry filling should be spread carefully to cover the cream cheese layer without disturbing it. After adding the pecans, the dessert should be refrigerated to allow the components to meld.
A successful assembly results in distinct, visible layers when viewed through the side of the glass dish.
Common mistakes
A common mistake is failing to pack the graham crust tightly enough, which can lead to a crumbly base that falls apart upon serving. Another error is not allowing the cream cheese to soften properly, resulting in a lumpy filling.
Additionally, rushing the chilling process will prevent the layers from setting, making it difficult to cut clean squares. Always ensure the refrigerator is cold enough to facilitate proper firming of the cream cheese fats.
How to tell it’s done
The dessert is considered done when the layers have set firmly after the required chilling time. The cream cheese layer should feel stable to the touch, and the cherry topping should be well-contained within the borders of the dish.
There is no internal temperature to monitor for this no-bake dessert, as all components are safe for consumption when prepared according to standard food safety guidelines.
Up next · Part 3 of 3
2 variations · storage & make-ahead · 3 answers · printable card
Tips, FAQ & printable recipe (Part 3)← Back to the ingredients (Part 1)