Appetizers · Part 2 of 3: Instructions
Cheesy Taco Sticks with Garlic Herb Butter Step-by-step instructions
- Prep
- Cook
- Total
- Serves
- 8
Before you start
Before you begin cooking, gather all of your ingredients and equipment to ensure a smooth, efficient assembly process. Preheat your oven to 400°F (200°C) and line a large baking sheet with parchment paper or a silicone baking mat to prevent sticking.
Measure out your ground beef, taco seasoning, mozzarella cheese, butter, garlic powder, and dried herbs. Chop the fresh parsley and set it aside for the final garnish. Ensure your refrigerated dough is slightly cool but workable, as dough that is too warm can become sticky and difficult to roll up.
Ingredients at a glance (8)
- 1 lb ground beef
- 1 packet taco seasoning
- 1 can refrigerated pizza dough
- 2 cups shredded mozzarella cheese, divided
- 2 tbsp butter, melted
- 1/2 tsp garlic powder
- 1/2 tsp dried Italian seasoning
- 1 tbsp finely chopped fresh parsley
Instructions
Preparing the Beef Filling
- Brown the Ground BeefHeat a large skillet over medium-high heat. Add the ground beef and cook, breaking it apart with a spatula, until it is completely browned and shows no pink. Ensure the beef reaches a safe internal temperature of 160°F (71°C) to guarantee it is fully cooked.Look for The meat is fully browned with no pink remaining.Safe temperature 160°F (71°C) internal temperature (ground meat)Tip Drain any excess grease from the skillet to keep the filling from becoming soggy.
- Season the BeefAdd the taco seasoning to the skillet with the browned beef. Stir thoroughly to ensure the meat is evenly coated with the spices, then cook over low heat for 2 to 3 minutes to let the flavors meld together.Look for The seasoning is fully integrated and coats the meat.Tip Let the seasoned beef cool slightly before assembling so it does not tear the dough.
At the end of this phase, the ground beef should be completely browned with no pink remaining, registering an internal temperature of 160°F (71°C). The taco seasoning should be fully integrated, coating the meat evenly without leaving excess dry spots in the pan.
Assembling the Taco Sticks
- Prepare the DoughUnroll the refrigerated pizza dough onto a clean, lightly floured work surface. Pat or roll it into a large rectangle of even thickness, then use a pizza cutter to slice the dough into eight equal rectangles.Look for The dough is cut into eight neat, equal pieces.Tip Keep the dough cool so it remains easy to handle and shape.
- Fill and Roll the SticksPlace a generous spoonful of the seasoned beef and a portion of the shredded mozzarella cheese along the center of each dough rectangle. Carefully roll the dough up around the filling, pinching the seams and ends tightly to seal.Look for The rolls are tightly sealed with no visible gaps.Tip Pinch the edges firmly to prevent the cheese from leaking out during baking.
Once assembled, you should have neat, tightly rolled dough cylinders arranged on your prepared baking sheet. The seams must be thoroughly pinched and sealed to lock in the seasoned beef and mozzarella cheese. The dough should look smooth, even, and ready to be brushed with the savory garlic herb butter.
Baking and Topping
- Apply the Garlic ButterIn a small bowl, whisk together the melted butter, garlic powder, and dried Italian seasoning. Place the rolled sticks seam-side down on a lined baking sheet, then brush the garlic herb butter generously over the top of each stick.Look for The sticks are evenly coated with the seasoned butter.Tip Using a pastry brush helps distribute the butter evenly without tearing the dough.
- Bake and GarnishBake in a preheated oven at 400°F (200°C) for 10 to 12 minutes until lightly golden. Sprinkle the remaining mozzarella cheese on top of the sticks, bake for another 3 to 5 minutes until bubbly, then garnish with fresh parsley.Look for The cheese is melted, toasted, and golden-brown.Tip Let the sticks cool for 5 minutes before serving so the cheese sets slightly.
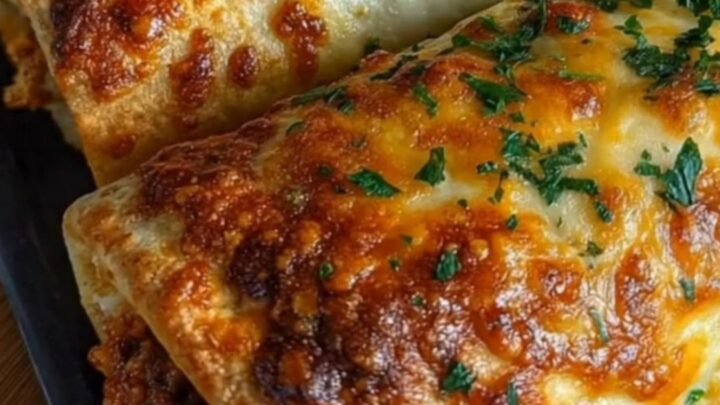
After the final bake, the taco sticks should be a deep golden-brown color with a satisfyingly crisp exterior. The cheese on top should be melted, bubbly, and beautifully toasted with golden spots.
When you pull a stick apart, steam should rise, revealing a dramatic, stretchy cheese pull and a hot, savory beef filling.
Common mistakes
One of the most common mistakes when making taco sticks is overfilling the dough. Putting too much beef or cheese inside makes it incredibly difficult to seal the edges properly, leading to blowout leaks in the oven where the cheese runs out onto the pan.
Another mistake is failing to drain the grease from the cooked ground beef; excess fat will make the dough soggy and greasy. Lastly, avoid rolling the dough too thin, as it can easily tear during the assembly or baking process, ruining the clean presentation.
How to tell it’s done
To determine if the taco sticks are fully cooked and ready to serve, look for a uniform golden-brown crust and a bubbly, toasted cheese topping. The dough should feel firm and crisp to the touch, and the cheese inside should be completely melted.
Since the ground beef is already fully cooked to a safe internal temperature of 160°F (71°C) during the first phase, the baking time is focused on cooking the dough through and melting the cheese to gooey perfection.
- Ground meat: 160°F (71°C) in the thickest part
Up next · Part 3 of 3
2 variations · storage & make-ahead · 3 answers · printable card
Tips, FAQ & printable recipe (Part 3)← Back to the ingredients (Part 1)