Dinner · Part 2 of 3: Instructions
Cheesy Stuffed Ground Meat Subs for a Satisfying Meal Step-by-step instructions
- Prep
- Cook
- Total
- Serves
- 4
Before you start
Before starting, ensure all ingredients are measured and ready on your workspace. Have your baking sheet lined with parchment paper for easy cleanup and preheat the oven to the specified temperature.
Keeping your work area organized will help the assembly process go smoothly and quickly once the meat is cooked.
Ingredients at a glance (4)
- 1 lb ground beef
- 4 sub rolls
- 8 oz shredded mozzarella cheese
- 1 tbsp Italian seasoning
Instructions
Browning the base
- Prepare the meat fillingHeat a large skillet over medium-high heat. Add the ground beef and cook, breaking it apart with a spatula, until it is fully browned and reaches an internal temperature of 160°F (71°C). Drain excess grease if necessary and stir in the Italian seasoning until well combined.Look for The meat should be browned and fragrant with the seasoning.Safe temperature 160°F (71°C) internal temperature (ground meat)Tip Do not rush the browning process as it develops the deep flavor of the filling.
The meat should be thoroughly browned with no pink remaining. It should look crumbly and smell aromatic from the Italian seasoning. Ensure the skillet is hot enough to achieve a nice sear on the meat, as this contributes significantly to the final flavor of the stuffed sandwiches.
Assembling the rolls
- Assemble the subsPreheat your oven to 375°F (190°C). Slice the sub rolls open lengthwise without cutting all the way through. Carefully spoon the cooked ground meat filling into each roll. Top each filled roll generously with the shredded mozzarella cheese, ensuring it is evenly distributed for the best melt.Look for The rolls should be stuffed firmly but not overfilled to prevent splitting.Tip Use a serrated knife to get clean cuts through the rolls without crushing the soft bread.
The rolls should be sturdy enough to hold the filling without collapsing. Ensure the cheese is spread evenly across the top of the meat to create a consistent layer.
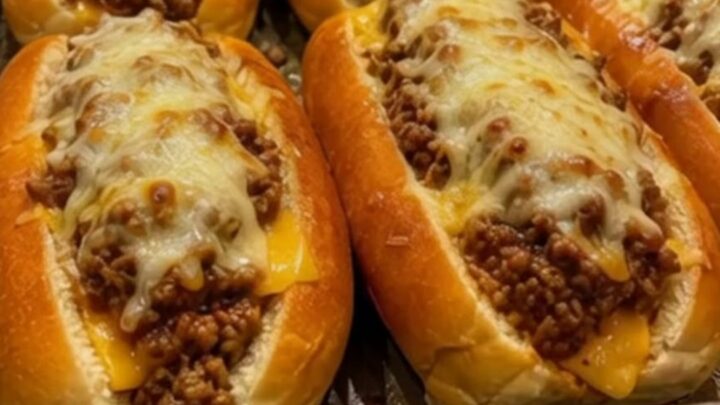
The visual goal is a well-proportioned sandwich that looks ready to be toasted, with the filling securely held inside the bread.
Final bake
- Bake and servePlace the assembled subs on a baking sheet. Bake for about 8 to 10 minutes, or until the rolls are golden brown and the cheese is bubbly and melted. Remove from the oven and let them rest for 5 minutes before serving to allow the filling to set slightly.Look for The cheese should be melted and lightly browned in spots.Tip Keep a close eye on the oven to ensure the rolls do not burn while the cheese melts.
The subs should emerge from the oven golden and fragrant. The cheese will have a beautiful, melted consistency and the bread should feel crisp to the touch.
Let the sandwiches rest for a few minutes so the filling stabilizes, making them easier to handle and eat without making a mess.
Common mistakes
A common mistake is overstuffing the rolls, which can cause them to split or spill their contents during the baking process.
Another error is failing to preheat the oven, which results in soggy bread instead of that desirable toasted crust. Always ensure the meat is properly drained so the rolls do not become greasy.
How to tell it’s done
The subs are done when the rolls are toasted to a light golden brown and the cheese is completely melted and bubbling. The ground meat must reach an internal temperature of 160°F (71°C) during the initial browning phase to ensure it is safe to eat before being stuffed into the rolls.
- Ground meat: 160°F (71°C) in the thickest part
Up next · Part 3 of 3
2 variations · storage & make-ahead · 3 answers · printable card
Tips, FAQ & printable recipe (Part 3)← Back to the ingredients (Part 1)