Dinner · Part 2 of 3: Instructions
Cheesy Spinach and Sun-Dried Tomato Stuffed Chicken Step-by-step instructions
- Prep
- Cook
- Total
- Serves
- 4
Before you start
Before beginning, ensure the chicken breasts are completely thawed if they were frozen. Prepare the filling ingredients by chopping the sun-dried tomatoes and spinach finely to ensure they fit well within the chicken pockets.
Preheat the oven to 375°F (190°C) and have your baking dish ready near your workspace to minimize mess and ensure a smooth cooking process.
Ingredients at a glance (4)
- 4 pieces chicken breasts, boneless and skinless
- 2 cups fresh spinach, chopped
- 1/2 cup sun-dried tomatoes, chopped
- 1 cup shredded mozzarella cheese
Instructions
Preparation
- Prepare the ChickenUsing a sharp knife, carefully slice a deep pocket into the side of each chicken breast, ensuring not to cut all the way through the other side.Look for The pocket should be large enough to hold the filling securely.Tip Ensure the chicken is patted dry with paper towels for better seasoning adhesion.
The chicken breasts should be clean, patted dry, and have a deep, clean pocket sliced into the side. The filling ingredients should be chopped and mixed in a bowl, ready to be used as soon as the chicken is prepped and seasoned.
Stuffing and Baking
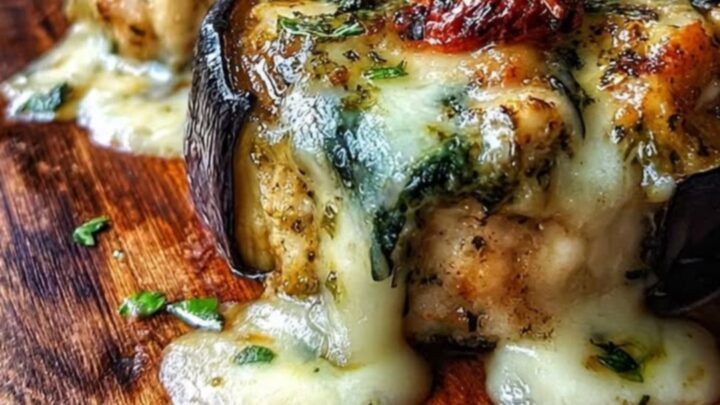
- Fill and BakeCombine the spinach, sun-dried tomatoes, and mozzarella in a bowl. Stuff each chicken breast pocket with the mixture. Place into a baking dish and bake at 375°F (190°C) until the chicken reaches 165°F (74°C).Look for The cheese should be bubbling and golden brown.Safe temperature 165°F (74°C) internal temperature (poultry)Tip Secure the edges with toothpicks if the filling threatens to spill out during baking.
The chicken should be securely stuffed and arranged in the baking dish. During the baking phase, the chicken will release some juices and the cheese will melt. Monitor the color of the chicken to ensure it reaches a beautiful golden hue.
Resting and Serving
- Rest and ServeRemove the chicken from the oven and let it rest for at least 5 minutes before serving. This allows the juices to redistribute throughout the meat, ensuring a tender and succulent bite every single time.Look for The meat should be firm to the touch and opaque throughout.Safe temperature 165°F (74°C) internal temperature (poultry)Tip The resting period is essential for maintaining the moisture of the chicken breast.
The chicken should be removed from the oven and allowed to rest undisturbed.
The meat will appear firm and opaque, and the filling should be beautifully melted, held within the chicken breast without excessive leaking onto the baking dish.
Common mistakes
A common mistake is overstuffing the chicken, which can cause the filling to leak out during the baking process. Use only the recommended amount to ensure the chicken remains closed.
Another error is failing to rest the meat; cutting into the chicken immediately after removing it from the oven will cause the juices to run out, resulting in a drier final product.
How to tell it’s done
The chicken is done when it reaches an internal temperature of 165°F (74°C) as measured by a meat thermometer inserted into the thickest part of the meat, avoiding the filling.
The exterior should be golden brown, and the cheese should be fully melted and bubbling. Let the chicken rest for 5 minutes after removing it from the oven to ensure the juices settle.
- Poultry: 165°F (74°C) in the thickest part
Up next · Part 3 of 3
2 variations · storage & make-ahead · 3 answers · printable card
Tips, FAQ & printable recipe (Part 3)← Back to the ingredients (Part 1)