Appetizers · Part 2 of 3: Instructions
Cheesy Skillet Spinach Artichoke Dip Stuffed Pull-Apart Bagels Step-by-step instructions
- Prep
- Cook
- Total
- Serves
- 8
Before you start
Before starting, heat the oven to 375°F (190°C). Cut the bagels into 1-inch chunks and set them aside. Thaw the frozen spinach and squeeze it very dry—use a clean kitchen towel to remove as much liquid as possible.
Drain the artichoke hearts and chop them into small pieces. Soften the cream cheese at room temperature for about 30 minutes, or microwave in 10-second bursts. Mince the garlic. Have all the ingredients measured and ready before you begin mixing.
Ingredients at a glance (10)
- 4 plain bagels, cut into 1-inch chunks
- 7 oz cream cheese, softened
- 1 cup sour cream
- 7 oz frozen chopped spinach, thawed and squeezed dry
- 14 oz canned artichoke hearts, drained and chopped
- 3 cloves garlic, minced
- 1 cup shredded mozzarella cheese
- 1/2 cup grated parmesan cheese
- 40 g unsalted butter, melted
- 1/2 cup shredded mozzarella cheese
Instructions
Prep and Assemble
- Prep the Bagels and DipHeat the oven to 375°F (190°C). Cut the bagels into 1-inch chunks and place them in a large bowl. In a separate bowl, mix the softened cream cheese, sour cream, squeezed spinach, chopped artichokes, minced garlic, 1 cup mozzarella, and parmesan until completely combined and creamy.Look for The dip should be thick, creamy, and evenly mixed with no streaks of cream cheese.Tip Make sure the spinach is very dry before adding; excess water makes the dip runny.
- Toss Bagels with Garlic ButterPour the melted butter over the bagel chunks and toss well to coat every piece evenly. Arrange the buttered bagel chunks in a decorative ring around the perimeter of a 10-inch cast iron skillet, leaving the center open.Look for Bagel chunks should be evenly glistening with butter and arranged snugly in the skillet.Tip Use your hands to toss gently so the bagels don't break apart.
At the end of this phase, you should have a bowl of creamy, well-combined dip and a skillet lined with buttered bagel chunks. The bagels should be evenly coated and arranged in a neat ring.
The dip should be thick and spreadable, with no visible lumps of cream cheese. The garlic and spinach should be evenly distributed. This is the point where you can taste the dip and adjust seasoning if needed, though the recipe doesn't call for extra salt.
Bake
- Fill the Center with DipScoop the prepared spinach artichoke dip into the center cavity of the skillet, spreading it evenly. Sprinkle the extra 1/2 cup mozzarella over the top of the dip and lightly over the bagel edges.Look for The center should be mounded with dip and covered with cheese.Tip Don't overfill; the dip will bubble and spread slightly as it bakes.
- Bake Until Bubbling and GoldenPlace the skillet in the preheated oven and bake for 20 minutes, until the dip is bubbling and the bagel chunks are golden brown and toasted. The cheese on top should be melted and lightly browned in spots.Look for The dip should be visibly bubbling at the edges and the bagels should be deeply golden.Tip For extra browning, switch to broil for the last 1–2 minutes, watching closely.
After 20 minutes in the oven, the kitchen should smell of garlic and toasted bread. The dip should be visibly bubbling, and the bagels should be golden brown. The cheese on top should be melted and starting to brown in spots. If the bagels are browning too quickly, tent the skillet with foil. The dip should be hot and molten, with a slight jiggle in the center. This is the moment to pull it out and let it rest.
Rest and Serve
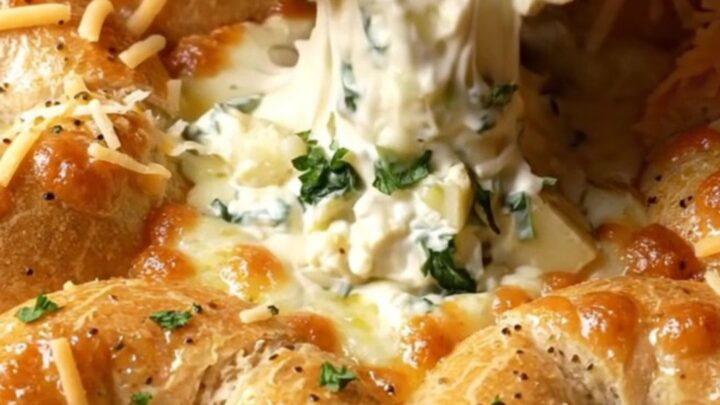
- Rest and ServeRemove the skillet from the oven and let it rest for 5 minutes. Serve warm, pulling the bagel chunks from the ring and dipping them into the molten cheesy center.Look for The dip will be molten and stretchy; the skillet will be very hot.Tip Use a wide spatula to serve, and warn guests that the skillet is hot.
After resting for 5 minutes, the dip will have thickened slightly and the bagels will be easier to handle. The cheese should be stretchy and the dip creamy. The bagel chunks should be crispy on the outside and soft inside. Serve immediately while still warm. The skillet will be very hot, so use a trivet. Guests can pull the bagel chunks directly from the skillet and dip them into the center. The dish should disappear quickly.
Common mistakes
One common mistake is not squeezing the spinach dry enough, which makes the dip watery and causes it to separate. Another is overcrowding the skillet with too many bagel chunks, which prevents them from toasting properly. Be sure to toss the bagels thoroughly with the butter so every piece is coated.
Overbaking can dry out the dip and make the bagels too hard, so watch the time carefully. Also, don't skip the resting period—it allows the dip to thicken and the bagels to set, making them easier to pull apart without breaking.
How to tell it’s done
The dish is done when the dip is bubbling around the edges and the bagel chunks are deeply golden brown and crispy. The cheese on top should be fully melted and lightly browned in spots. The internal temperature of the dip should be at least 165°F (74°C) if you want to check, but the visual cues are reliable.
Let the skillet rest for 5 minutes before serving to allow the dip to set slightly and the bagels to firm up. The bagels should be crunchy on the outside and soft inside, and the dip should be thick and creamy, not runny.
Up next · Part 3 of 3
4 variations · storage & make-ahead · 5 answers · printable card
Tips, FAQ & printable recipe (Part 3)← Back to the ingredients (Part 1)