Dinner · Part 2 of 3: Instructions
Cheesy Philly Cheesesteak Garlic Bread Bake Step-by-step instructions
- Prep
- Cook
- Total
- Serves
- 6
Before you start
Before you begin cooking, ensure all your ingredients are prepped and ready for use. Slice your steak thinly against the grain, which is essential for achieving the best texture.
Clean and slice your bell peppers and onions into uniform strips to ensure they cook evenly in the skillet.
Have your cheese shredded and your garlic bread sliced if not already prepared. Having everything staged near your stove will make the cooking process smooth, efficient, and stress-free.
Ingredients at a glance (5)
- 1 lb thinly sliced ribeye or sirloin
- 2 cups sliced bell peppers and onions
- 1 loaf garlic bread, sliced
- 2 cups shredded provolone or mozzarella cheese
- fresh parsley, chopped, for serving
Instructions
Searing the steak and vegetables
- Sear the steak and vegetablesHeat a large skillet over medium-high heat. Add the thinly sliced beef and cook until browned. Add the sliced bell peppers and onions, sautéing until softened. Ensure the beef reaches an internal temperature of 145°F (63°C) and let it rest for at least 3 minutes before proceeding.Look for The beef should be browned and peppers tender.Safe temperature 145°F (63°C) internal temperature (steaks, chops and roasts)Tip Slice the beef against the grain for maximum tenderness.
The beef should be deeply browned with no pink remaining, and the vegetables should be tender and slightly caramelized. The pan should have developed a nice fond, which adds depth to the overall flavor of the dish before you move on to the assembly stage.
Assembling the bread bake
- Assemble the bakePlace the slices of garlic bread into a baking dish, overlapping them slightly if necessary to fit. Top the bread slices evenly with the seared steak and pepper mixture. Generously sprinkle the shredded cheese over the top to ensure full coverage.Look for The dish should be evenly covered with ingredients.Tip Use a deep baking dish to keep all the fillings contained.
The bread should be neatly arranged in the baking dish, creating a solid base. Ensure the steak and pepper mixture is spread evenly across every slice of bread, and the cheese is distributed edge-to-edge for consistent melting and maximum coverage in every bite.
Broiling the final dish
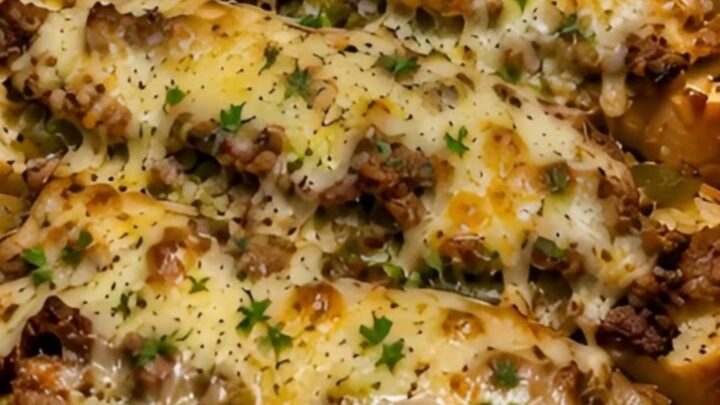
- Broil and servePreheat your oven to broil. Place the baking dish under the broiler for 2-3 minutes, or until the cheese is bubbling and golden brown. Watch closely to prevent burning. Remove from the oven, garnish with fresh chopped parsley, and serve immediately while hot.Look for The cheese is melted, bubbling, and golden brown.Tip Keep the oven door slightly cracked to monitor the browning.
The cheese should be completely melted, bubbling, and golden brown. The edges of the garlic bread should appear toasted and crisp. Once you reach this visual cue, the dish is ready to be removed from the oven and garnished with fresh parsley.
Common mistakes
Avoid overcrowding the skillet when searing the beef; if the pan is too full, the meat will steam rather than brown, which results in a loss of flavor. Work in batches if necessary to maintain high heat.
Additionally, keep a close watch during the broiling step, as cheese can transition from perfectly melted to burnt in a matter of seconds. Never walk away from the oven while the broiler is active, as the high heat requires constant attention.
How to tell it’s done
The dish is considered done when the cheese is fully melted, bubbling, and shows golden-brown spots across the top. The steak, having been seared to a safe internal temperature of 145°F (63°C) during the initial cooking phase, will be perfectly tender.
The bread should be warm and slightly crispy around the edges, providing a sturdy foundation for the savory toppings. Let the dish rest for a few minutes before serving to allow the flavors to settle.
- Steaks, chops and roasts: 145°F (63°C) in the thickest part, then a 3-minute rest
Up next · Part 3 of 3
2 variations · storage & make-ahead · 3 answers · printable card
Tips, FAQ & printable recipe (Part 3)← Back to the ingredients (Part 1)