Appetizers · Part 2 of 3: Instructions
Cheesy Meat Lovers Pizza Bread Step-by-step instructions
- Prep
- Cook
- Total
- Serves
- 8
Before you start
Before beginning, ensure the oven is fully preheated to 400°F (200°C) to allow for an even rise. Have all ingredients measured and ready, especially the shredded cheese and the seasoned meat, which should be at room temperature to avoid cooling the dough too rapidly.
Prepare a baking sheet with parchment paper to prevent sticking and ensure an easy cleanup. Ensure the workspace is clean and lightly floured to make rolling out the dough simple and efficient.
Ingredients at a glance (3)
- 1 lb pizza dough, store-bought or made ahead
- 2 cups mozzarella cheese, shredded
- 1 lb ground meat, seasoned
Instructions
Dough and Filling Assembly
- Prepare the Dough and FillingRoll out the pizza dough on a floured surface into a large rectangle. Spread the seasoned ground meat evenly across the center of the dough, leaving enough room at the edges for braiding. Sprinkle the shredded mozzarella cheese generously over the meat filling.Look for The dough is rolled into a consistent rectangle with an even layer of filling.Tip Ensure the meat is cooled slightly before placing it on the dough to prevent the dough from becoming too soft.
The dough should be rolled into a neat rectangle with even thickness. The filling should be spread uniformly, leaving enough space for the braid. Check that the edges are clean and ready for cutting, ensuring the dough is not sticking to the surface.
Braiding and Baking
- Braid and BakeCut strips into the dough along the sides of the filling. Fold the strips over the filling in a crisscross pattern to create a braid. Transfer the braided loaf to a parchment-lined baking sheet. Bake in a preheated oven at 400°F (200°C) until the crust is golden brown and the cheese is melted and bubbling, ensuring the ground meat reaches an internal temperature of 160°F (71°C).Look for The crust turns golden brown and the cheese is fully melted and steaming.Safe temperature 160°F (71°C) internal temperature (ground meat)Tip Brush the top of the dough with a little olive oil or egg wash for an extra shiny, golden finish.
The braid should look secure, with the dough strips overlapping neatly to cover the filling. The loaf should be centered on the parchment-lined sheet. Check that the oven temperature is steady at 400°F (200°C) to guarantee an even, golden bake.
Final Rest and Service
- Rest and ServeRemove the pizza bread from the oven and allow it to rest on the baking sheet for 5 minutes before slicing. This helps the filling set slightly, making it easier to cut and serve without losing the melted cheese. Use a spatula to lift the slices onto a serving plate.Look for The bread is firm enough to slice without the filling spilling out.Tip Serve warm to maintain the best texture and the signature cheese pull when taking a bite.
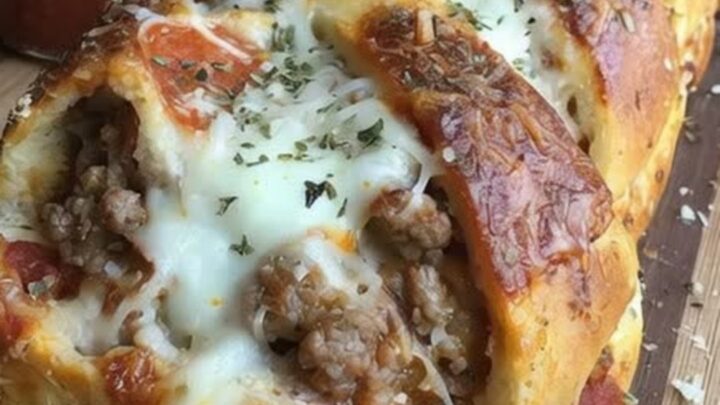
The bread should be golden and firm to the touch. The cheese should appear molten and inviting. After the 5-minute rest, the loaf should be stable enough to slice into thick pieces without losing its shape or the delicious, cheesy filling.
Common mistakes
Avoid overstuffing the dough, as this can make it difficult to braid properly and lead to the bread bursting during the baking process.
Do not skip the resting period after the bread comes out of the oven; slicing too early will cause the hot, melted cheese and juices to run out, resulting in a messier presentation.
Additionally, ensure the oven is properly preheated, as a cold oven will lead to a dense, undercooked crust.
How to tell it’s done
The pizza bread is done when the crust is a deep golden brown and sounds hollow when tapped gently. The cheese should be bubbling through the gaps in the braid, indicating it is fully melted.
The internal temperature of the meat filling must reach 160°F (71°C) for safety. Allow the bread to rest for at least 5 minutes before slicing to ensure the filling stays inside the crust.
- Ground meat: 160°F (71°C) in the thickest part
Up next · Part 3 of 3
2 variations · storage & make-ahead · 3 answers · printable card
Tips, FAQ & printable recipe (Part 3)← Back to the ingredients (Part 1)