Dinner · Part 2 of 3: Instructions
Cheesy Hamburger Rice Casserole for a Quick Dinner Step-by-step instructions
- Prep
- Cook
- Total
- Serves
- 6
Before you start
Before starting, ensure all ingredients are measured and ready. If the rice is not already cooked, prepare it ahead of time and let it cool slightly. Preheat the oven to 375°F (190°C) so it is ready for the baking step.
Having the skillet and baking dish clean and accessible will make the process much smoother and more efficient, allowing for a quick transition from the stovetop to the oven.
Ingredients at a glance (3)
- 1 lb ground beef
- 2 cups cooked white rice
- 2 cups shredded cheddar cheese
Instructions
Browning the beef
- Prepare the beef baseHeat a large skillet over medium-high heat. Add the ground beef and cook, breaking it apart with a spatula, until it is browned and no longer pink. Ensure the meat reaches an internal temperature of 160°F (71°C). Drain any excess grease from the skillet.Look for The beef should be fully browned and sizzling.Safe temperature 160°F (71°C) internal temperature (ground meat)Tip Season the beef with salt and pepper to taste before adding it to the casserole.
The beef should be completely browned with no pink remaining. The pan should be sizzling, and the fat should be rendered and drained. The meat should smell savory and aromatic, indicating it is ready to be mixed with the rice.
Assembling the casserole
- Combine ingredientsIn a large mixing bowl, combine the browned ground beef with the cooked white rice. Mix well to ensure the beef is evenly distributed throughout the rice. Transfer the mixture into a 9x13 inch baking dish, spreading it out into an even layer.Look for The mixture should be thoroughly combined.Tip Use a spatula to press the mixture down lightly so it bakes evenly.
The beef and rice should be thoroughly combined in the bowl so that no large clumps of meat remain.
The mixture should look uniform and be spread evenly across the bottom of the baking dish to ensure consistent cooking and heating in the oven.
Baking until golden
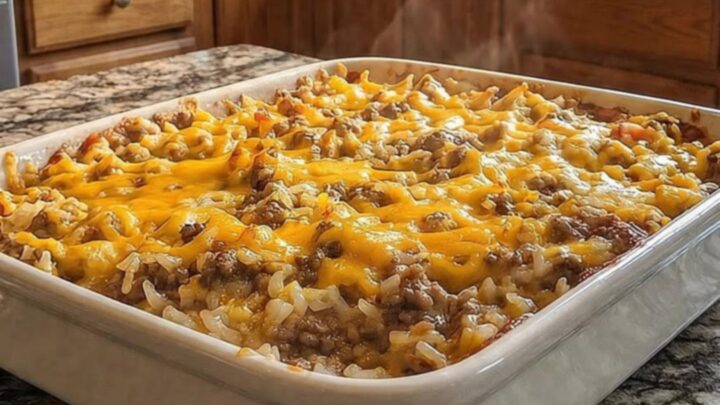
- Bake and melt cheesePreheat your oven to 375°F (190°C). Sprinkle the shredded cheddar cheese evenly over the top of the beef and rice mixture. Place the baking dish into the oven and bake for about 15 to 20 minutes, or until the cheese is bubbly and melted. Remove from the oven and let it rest for 5 minutes before serving.Look for The cheese should be melted and lightly golden on top.Tip Keep an eye on the oven to ensure the cheese does not burn.
The cheese should be completely melted and bubbly across the entire surface. The edges of the casserole might show slight browning, indicating it is ready to be removed from the oven and allowed to rest before serving.
Common mistakes
Avoid using rice that is already overcooked, as it will break down too much during the baking process and result in a mushy texture.
Additionally, do not skip the browning step for the beef, as this is where the primary flavor is developed. Finally, be careful not to over-bake the cheese, as this can cause it to separate and become oily rather than gooey and delicious.
How to tell it’s done
The casserole is done when the cheese is fully melted, bubbling, and starting to brown slightly on the edges. The internal temperature of the beef mixture should have reached at least 160°F (71°C) during the initial browning phase.
The texture should be moist and cohesive, with the cheese providing a creamy binding agent that holds the beef and rice together when scooped.
- Ground meat: 160°F (71°C) in the thickest part
Up next · Part 3 of 3
2 variations · storage & make-ahead · 3 answers · printable card
Tips, FAQ & printable recipe (Part 3)← Back to the ingredients (Part 1)