Dinner · Part 2 of 3: Instructions
Cheesy Ground Beef Rice Casserole for a Cozy Dinner Step-by-step instructions
- Prep
- Cook
- Total
- Serves
- 4
Before you start
Before starting, ensure all ingredients are measured and ready. If you are using freshly cooked rice, allow it to cool slightly so it does not turn into mush when mixed.
Grate the cheddar cheese to ensure it melts evenly over the top of the casserole. Have your baking dish ready near the stove so the transfer process is seamless and quick once the beef and rice base is prepared.
Ingredients at a glance (5)
- 1 lb ground beef
- 2 cups cooked rice
- 1 cup creamy cheese sauce
- 1 cup shredded cheddar cheese
- fresh parsley for serving
Instructions
Browning the Beef
- Brown the BeefHeat a large skillet over medium-high heat. Add the ground beef and cook, breaking it apart with a spoon, until it is fully browned and no longer pink. Ensure the beef reaches an internal temperature of 160°F (71°C). Drain any excess grease from the skillet if necessary.Look for The beef should be deeply browned and crumbled into small, consistent pieces.Safe temperature 160°F (71°C) internal temperature (ground meat)Tip Do not crowd the pan to ensure the meat browns rather than steams.
The ground beef should be deeply browned and aromatic. Listen for the sizzling sound as the moisture evaporates and the meat starts to sear in the pan. Check that no pink remains and that the fat has rendered out. This stage provides the savory backbone for the entire casserole, so ensure the color is rich and dark before moving to the next step.
Combining the Rice and Sauce
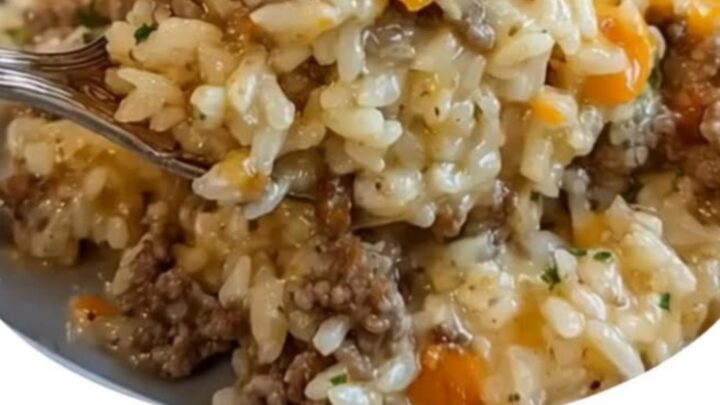
- Combine IngredientsLower the heat and add the cooked rice and creamy cheese sauce to the skillet with the browned beef. Stir everything together thoroughly until the rice is evenly coated in the creamy sauce and the mixture is well combined.Look for The mixture should look uniform, creamy, and well-integrated.Tip Use a gentle folding motion to keep the rice grains from becoming mushy.
The mixture should look thick, creamy, and uniform. Ensure the rice is evenly coated with the cheese sauce. You should smell a rich, savory aroma as the rice absorbs the flavors of the beef and sauce. Check that the consistency is not too dry; if it seems tight, a splash of milk or broth can be added to keep it creamy.
Broiling to Perfection
- Bake and ServeTransfer the mixture to a baking dish. Top with the shredded cheddar cheese. Place under the broiler for a few minutes until the cheese is melted, bubbly, and golden brown. Remove from the oven, garnish with fresh parsley, and let rest for five minutes before serving.Look for The top should be bubbling and showing golden brown spots.Tip Watch the broiler closely as cheese can burn very quickly.
The top should be covered in a layer of bubbling, golden-brown cheese. The edges of the casserole should be slightly crisp, and the aroma should be intensely cheesy and savory.
Confirm that the cheese has melted completely and is uniform across the surface. Once it reaches this golden state, remove it from the heat immediately to prevent the cheese from burning.
Common mistakes
A common mistake is overcrowding the skillet while browning the beef, which causes the meat to steam rather than sear, resulting in a loss of flavor. Another error is over-mixing the rice once the sauce is added, which can break the grains and lead to a gummy texture.
Finally, do not walk away from the broiler; cheese transitions from perfectly golden to burnt in seconds, so keep a close watch during the final minutes.
How to tell it’s done
The casserole is done when the cheese on top is fully melted, bubbling vigorously, and has developed a light golden-brown color. The internal temperature of the beef base should have reached 160°F (71°C) during the initial browning phase.
The texture should be creamy and cohesive, with no excess liquid pooled at the bottom of the dish, indicating that the flavors have melded perfectly during the final broiling step.
- Ground meat: 160°F (71°C) in the thickest part
Up next · Part 3 of 3
2 variations · storage & make-ahead · 3 answers · printable card
Tips, FAQ & printable recipe (Part 3)← Back to the ingredients (Part 1)