Dinner · Part 1 of 3: Ingredients
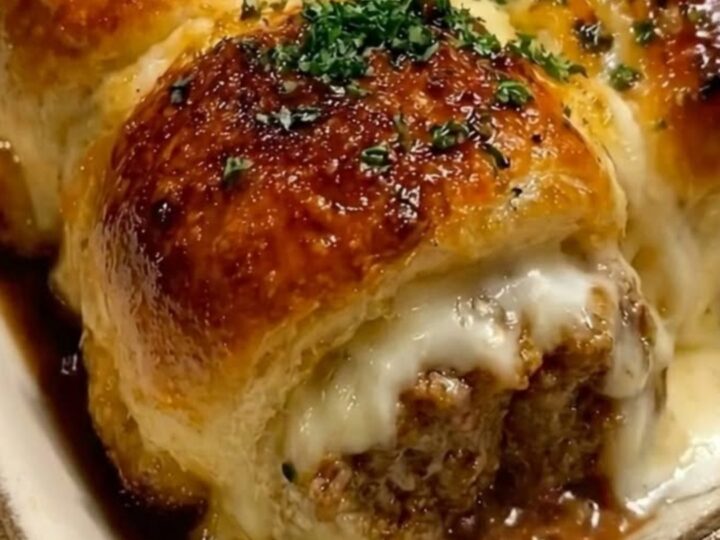
Cheesy Garlic Butter Meatball Sliders for a Crowd
- Prep
- Cook
- Total
- Serves
- 12
Elevate your next gathering with these irresistible cheesy garlic butter meatball sliders. Combining tender meatballs, rich marinara, and a golden garlic-buttered bun, this recipe is designed to impress with minimal effort.
Whether for a game day, family dinner, or quick party snack, these sliders deliver the perfect balance of savory flavors and satisfying textures that everyone loves. Discover how simple it is to bring this bakery-style treat into your own home kitchen with just a few pantry staples.
These sliders are a masterclass in comfort food. By utilizing pre-cooked meatballs, the preparation time is drastically reduced, allowing for a quick and stress-free assembly. The combination of melty mozzarella and a fragrant garlic butter topping ensures that every bite is packed with depth.
Designed for efficiency, this recipe ensures a consistent result every time, making it a reliable choice for busy weeknights or unexpected guests. Follow these steps to achieve the signature long cheese pull and perfectly toasted buns that define the ultimate slider experience.
Ingredients
Sliders
- 1 package slider buns
- 12 meatballs, cooked
- 1 cup marinara sauce
- 8 oz mozzarella cheese, shredded
Garlic Butter
- 1/4 cup unsalted butter, melted
- 1 tsp garlic powder
- 1 tbsp fresh parsley, chopped
Why this recipe works
The method focuses on layering flavors to ensure the meatballs remain moist while the buns achieve a crisp, golden exterior. By brushing the tops with a seasoned garlic butter before baking, the bread absorbs the aromatic fats, creating a rich base that complements the acidity of the marinara sauce.
This layering technique prevents the sliders from becoming soggy, keeping the structural integrity intact even with a generous amount of melted cheese.
Using a 9x13 baking dish allows the sliders to bake as a single unit, which helps retain heat and creates a cohesive pull-apart effect. The enclosed environment of the oven ensures that the mozzarella melts uniformly throughout the meatball layer without drying out the buns.
This process is highly effective for large quantities, as it minimizes handling and ensures that every slider receives an equal distribution of toppings and heat for a consistent, professional-quality finish.
Notes and substitutions
For the best results, use high-quality marinara sauce that has a balanced flavor profile. If the meatballs are very large, consider cutting them in half to ensure they fit properly within the sliders. The type of mozzarella used is also important; fresh, shredded mozzarella melts better and provides that iconic, long cheese pull compared to pre-shredded varieties which often contain anti-caking agents that can hinder the melting process.
The garlic butter can be customized by adding a pinch of red pepper flakes for heat or a dash of parmesan cheese for extra saltiness. Ensure the butter is fully melted but not boiling when mixing in the parsley to keep the herbs vibrant and fresh. A serrated knife is essential for slicing through the buns without squashing them, ensuring the sliders remain fluffy and light even after being loaded with hearty ingredients.
- mozzarella cheese: provolone or monterey jack cheese for a different melt profile
- fresh parsley: dried oregano or italian seasoning
Equipment
- 9x13 baking dish
- small mixing bowl
- pastry brush
- serrated knife
Up next · Part 2 of 3
3 steps · 25 min of cooking · what to look for at each stage
Step-by-step instructions (Part 2)