Dinner · Part 2 of 3: Instructions
Cheesy French Onion Spaghetti Bake Step-by-step instructions
- Prep
- Cook
- Total
- Serves
- 6
Before you start
Before beginning, ensure your oven is preheated to 375°F (190°C) to ensure consistent cooking. Have your Swiss cheese shredded and ready, and ensure your French onion broth is at room temperature or slightly warmed to help the pasta absorb the liquid more efficiently.
Clear enough space on your counter to arrange the baking dish and have all ingredients measured out to streamline the assembly process.
Ingredients at a glance (4)
- 1 lb dry spaghetti, broken in half
- 4 cups rich French onion broth with soft onion pieces
- 2 tbsp melted butter
- 2 cups shredded Swiss cheese
Instructions
Pasta Preparation
- Assemble the pasta basePreheat your oven to 375°F (190°C). Take your 9x13 inch ceramic baking dish and arrange the broken spaghetti strands in an even layer across the bottom. Ensure the pasta is distributed consistently so it cooks uniformly once the liquid is added, preventing any clumps that might remain undercooked during the baking process.Look for Pasta should lie flat and even across the bottom of the dish.Tip Breaking the spaghetti in half makes it much easier to fit into the rectangular dish and creates a more manageable texture when serving.
At the end of this phase, the spaghetti should be arranged in a uniform, flat layer across the bottom of the dish.
This ensures the pasta cooks evenly and prevents any sections from remaining hard or clumping together during the baking process, setting the foundation for a successful meal.
Liquid Incorporation
- Add the onion liquidCombine the rich French onion broth with the melted butter in a glass pitcher. Slowly pour this mixture over the dry spaghetti strands in the baking dish. Ensure that every strand of pasta is submerged under the broth to guarantee proper hydration and softening during the cooking cycle in the oven.Look for All pasta strands must be fully covered by the onion broth.Tip Pouring slowly ensures the broth reaches the corners of the dish without splashing over the sides.
The dish is ready for the oven when the onion broth and butter mixture has completely covered the pasta. You should see the onions distributed throughout the liquid, ensuring every bite will be infused with that signature French onion flavor once the baking cycle is complete.
Final Baking
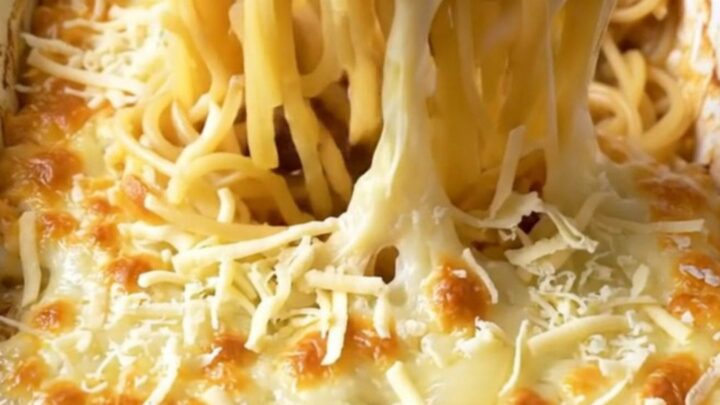
- Top and bakeGenerously scatter the shredded Swiss cheese over the top of the pasta and broth mixture. Place the dish into the preheated oven and bake until the cheese is golden brown in spots and the liquid is bubbling around the edges. Remove from the oven and let it rest for five minutes before serving.Look for Cheese is melted and golden, and the liquid is bubbling vigorously.Tip Allowing the dish to rest for five minutes helps the sauce thicken slightly and makes serving much neater.
The bake is finished when the cheese is bubbling, golden, and fragrant. The edges of the dish should show active bubbling of the broth, indicating that the internal temperature is high and the pasta has reached the perfect state of tenderness before you pull it from the heat.
Common mistakes
Avoid overcrowding the baking dish, as this will prevent the pasta from cooking evenly in the broth. Another common mistake is using too little liquid; ensure the broth fully submerges the pasta strands before baking, or the top layer may end up dry and brittle.
Finally, do not rush the resting period, as this allows the sauce to settle and ensures a much better texture when you finally lift it onto the serving plates.
How to tell it’s done
The dish is considered done when the pasta is tender and has absorbed most of the broth, leaving a thick, clinging sauce.
The Swiss cheese should be melted throughout and display a deep golden-brown color on the surface, with visible bubbling occurring around the edges of the baking dish. A quick check with a fork will confirm the pasta is cooked through to your preferred level of al dente tenderness.
Up next · Part 3 of 3
2 variations · storage & make-ahead · 3 answers · printable card
Tips, FAQ & printable recipe (Part 3)← Back to the ingredients (Part 1)