Dinner · Part 1 of 3: Ingredients
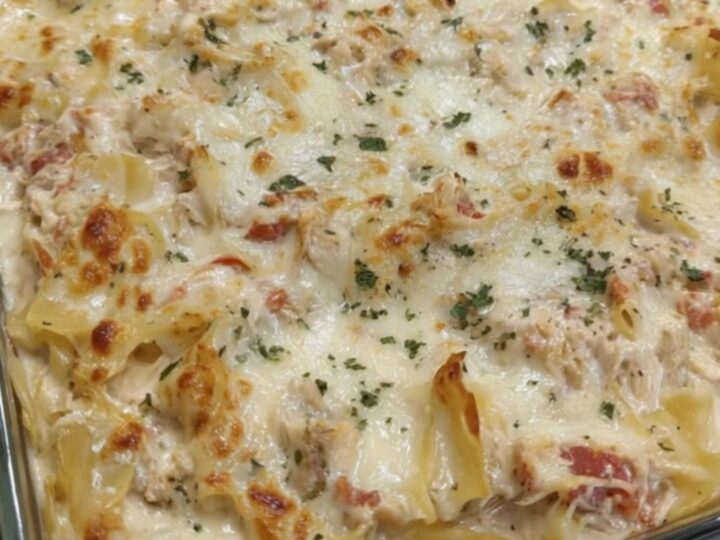
Cheesy Chicken Spaghetti Lasagna Bake
- Prep
- Cook
- Total
- Serves
- 6
When the craving for ultimate comfort food strikes, this chicken spaghetti lasagna bake delivers everything you want in a single dish. It combines the velvety creaminess of a classic white-sauce pasta with the rich, bubbling cheese layers of a traditional baked lasagna. Perfect for busy weeknights or cozy weekend family gatherings, this dish is guaranteed to satisfy everyone at the table.
Imagine tender, shredded chicken and perfectly cooked spaghetti folded into a rich, velvety cream sauce, then baked under a thick blanket of melted mozzarella cheese until golden and bubbling. This comforting casserole brings together the best elements of chicken Alfredo and cheesy lasagna.
It is incredibly easy to assemble, making it a fantastic option for home cooks who want a restaurant-quality meal with minimal fuss. The combination of textures from the soft pasta and juicy chicken to the gooey cheese pull and crispy golden edges creates a truly satisfying dining experience that will have everyone reaching for seconds.
Ingredients
- 8 oz dry spaghetti
- 1 lb boneless skinless chicken breasts
- 15 oz jarred Alfredo sauce
- 4 oz cream cheese, softened
- 2 cups shredded mozzarella cheese
- 1 tbsp finely chopped fresh parsley
Why this recipe works
This recipe works beautifully because it utilizes a dual-texture baking method that locks in moisture while creating a perfect crust. Tossing the cooked spaghetti and shredded chicken directly in a cream-based sauce before baking ensures that every single strand of pasta is thoroughly coated and remains tender during the oven cycle.
The sauce acts as a barrier, preventing the chicken from drying out under the high heat of the oven. Meanwhile, the starch from the pasta helps bind the cream sauce together, creating a cohesive, velvety texture that holds its shape nicely when sliced and served.
The magic really happens under the high-heat cheese blanket. By topping the pasta mixture with a generous layer of shredded mozzarella, you create a sealed environment that steams the pasta underneath while the top layer melts and caramelizes.
This cheese layer acts as an insulator, trapping steam and keeping the interior of the bake incredibly creamy and hot. As the casserole bakes, the edges turn golden and slightly crispy, providing a wonderful contrast to the rich, gooey center. It is a foolproof method for achieving that perfect cheese pull every single time.
Notes and substitutions
For the best results, select high-quality ingredients that melt smoothly. While jarred Alfredo sauce provides an excellent, time-saving shortcut, stirring in a bit of softened cream cheese elevates the texture to a whole new level of richness. When it comes to the cheese topping, always opt for low-moisture, whole-milk mozzarella.
Pre-shredded cheese often contains anti-caking agents that prevent it from melting into that perfect, stretchy blanket. Shredding your own mozzarella off the block ensures a superior melt, a more delicate flavor, and the ultimate camera-ready cheese pull when you lift the first slice.
You can easily adapt this recipe to suit what you have on hand in your pantry. Standard spaghetti is the classic choice, but other pasta shapes like penne, rigatoni, or fettuccine work equally well at catching the creamy sauce. If you want to save even more time, substitute the raw chicken breasts with pre-cooked rotisserie chicken. Simply shred the rotisserie chicken and skip the skillet cooking step entirely. For a touch of color and a fresh, peppery bite, do not skip the final garnish of finely chopped fresh parsley right as the casserole comes out of the oven.
- jarred Alfredo sauce: homemade garlic cream sauce made with heavy cream, butter, and grated Parmesan cheese
- chicken breasts: 3 cups of shredded rotisserie chicken to save prep time
Equipment
- 9x13-inch glass baking dish
- large pot
- large skillet
- meat thermometer
- large mixing bowl
- spatula
Up next · Part 2 of 3
8 steps · 35 min of cooking · what to look for at each stage
Step-by-step instructions (Part 2)