Appetizers · Part 2 of 3: Instructions
Cheesy Chicken Bacon Sliders: Easy Party Appetizer Step-by-step instructions
- Prep
- Cook
- Total
- Serves
- 12
Before you start
Before beginning, ensure that your chicken is already cooked and shredded. Having your bacon pre-cooked and crumbled saves significant time during assembly.
Preheating the oven is crucial for achieving the perfect golden-brown crust on the rolls. Gather all ingredients and have your 9x13 inch pan ready to ensure a smooth assembly process once you start.
Ingredients at a glance (6)
- 1 package slider buns
- 2 cups shredded cooked chicken
- 6 slices cooked bacon, crumbled
- 2 cups shredded cheddar cheese
- 4 tbsp melted butter
- 1 tsp garlic powder
Instructions
Assembly of the layers
- Prepare the slidersSlice the entire package of slider buns in half horizontally to create a top and bottom slab. Place the bottom half in a 9x13 inch baking pan. Layer the shredded cooked chicken, crumbled bacon, and shredded cheddar cheese evenly over the bottom buns. Place the top slab of buns over the cheese layer.Look for ensure an even layer of ingredientsTip Keep the buns connected to make assembly faster and easier.
The base should be stable and the layers should be uniform, ensuring that each slider receives an equal amount of chicken, bacon, and cheese.
Check that the top bun slab is placed securely over the filling before moving on to the glazing step.
Baking and glazing
- Glaze and bakeIn a small bowl, whisk together the melted butter and garlic powder. Use a pastry brush to coat the tops of the slider buns generously with the garlic butter mixture. Place the pan in a preheated 350°F (175°C) oven and bake for 20 minutes, or until the cheese is melted and bubbly and the tops are golden brown. Ensure the chicken reaches 165°F (74°C).Look for golden brown tops and melted cheeseSafe temperature 165°F (74°C) internal temperature (poultry)Tip Brush the edges of the rolls to ensure they get crispy and flavorful.
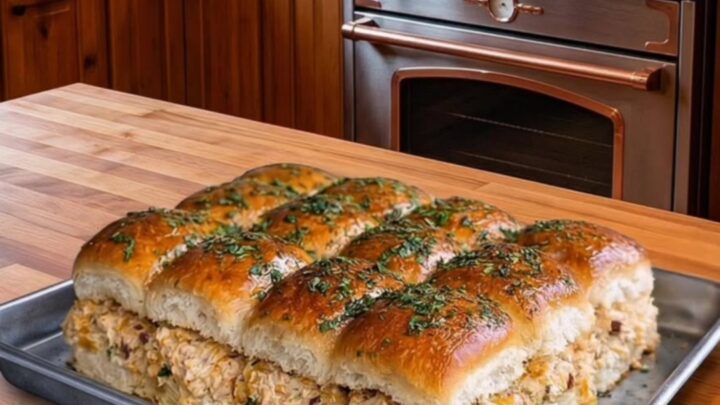
The kitchen should be filled with the aromatic scent of garlic and toasted bread. The rolls should look golden and glossy, and the cheese should be visibly bubbling around the edges of the pan, indicating it is fully melted.
Final rest and service
- Serve and restRemove the sliders from the oven and let them rest for 5 minutes before slicing into individual pieces. Serve immediately while warm to enjoy the dramatic cheese pull and crisp texture of the rolls.Look for slightly cooled for easier handlingTip Use a serrated knife to cut through the crust without squashing the soft bread.
The sliders should be slightly firm to the touch, and the cheese should hold the components together. The bread should be crisp on top and soft underneath. Once rested, they are ready to be sliced and served immediately.
Common mistakes
A common mistake is overcrowding the pan or using too much filling, which can cause the sliders to become soggy. Ensure the chicken and bacon are distributed evenly but not piled too high.
Another error is neglecting to brush the edges of the rolls, which can result in dry, pale crusts. Always brush the butter generously across the entire surface and down the sides.
How to tell it’s done
The sliders are done when the tops are golden brown and the cheese is completely melted, creating a consistent cheese pull throughout.
The internal temperature of the chicken must reach 165°F (74°C) to ensure food safety. If the tops are browning too quickly, you can tent the pan with aluminum foil for the final few minutes of baking to prevent burning.
- Poultry: 165°F (74°C) in the thickest part
Up next · Part 3 of 3
2 variations · storage & make-ahead · 3 answers · printable card
Tips, FAQ & printable recipe (Part 3)← Back to the ingredients (Part 1)