Dinner · Part 2 of 3: Instructions
Cheesy Chicken Bacon Ranch Roll-Ups Step-by-step instructions
- Prep
- Cook
- Total
- Serves
- 4
Before you start
Before beginning, ensure that your chicken is fully cooked and shredded. Prepare your workspace by laying out all ingredients, ensuring the bacon is already cooked and crumbled to save time.
Preheat your broiler to high and lightly grease your baking dish to prevent sticking. Having everything measured and ready will streamline the assembly process, allowing you to focus on getting that perfect roll.
Ingredients at a glance (7)
- 4 large flour tortillas
- 2 cups shredded cooked chicken
- 6 slices cooked bacon, crumbled
- 1 1/2 cups shredded cheddar cheese
- 1/4 cup ranch dressing
- 2 tbsp melted butter
- sliced scallions, for serving
Instructions
Mixing the filling
- Prepare the fillingIn a medium mixing bowl, combine the shredded cooked chicken, half of the crumbled bacon, one cup of the shredded cheddar cheese, and the ranch dressing. Stir the mixture thoroughly until all the ingredients are evenly incorporated and coated with the dressing.Look for The mixture should be thick and well-combined.Tip Ensure the chicken is finely shredded to make rolling easier.
The filling should have a thick, cohesive consistency where the ranch dressing has thoroughly coated the chicken, bacon, and cheese. It should look creamy and smell savory, with the aroma of the ranch dressing clearly present. Ensure all ingredients are mixed evenly so every bite contains a balanced ratio of each flavor component.
Rolling and arranging
- Assemble the roll-upsLay out the flour tortillas on a flat surface. Divide the chicken filling evenly among the tortillas, placing it in a line across the center of each. Roll each tortilla tightly to secure the filling inside, then place them seam-side down into a baking dish.Look for The tortillas should be wrapped tightly so they do not unroll.Tip Tuck the edges in slightly as you roll for a neater finish.
Each roll-up should be tightly wrapped with the seam facing down in the baking dish to ensure it stays closed during the cooking process. The tortillas should feel firm and secure.
Check that the rolls are placed close enough together to support one another, which helps maintain their structure and prevents them from unrolling while they heat.
Broiling to perfection
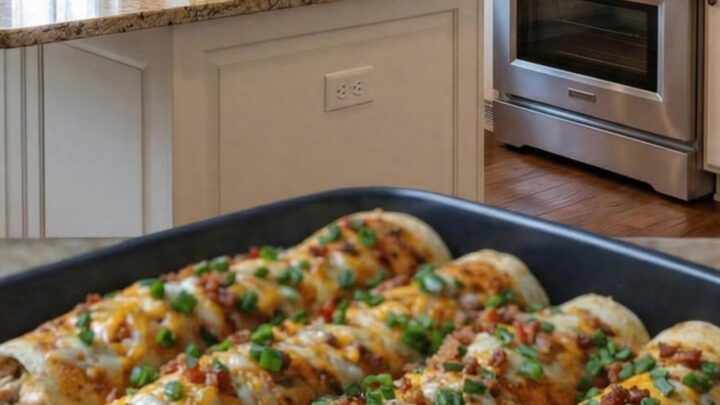
- Bake and garnishBrush the tops of the roll-ups with the melted butter. Sprinkle the remaining cheddar cheese and bacon over the top. Place under a preheated broiler until the cheese is bubbling and golden. Remove from the heat and garnish with sliced scallions before serving to ensure the chicken reaches a safe internal temperature of 165°F (74°C).Look for The cheese should be melted and bubbling with a golden-brown hue.Safe temperature 165°F (74°C) internal temperature (poultry)Tip Watch the broiler closely to prevent the tortillas from burning.
The final phase is complete when the cheese is bubbling vigorously and the topping has developed a rich, golden-brown color. The bacon pieces should look crispy and the scallions should be slightly wilted.
The entire dish should be steaming and smell toasted, indicating the internal temperature has reached the required level for safety.
Common mistakes
Avoid overstuffing the tortillas, as this can make them difficult to roll and may cause them to burst open during the broiling process.
Additionally, do not walk away while the roll-ups are under the broiler, as the high heat can turn them from perfectly golden to burnt in a matter of seconds. Keep a close eye on the progress to ensure even browning.
How to tell it’s done
The roll-ups are ready when the cheese on top is fully melted, bubbling, and has achieved a deep golden-brown color. The edges of the tortillas should be crisp and slightly toasted. Most importantly, the internal temperature of the chicken filling must reach 165°F (74°C) to ensure it is thoroughly heated and safe to consume.
- Poultry: 165°F (74°C) in the thickest part
Up next · Part 3 of 3
2 variations · storage & make-ahead · 3 answers · printable card
Tips, FAQ & printable recipe (Part 3)← Back to the ingredients (Part 1)