Dinner · Part 2 of 3: Instructions
Cheesy Chicken and Broccoli Bake for an Easy Dinner Step-by-step instructions
- Prep
- Cook
- Total
- Serves
- 4
Before you start
Before beginning, ensure that the oven is fully preheated to 375°F (190°C) to facilitate even cooking from the moment the pan enters.
Have all ingredients washed, dried, and chopped to the required sizes. Prepare the aluminum baking pan by ensuring it is clean and placed on a flat, heat-resistant surface.
Having a reliable meat thermometer ready is essential for confirming the internal temperature of the chicken. Clear the counter space to organize the cutting board and knives, making the assembly process smooth and efficient while maintaining a clean workspace.
Ingredients at a glance (3)
- 1.5 lb chicken breasts, sliced into bite-sized pieces
- 2 cups broccoli florets
- 2 cups shredded mozzarella cheese
Instructions
Preparation phase
- Prepare the ingredientsPreheat the oven to 375°F (190°C). Slice the chicken breasts into uniform bite-sized pieces to ensure even cooking. Trim the broccoli into small, manageable florets, making sure they are roughly the same size as the chicken pieces to promote consistent heat distribution throughout the baking pan.Look for Chicken is sliced and broccoli is cut into florets.Tip Using uniform sizes helps every piece cook at the same rate.
The chicken is sliced into even, bite-sized pieces and the broccoli is trimmed into uniform florets. Everything is ready to be arranged in the baking pan, with the oven preheated to the correct temperature to ensure immediate and consistent cooking once the pan is placed inside.
Initial baking phase
- Assemble and bakePlace the sliced chicken and broccoli florets into the aluminum baking pan, spreading them out into an even layer. Bake in the preheated oven for 20 to 25 minutes. Once the chicken reaches an internal temperature of 165°F (74°C), remove the pan from the oven to add the cheese topping.Look for Chicken reaches an internal temperature of 165°F (74°C).Safe temperature 165°F (74°C) internal temperature (poultry)Tip Ensure the chicken is fully cooked through before adding the cheese.
The chicken and broccoli have roasted for 20 to 25 minutes. The chicken is opaque and cooked through to 165°F (74°C). The broccoli is tender and the edges are starting to soften, indicating it is time to move to the final step of adding the cheese.
Final melting phase
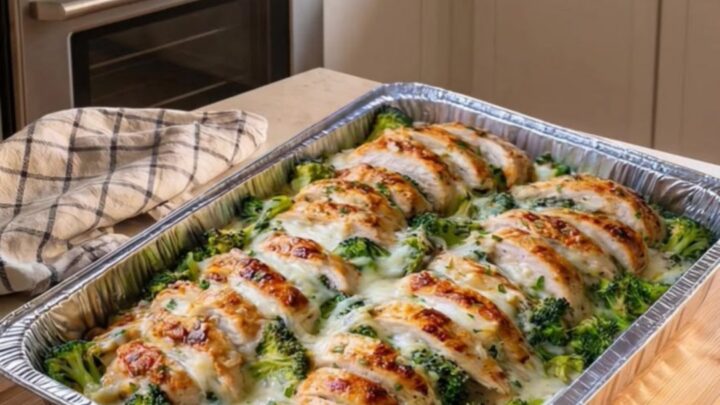
- Melt the cheese and serveSprinkle the shredded mozzarella cheese generously over the cooked chicken and broccoli. Return the pan to the oven for an additional 5 minutes, or until the cheese is melted and bubbling. Allow the dish to rest for 5 minutes before scooping out portions with a metal spatula to serve.Look for Cheese is melted, bubbly, and golden.Tip Letting the dish rest helps the cheese set slightly for that perfect pull.
The cheese is added and has melted into a gooey, golden layer over the chicken and broccoli. The dish is bubbling, and the aroma is savory and inviting. After a short rest, the dish is ready to be scooped onto plates for serving.
Common mistakes
Avoid overcrowding the baking pan, as this can cause the chicken and broccoli to steam rather than roast, leading to a soggy texture. Ensure the chicken pieces are sliced to a uniform thickness; if some are significantly larger than others, they will not finish cooking at the same time.
Do not skip the final resting time, as this allows the juices to redistribute within the chicken, ensuring each bite remains succulent and flavorful instead of dry or tough.
How to tell it’s done
The chicken is perfectly done when it reaches an internal temperature of 165°F (74°C) as measured by a meat thermometer inserted into the thickest part of the meat.
Visually, the chicken should be opaque throughout, and the broccoli should be tender but still retain a bright green color. The cheese should be completely melted, bubbling across the surface, and beginning to show small, golden-brown spots in areas where the heat has concentrated.
- Poultry: 165°F (74°C) in the thickest part
Up next · Part 3 of 3
2 variations · storage & make-ahead · 3 answers · printable card
Tips, FAQ & printable recipe (Part 3)← Back to the ingredients (Part 1)