Dinner · Part 2 of 3: Instructions
Cheesy Beef Stuffed Shells in a Skillet Step-by-step instructions
- Prep
- Cook
- Total
- Serves
- 4
Before you start
Before starting the cooking process, organize all ingredients and equipment to ensure a smooth workflow. Bring a large pot of salted water to a rolling boil for the jumbo shells. While the water heats, finely chop the fresh herbs and shred the mozzarella and parmesan cheeses.
Set up a clean workstation with a baking sheet or large plate where you can place the boiled pasta shells to cool slightly before stuffing. Having the ricotta cheese, cooked ground beef, and marinara sauce measured and ready will make the assembly process quick and effortless.
Ingredients at a glance (7)
- 12 oz jumbo pasta shells
- 1 lb ground beef
- 24 oz marinara sauce
- 15 oz ricotta cheese
- 2 cups shredded mozzarella cheese
- 1/4 cup grated parmesan cheese, for serving
- 2 tbsp chopped fresh herbs, for serving
Instructions
Boiling the Shells and Browning the Beef
- Boil the Jumbo ShellsBring a large pot of salted water to a boil. Add the jumbo pasta shells and cook for 9 minutes, or until just al dente. Drain the shells and rinse them briefly with cold water to stop the cooking process, then set them aside on a baking sheet to cool.Look for The shells should be pliable but still firm.Tip Rinsing prevents the shells from sticking together.
- Brown the Ground BeefHeat a large skillet over medium-high heat. Add the ground beef. Cook, breaking up the meat with a spoon, for 6 to 8 minutes until the beef is fully browned and reaches an internal temperature of 160°F (71°C). Drain any excess grease from the skillet.Look for No pink meat should remain in the skillet.Safe temperature 160°F (71°C) internal temperature (ground meat)Tip Use a wooden spoon to crumble the beef finely.
At the end of this phase, the jumbo pasta shells should be cooked just to al dente, remaining firm enough to hold their shape without tearing. The ground beef in the skillet should be completely browned and crumbled, with no pink remaining, releasing a savory, rich aroma of cooked meat and seasonings.
Any excess grease should be drained from the skillet, leaving a clean, flavorful base of seasoned beef ready to be combined with the marinara sauce.
Stuffing and Assembling the Pasta Shells
- Prepare the Meat SaucePour the marinara sauce directly into the skillet with the browned ground beef. Stir well to combine, scraping up any browned bits from the bottom of the pan. Simmer the meat sauce over low heat for 5 minutes, then remove the skillet from the heat.Look for The sauce should be hot and slightly thickened.Tip Letting it simmer helps the beef absorb the marinara.
- Stuff and Arrange the ShellsIn a medium bowl, stir the ricotta cheese. Spoon about 2 tablespoons of the ricotta mixture into each cooked jumbo shell. Arrange the stuffed shells snugly in the skillet, nestling them directly into the warm beef marinara sauce.Look for The shells should be filled completely but not overflowing.Tip Use a small spoon or piping bag to fill easily.
At this stage, each jumbo shell is generously stuffed with the smooth, seasoned ricotta cheese mixture and arranged neatly in the skillet. The shells should sit snugly nestled in the rich, red meat sauce, with the beef-topped marinara spooned carefully over each one. The skillet should look completely assembled, with the vibrant red sauce contrasting beautifully against the pale pasta shells, ready for the final cheese topping and melting process.
Melting the Cheese and Garnishing the Skillet
- Melt the Cheese and GarnishSprinkle the shredded mozzarella cheese evenly over the stuffed shells. Cover the skillet with a lid and cook over medium-low heat for 8 to 10 minutes, until the cheese is bubbling furiously and completely melted. Garnish with grated parmesan cheese and chopped fresh herbs before serving.Look for The cheese should be hot, stretchy, and steaming.Tip Keep the lid on tight to trap the steam.
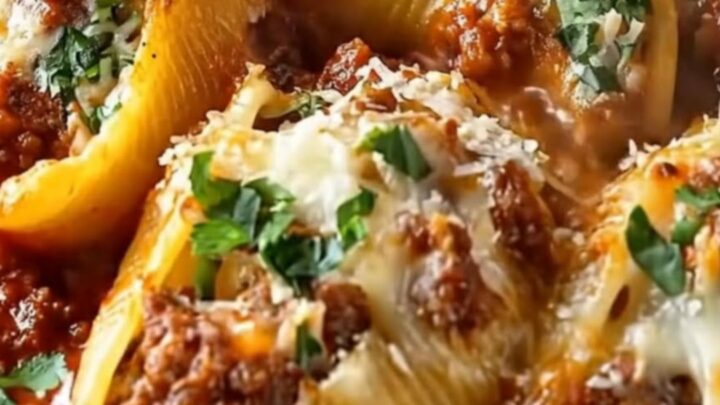
By the end of this final phase, the mozzarella cheese on top of the shells should be completely melted, bubbling furiously around the edges of the skillet with gentle steam rising. The cheese should have a beautiful, stretchy consistency with a slightly golden hue in spots. The fresh herbs and grated parmesan sprinkled over the top add a vibrant green and white garnish, creating an incredibly appetizing contrast against the bubbling red sauce.
Common mistakes
One common mistake is overcooking the pasta shells during the initial boil. Because the shells continue to cook and steam inside the skillet with the hot sauce, starting with overcooked pasta will result in mushy, structural failures that tear apart during assembly.
Another error is failing to drain the excess fat from the browned ground beef. Leaving too much grease in the skillet will cause the marinara sauce to become oily and separate, preventing the cheese from melting into a cohesive, gooey layer on top of the dish.
How to tell it’s done
To determine when the dish is perfectly cooked, check that the meat sauce is bubbling vigorously throughout the skillet and the cheese in the center is completely melted and hot. Since the ground beef is cooked beforehand, ensure it reaches a safe internal temperature of 160°F (71°C) during the browning step.
The pasta shells should be tender when pierced with a fork, and the ricotta filling inside should be hot and set, indicating that the entire skillet has heated through evenly and is ready to serve.
- Ground meat: 160°F (71°C) in the thickest part
Up next · Part 3 of 3
2 variations · storage & make-ahead · 3 answers · printable card
Tips, FAQ & printable recipe (Part 3)← Back to the ingredients (Part 1)