Dinner · Part 2 of 3: Instructions
Cheesy Beef Rigatoni Pasta Bake Step-by-step instructions
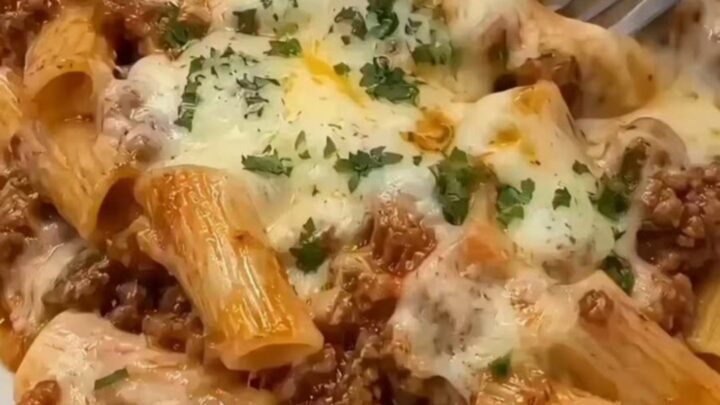
- Prep
- Cook
- Total
- Serves
- 4
Before you start
Before starting, ensure all ingredients are measured and ready to go for a smooth cooking experience. Preheat the oven to 375°F (190°C) so it is ready by the time the assembly phase begins. Prepare a large pot of water for the pasta and have a colander nearby for draining.
Having the cheese shredded and the parsley chopped beforehand will save significant time once the cooking process begins, allowing for a seamless transition between the stovetop and the oven.
Ingredients at a glance (5)
- 1 lb rigatoni pasta
- 1 lb ground beef
- 2 cups tomato sauce
- 2 cups shredded mozzarella cheese
- fresh parsley, for serving
Instructions
Sauce and Pasta Preparation
- Prepare the pasta and sauceCook the rigatoni in a large pot of boiling salted water until al dente. In a separate skillet, brown the ground beef over medium-high heat. Once the ground beef reaches 160°F (71°C), stir in the tomato sauce and simmer for a few minutes until the flavors are well combined.Look for The beef should be browned and the sauce simmering gently.Safe temperature 160°F (71°C) internal temperature (ground meat)Tip Drain the pasta well so the sauce adheres better.
The ground beef should be thoroughly browned with no pink remaining, and the tomato sauce should be well-incorporated and fragrant.
The rigatoni should be cooked to al dente, meaning it has a slight bite to it, and should be drained well. Ensure the sauce is not too thin before proceeding to the assembly stage, as a thicker sauce yields a better final texture.
Assembly and Layering
- Combine and assembleToss the cooked rigatoni into the skillet with the beef and tomato sauce. Ensure every piece of pasta is evenly coated with the mixture. Transfer the pasta mixture into a baking dish and spread it out into an even layer.Look for The pasta should be fully coated in the red sauce.Tip Use a wide skillet to make tossing easier.
The pasta and sauce mixture should look uniform, with the meat and sauce clinging to every tube of rigatoni. When transferring to the baking dish, spread the mixture evenly to ensure consistent cooking. Check that no large clumps of pasta are left dry; if necessary, add a tiny bit of pasta water to help loosen the mixture before adding the cheese topping.
Final Baking
- Bake and serveTop the pasta evenly with the shredded mozzarella cheese. Place the baking dish in a preheated oven and bake until the cheese is melted, golden brown, and bubbling. Remove from the oven, let rest briefly, garnish with fresh parsley, and serve immediately.Look for The cheese should be golden brown and bubbling with steam rising.Tip Broil for the last minute if the cheese needs more color.
The cheese should be completely melted and show signs of browning. The sauce should be actively bubbling up through the cheese layer, indicating the entire dish is heated through. The edges of the pasta should look slightly crispy. Once these visual cues are met, remove the dish from the oven and allow it to rest for a few minutes to set before serving.
Common mistakes
A common mistake is overcooking the pasta before it hits the oven, which can lead to mushy results. Always aim for al dente, as the pasta will absorb moisture from the sauce during baking.
Another error is using too much sauce, which can make the dish watery; start with the recommended amount and add only if necessary. Finally, ensure the cheese is distributed evenly to avoid dry spots that do not brown properly.
How to tell it’s done
The dish is considered done when the cheese is fully melted, golden brown in spots, and the sauce is bubbling around the edges of the baking dish. The internal temperature of the ground beef should reach at least 160°F (71°C) to ensure safety.
The pasta should be tender but still hold its shape, and the sauce should appear thick and glossy rather than runny, indicating it has properly reduced and combined with the pasta.
- Ground meat: 160°F (71°C) in the thickest part
Up next · Part 3 of 3
2 variations · storage & make-ahead · 3 answers · printable card
Tips, FAQ & printable recipe (Part 3)← Back to the ingredients (Part 1)