Appetizers · Part 3 of 3: Tips & recipe card
Cheesy Baked Ham and Cheese Rolls for an Easy Snack Tips, FAQ & printable recipe

- Prep
- Cook
- Total
- Serves
- 6
Tips for success
If you want to add an extra layer of flavor, consider brushing the tops of the rolls with a small amount of melted butter mixed with garlic powder or dried herbs before baking.
This will give the exterior a beautiful shine and an additional savory note that complements the ham and cheese perfectly, elevating the dish for special occasions or game day snacks.
For a more intense flavor, you can layer a thin spread of Dijon mustard on the bottom half of the roll before adding the ham. This adds a subtle tang that cuts through the richness of the melted cheese, balancing the overall flavor profile of the rolls and providing a sophisticated touch to what is otherwise a very simple and comforting snack.
Variations
- Spicy Ham and Cheese: Add a few slices of pickled jalapeños or a dash of hot sauce over the ham before adding the cheese to introduce a spicy kick that balances the richness.
- Herbed Ham and Cheese: Sprinkle dried oregano, basil, or Italian seasoning over the cheese before closing the rolls to infuse the dish with aromatic, savory herb notes that enhance the flavor.
Storage and make-ahead
- Fridge
- Store in an airtight container for up to 3 days in the refrigerator.
- Freezer
- Not recommended for freezing, as the texture of the bread and cheese may change significantly upon thawing.
- Reheat
- Reheat in a preheated oven at 350°F (175°C) for 5-8 minutes until warmed through and the cheese is melted again.
If you have leftovers, allow them to cool completely at room temperature for no more than two hours before placing them in an airtight container.
Storing them correctly will help maintain the texture of the bread and prevent the cheese from becoming too rubbery. Keep them in the refrigerator to ensure they remain safe for consumption over the next few days.
These rolls are best enjoyed fresh, but you can assemble them up to two hours in advance and keep them covered in the refrigerator until you are ready to bake. If you choose to refrigerate them before baking, add two to three extra minutes to the total baking time to account for the cold starting temperature of the ingredients.
Serving ideas
Serve these rolls warm, directly from the baking dish, to ensure the cheese remains soft and stretchy. They are best enjoyed as a standalone snack or as part of a larger spread of appetizers.
Providing a small side of marinara sauce or a mustard-based dipping sauce can add another layer of flavor and is often appreciated by guests who enjoy a bit of extra acidity.
Because these rolls are quite filling, they work well when served alongside a light, crisp salad or a bowl of vegetable soup.
This combination balances the richness of the ham and cheese with fresh, crisp textures, creating a more well-rounded meal. Ensure you have plenty of napkins on hand, as the cheesy, bubbling nature of the rolls can be a bit messy to eat.
Frequently asked questions
Can these rolls be made ahead of time?
What is the best way to prevent the rolls from getting soggy?
Can different types of bread be used for this recipe?
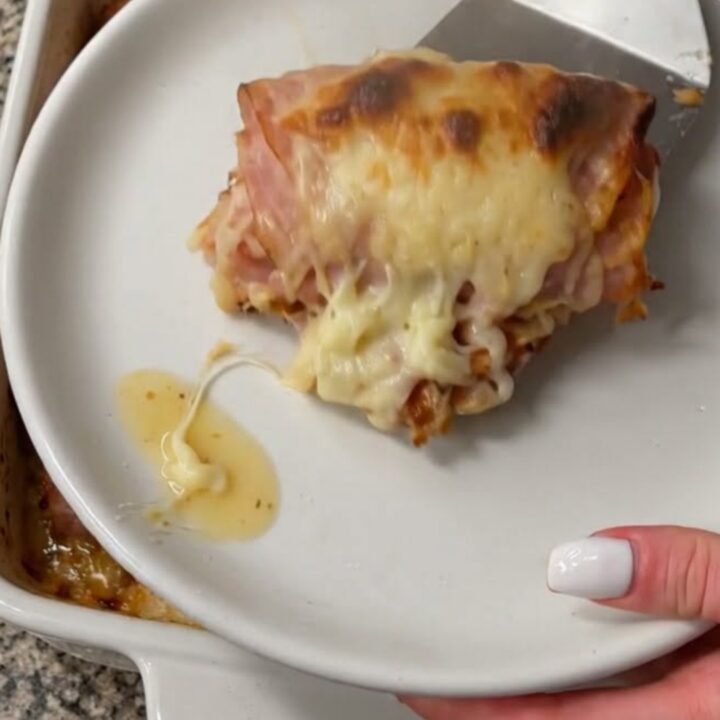
Cheesy Baked Ham and Cheese Rolls for an Easy Snack
Ingredients
- 6 pieces dinner rolls, split horizontally
- 6 slices deli ham
- 1 cup shredded mozzarella cheese
Instructions
- Using a serrated knife, slice each dinner roll in half horizontally. Arrange the bottom halves in a single layer inside a lightly greased baking dish to ensure even heat distribution during the baking process.
- Place one slice of deli ham onto each roll base. Distribute the shredded mozzarella cheese generously over the ham slices, ensuring it covers the surface of the meat. Place the top halves of the dinner rolls over the cheese to close the sandwiches.
- Preheat your oven to 350°F (175°C). Place the baking dish in the oven and bake for 15 minutes, or until the rolls are golden brown and the cheese is bubbling and fully melted. Remove from the oven and let them rest for 5 minutes before serving to allow the cheese to set slightly.
Estimated nutrition per serving
- Calories
- 320
- Protein
- 14.5 g
- Carbohydrates
- 26 g
- Fat
- 18 g
- Fiber
- 1.2 g
- Sugar
- 3.5 g
- Sodium
- 650 mg
Next recipe

Cheesy Bacon-Wrapped BBQ Onion Bombs for a Crispy Appetizer
See the recipe → →This recipe is based on a short cooking video and is published under the pen name Clara Weller. It was checked before publication, but errors can slip through. Nutrition, when shown, is an estimate. Read more in our editorial policy and on our food safety page.
More recipes to try

Buttery Roasted Beef Bone Marrow with Garlic Bread
Total time: 35 min
Cheesy Ham-Stuffed Pull-Apart Bread for Easy Sharing
Total time: 45 min
Cheesy Baked Ham and Cheese Rolls for an Easy Appetizer
Total time: 30 min
Creamy Garlic Butter Shrimp Bites for Quick Appetizers
Total time: 20 min
Cheesy Bacon Beef Crescent Rolls for a Quick Savory Treat
Total time: 35 min