Dinner · Part 2 of 3: Instructions
Cheddar Salsa Verde Skirt Steak Crockpot Fajitas Step-by-step instructions
- Prep
- Cook
- Total
- Serves
- 6
Before you start
Before you start, make sure you have a 6-quart slow cooker. Slice the skirt steak into thin strips, about 2 inches long. If the steak is cold, it's easier to slice. Soften the cream cheese by leaving it at room temperature for 20 minutes or microwaving it briefly.
Measure out the salsa verde, green chiles, and shredded cheddar. Have the cilantro-lime rice ready to serve, or prepare it just before the beef is done. No other prep is needed; everything goes into the slow cooker in layers.
Ingredients at a glance (6)
- 2 lb skirt steak, sliced into strips
- 1 1/2 cups tomatillo salsa verde
- 1 cup diced Hatch green chiles
- 8 oz cream cheese, softened
- 2 cups shredded sharp cheddar cheese
- cilantro-lime rice, for serving
Instructions
Layer and Set
- Layer the BeefPlace the sliced skirt steak strips in the bottom of a 6-quart slow cooker, spreading them into an even layer. The strips should cover the bottom without overlapping too much, so they cook evenly.Look for The raw beef strips cover the bottom of the Crockpot in a single layer.Tip For easier slicing, freeze the steak for 15 minutes before cutting.
- Add Salsa Verde and ChilesPour the tomatillo salsa verde over the beef, then scatter the diced Hatch green chiles evenly on top. Use a spoon to gently nudge the sauce so it flows around the meat, but no need to stir thoroughly.Look for The beef is mostly submerged in green sauce with chiles distributed.Tip If you prefer a milder heat, use mild green chiles.
- Top with CheesesPlace the softened cream cheese in the center of the slow cooker, then sprinkle the shredded sharp cheddar over the top. Do not stir; the cheeses will melt and blend during cooking.Look for The cream cheese block sits in the middle, covered with cheddar.Tip Soften the cream cheese beforehand for quicker melting.
At the end of this phase, the slow cooker contains raw beef strips covered with salsa verde and green chiles, topped with a block of cream cheese and a pile of shredded cheddar.
The colors are vibrant: green sauce, white cheese, and yellow cheddar. The raw beef should be in a single layer, and the ingredients should be evenly distributed but not stirred. Everything is ready for the slow cooker to work its magic.
Slow-Cook to Tender
- Slow Cook on LowCover the slow cooker and cook on low for 6 to 8 hours, until the beef is fork-tender and the sauce is bubbling. The cheese will melt into a creamy sauce as the beef braises. Let it rest for 3 minutes before slicing.Look for The sauce bubbles gently around the edges, and the beef shreds easily with a fork.Safe temperature 145°F (63°C) internal temperature (steaks, chops and roasts)Tip Resist lifting the lid; each peek adds 15 minutes of cooking time.
- Check Temperature and RestCheck that the thickest piece of beef registers at least 145°F (63°C) on an instant-read thermometer. Let the beef rest in the sauce for 5 minutes before serving so the juices redistribute.Look for The thermometer reads 145°F or higher, and the meat rests in the hot sauce.Safe temperature 145°F (63°C) internal temperature (steaks, chops and roasts)Tip The resting time is essential for tender, juicy meat.
After 6 to 8 hours on low, the sauce is bubbling and the cheese has melted into a creamy, golden-green sauce. The beef is fork-tender and easily pulls apart. The aroma is rich and tangy, with notes of roasted tomatillo and melted cheese. The sauce should be thick enough to coat a spoon but still fluid. Check the temperature reaches 145°F (63°C) and let it rest before serving.
Serve and Savor
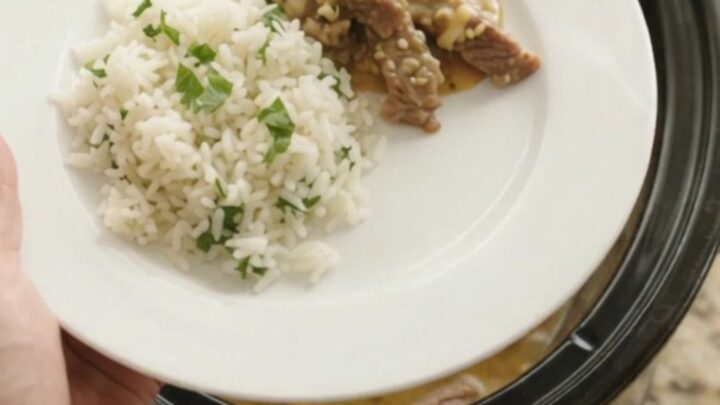
- Serve Over RiceSpoon the cilantro-lime rice onto a plate, then ladle the beef and sauce over the top. Use a slotted spoon to portion the meat, and finish with extra sauce from the Crockpot.Look for Steaming beef and sauce sit atop a bed of fluffy rice.Tip Warm the rice before serving for the best texture.
The final phase is all about plating. Spoon the cilantro-lime rice onto plates, then ladle the beef and sauce over the top. The meat should be glistening with sauce, and the rice should soak up the flavorful liquid. The dish looks vibrant and inviting, with streaks of green and yellow. Serve immediately while hot, and enjoy the tender beef and creamy sauce.
Common mistakes
A common mistake is lifting the lid to check on the food, which releases heat and extends cooking time. Trust the slow cooker and keep the lid on until the minimum time is up. Another mistake is using pre-shredded cheddar; it often doesn't melt as smoothly due to anti-caking agents.
Also, don't skip the resting time after cooking—it's crucial for tender meat. Finally, be careful not to overcook, as skirt steak can become mushy if cooked too long on high.
How to tell it’s done
The dish is done when the beef is fork-tender and easily shreds apart. The sauce should be bubbling gently around the edges, and the cheese should be fully melted and incorporated into a creamy, smooth sauce.
For food safety, check that the thickest piece of beef reaches at least 145°F (63°C) on an instant-read thermometer. Let the meat rest in the sauce for 5 minutes before serving to allow the juices to redistribute. The texture should be moist and tender, not dry or stringy.
- Steaks, chops and roasts: 145°F (63°C) in the thickest part, then a 3-minute rest
Up next · Part 3 of 3
4 variations · storage & make-ahead · 5 answers · printable card
Tips, FAQ & printable recipe (Part 3)← Back to the ingredients (Part 1)