Dinner · Part 1 of 3: Ingredients
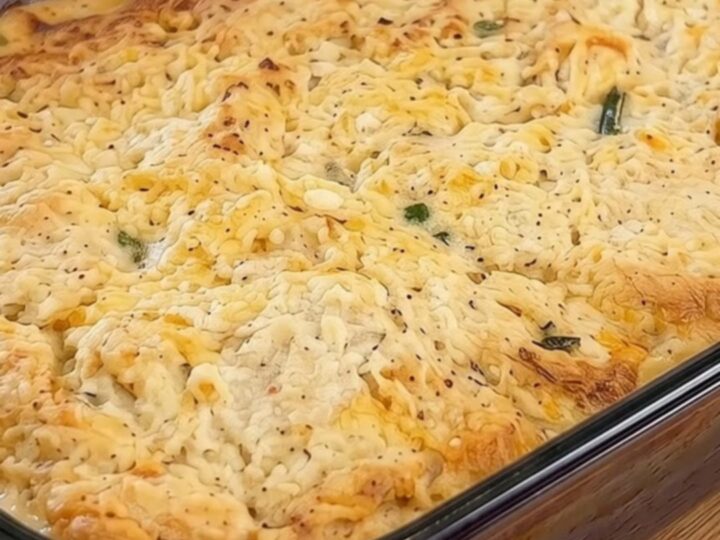
Cheddar Biscuit Chicken Pot Pie Bake with Golden Garlic Butter Crust
- Prep
- Cook
- Total
- Serves
- 6
Craving a warm, comforting dinner that satisfies the entire family? This Cheddar Biscuit Chicken Pot Pie Bake is the ultimate cozy meal. It delivers all the nostalgic, creamy flavors of a traditional pot pie but with a spectacular upgrade: a thick, golden cheddar biscuit crust. Every spoonful is packed with tender chicken, savory vegetables, and rich gravy, crowned by a bubbly, cheesy biscuit layer.
Comfort food reaches new heights with this easy, crowd-pleasing casserole. Instead of dealing with fussy pie dough, this recipe utilizes a quick drop-biscuit method that saves time without sacrificing texture or flavor.
The filling is velvety and deeply savory, providing the perfect base for the fluffy, cheese-packed biscuits. A final drizzle of garlic herb butter right after baking infuses the crust with an irresistible aroma and a beautiful gloss. It is a complete, satisfying meal that brings warmth to any dinner table.
Ingredients
Chicken Filling
- 4 tbsp unsalted butter
- 1 medium yellow onion, diced
- 2 stalks celery, sliced
- 1.5 lb boneless skinless chicken breasts, cut into bite-sized pieces
- 1/3 cup all-purpose flour
- 2 cups chicken broth
- 1/2 cup heavy cream
- 2 cups frozen peas and carrots, thawed
- kosher salt and black pepper to taste
Cheddar Biscuit Topping
- 2 cups all-purpose flour
- 1 tbsp baking powder
- 1/2 cup unsalted butter, cold and cubed
- 1 1/2 cups shredded cheddar cheese
- 3/4 cup whole milk
Garlic Herb Butter Drizzle
- 3 tbsp unsalted butter, melted
- 1/2 tsp garlic powder
- 1 tsp dried parsley
Why this recipe works
The secret to this recipe's success lies in the dual-texture contrast between the creamy chicken filling and the fluffy biscuit topping. By cooking the chicken and vegetable filling on the stovetop first, you ensure the base is hot and fully developed in flavor before it ever enters the oven. This hot filling immediately begins to cook the bottom of the biscuits when they are dropped on top, preventing them from turning soggy or doughy during the baking process.
Additionally, incorporating cold butter into the biscuit mixture creates tiny steam pockets as it melts in the oven. This reaction is what gives the cheddar biscuits their signature light, flaky rise.
Drizzling the garlic herb butter over the top during the final minutes of baking allows the seasoning to seep into the warm nooks and crannies, ensuring every bite is rich, savory, and perfectly seasoned. This simple technique elevates a basic casserole into an extraordinary dining experience that everyone will love.
Notes and substitutions
For the best results, use sharp or extra-sharp cheddar cheese shredded directly from the block. Pre-shredded cheeses are coated with anti-caking agents that prevent them from melting smoothly, which can affect the texture of your biscuit topping.
If you want to save time, you can substitute the homemade biscuit mixture with a high-quality store-bought biscuit mix, but be sure to still fold in the fresh cheddar and brush with the garlic butter. This ensures you still get that homemade taste with less effort.
When preparing the filling, feel free to use rotisserie chicken to cut down on prep time. If doing so, simply skip the raw chicken cooking step and fold the shredded rotisserie chicken directly into the cream sauce along with the vegetables.
Ensure your baking dish is deep enough—at least two inches—to prevent the bubbly filling from overflowing in the oven as the biscuits rise to their golden perfection. A standard glass baking dish works beautifully for this purpose.
- heavy cream: whole milk or half-and-half for a lighter filling, though the final sauce will be slightly less rich
- frozen peas and carrots: any frozen mixed vegetables such as corn, green beans, or a stir-fry blend
Equipment
- large skillet
- 9x13-inch glass baking dish
- large mixing bowl
- pastry cutter
- whisk
- meat thermometer
Up next · Part 2 of 3
7 steps · 35 min of cooking · what to look for at each stage
Step-by-step instructions (Part 2)