Dinner · Part 2 of 3: Instructions
Cheddar Bay Chicken Cobbler with Cheesy Biscuit Crust Step-by-step instructions
- Prep
- Cook
- Total
- Serves
- 8
Before you start
Before you begin assembling this comforting bake, gather all your ingredients and measure them out precisely. Preheating your oven to 375°F (190°C) is crucial to ensure the baking mix reacts immediately when it hits the heat.
Shred your cooked chicken into bite-sized pieces, and melt your butter so it is ready to coat the bottom of your baking dish. Whisk your biscuit mix with the milk and shredded cheddar cheese in one bowl, and whisk the chicken broth and heavy cream together in another container so everything is primed for layering.
Ingredients at a glance (9)
- 1/2 cup unsalted butter, melted
- 3 cups cooked shredded chicken
- 1 cup frozen peas
- 1 cup frozen corn
- 2 cups Cheddar Bay biscuit mix
- 2 cups whole milk
- 1 cup shredded cheddar cheese
- 2 cups chicken broth
- 1 cup heavy cream
Instructions
Base Layer Assembly
- Prep the Dish and Base LayersPreheat your oven to 375°F (190°C). Pour the melted butter into the bottom of a 9x13-inch baking dish, spreading it evenly. Scatter the cooked shredded chicken in an even layer over the butter. Top the chicken with the frozen peas and frozen corn, distributing them evenly across the dish without stirring.Look for The chicken and vegetables should form a flat, colorful, even layer over the melted butter.Tip Do not stir the ingredients; keeping them layered prevents the dish from turning mushy.
At the end of this phase, your baking dish will show distinct, colorful layers. The bottom is coated in a rich, golden pool of melted butter, topped with an even blanket of shredded chicken, bright green peas, and sweet yellow corn.
The ingredients should look vibrant and evenly distributed across the pan, with no dry spots. You should smell the rich aroma of melted butter mingling with the savory chicken, ready to receive the biscuit and liquid toppings.
Batter and Liquid Layering
- Mix and Pour the Biscuit BatterIn a medium bowl, whisk together the biscuit mix, whole milk, and shredded cheddar cheese until a smooth batter forms. Gently pour this batter evenly over the chicken and vegetable layers. Use a spatula to spread it slightly if needed, but do not stir it into the bottom layers.Look for The batter should form a thick, creamy layer covering most of the chicken and vegetables.Tip Using freshly grated cheddar cheese ensures it melts beautifully into the biscuit topping.
- Add the Liquid LayerIn another bowl, whisk together the chicken broth and heavy cream. Pour this liquid mixture slowly and evenly over the biscuit batter layer. Do not stir or mix the layers together; they must remain separate to bake correctly.Look for The liquid will pool on top, looking watery and unmixed, which is exactly what you want.Tip Pouring the liquid slowly prevents it from displacing the biscuit batter too much.
At this stage, the dish will look somewhat unappealing and liquidy, which is completely normal. The thick cheddar biscuit batter has been poured over the chicken, followed by the smooth, pale cream and broth mixture. It should look like a pale, wet lake with patches of biscuit batter peeking through. Do not be tempted to stir this mixture; keeping these layers undisturbed is the key to the final texture.
Baking and Browning
- Bake to Golden PerfectionBake uncovered in the preheated oven at 375°F (190°C) for 45 to 50 minutes. The biscuit layer will rise to the top and turn a deep golden-brown, while the filling bubbles around the edges. Let the cobbler rest for 10 minutes before serving to allow the rich cream sauce to thicken.Look for The crust should be firm and golden-brown, and the edges should bubble with a thick cream sauce.Tip If the top browns too quickly, tent it loosely with aluminum foil for the last 10 minutes.
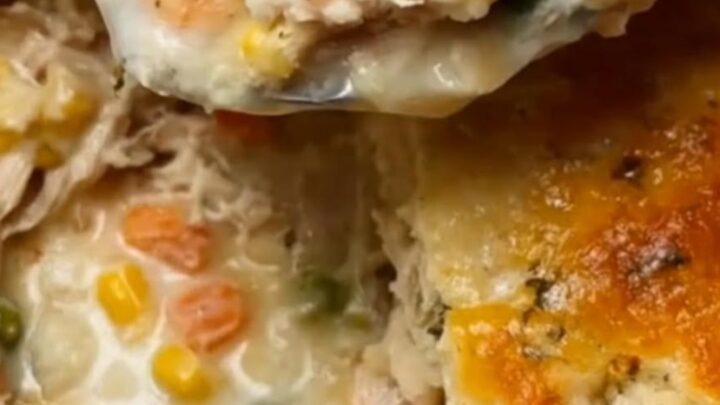
As the cobbler finishes baking, your kitchen will fill with an incredible aroma of garlic, melted cheese, and toasted butter. The top of the cobbler should be a beautiful deep golden-brown, with a firm, puffed biscuit crust that gently bounces back when pressed. Hot, velvety cream sauce should be bubbling vigorously around the edges of the dish, indicating that the filling is piping hot and has thickened to a luscious, gravy-like consistency.
Common mistakes
The single biggest mistake cooks make with this recipe is stirring the layers during assembly. It is incredibly tempting to mix the biscuit batter and liquid together, but doing so will ruin the dish, resulting in a dense, soggy, and gummy mess instead of a fluffy biscuit crust over a smooth gravy.
Another common error is using cold chicken broth and heavy cream, which can shock the melted butter and cause it to clump up. Always ensure your liquid ingredients are at least room temperature before pouring them over the layers.
How to tell it’s done
To determine if your chicken cobbler is perfectly done, look for a beautiful, uniform golden-brown crust across the entire top surface. The edges of the dish must be bubbling actively with thick, velvety sauce.
If you insert a toothpick into the center of the biscuit topping, it should come out clean without any wet batter clinging to it. Because this recipe uses pre-cooked chicken, there is no raw protein to monitor, but the entire dish should reach an internal temperature of at least 165°F (74°C) to ensure it is thoroughly heated.
Up next · Part 3 of 3
2 variations · storage & make-ahead · 3 answers · printable card
Tips, FAQ & printable recipe (Part 3)← Back to the ingredients (Part 1)