Dinner · Part 2 of 3: Instructions
Pepperoni Cup Ricotta Hot Honey Pizza Step-by-step instructions
- Prep
- Cook
- Total
- Serves
- 4
Before you start
Heat the oven to 500°F (260°C) with a baking steel on the upper-middle rack for at least 45 minutes. This gives the steel time to fully absorb the heat, which is crucial for a crisp bottom. Take the pizza dough out of the fridge 30 minutes before stretching.
Shred the mozzarella and measure the pepperoni. Set up a stand mixer with the paddle attachment for the ricotta. Dust a pizza peel with flour and have a bench scraper and a pastry brush ready.
Ingredients at a glance (7)
- 300 g pizza dough, stretched
- 8 oz low-moisture mozzarella, shredded
- 40 cup-and-char pepperoni slices
- 1 cup whole-milk ricotta
- 1 tsp lemon zest
- 2 tbsp hot honey
- all-purpose flour, for dusting, to taste
Instructions
Prep and Assemble
- Prepare the Dough and ToppingsPlace a baking steel on the upper-middle oven rack and heat the oven to 500°F (260°C) for at least 45 minutes. Dust a pizza peel with flour. Stretch the pizza dough into a 12-inch round on a floured surface, keeping the outer edge slightly thicker. Transfer the dough to the prepared peel and gently reshape if needed.Look for The dough should be evenly thin in the center with a puffy rim, and it should slide easily on the peel.Tip Work quickly to prevent the dough from sticking to the peel; shake the peel gently to test.
- Assemble the PizzaScatter the shredded mozzarella evenly over the dough, leaving a 1-inch border for the crust. Arrange the pepperoni slices over the cheese in a single layer, slightly overlapping if needed. Make sure each slice sits flat so it can cup and char during baking.Look for The pizza should be fully covered with cheese and pepperoni, with no bare dough except the rim.Tip Use pepperoni slices that are about 1 1/2 inches in diameter for the best cup effect.
The dough should be stretched into an even 12-inch round, with a slightly thicker rim. The peel should be well-floured so the dough slides easily.
The pizza is topped with a layer of mozzarella and pepperoni, with no bare spots except the crust edge. The oven is preheated and the steel is ripping hot.
Bake to Blistered Perfection
- Bake on the SteelSlide the pizza onto the hot baking steel and bake for 8 minutes, until the crust is golden brown and puffed, the cheese is blistered in spots, and the pepperoni cups are charred at the edges. Rotate the pizza halfway through if your oven heats unevenly.Look for The pepperoni cups should be dark and crispy at the rims, with pools of rendered grease in the centers.Safe temperature 160°F (71°C) internal temperature (ground meat)Tip If the crust browns too quickly, lower the rack slightly, but keep the steel hot.
- Check the Crust and CheeseAfter 8 minutes, the crust should be deep golden with a few charred spots, and the cheese should be bubbling and lightly browned. The pepperoni cups should hold their shape. If the underside is not crisp enough, bake for an additional 1 to 2 minutes.Look for Lift an edge with a spatula to check the bottom; it should be crisp and browned.Safe temperature 160°F (71°C) internal temperature (ground meat)Tip A hot steel gives the best oven spring; avoid opening the oven door too often.
After 8 minutes, the crust is golden and puffed, the cheese is bubbling with browned spots, and the pepperoni cups are charred at the edges. The bottom is crisp and browned. The kitchen smells of toasted dough and rendered pepperoni. The pizza is ready to come out.
Finish and Serve
- Whip the RicottaWhile the pizza bakes, place the ricotta and lemon zest in a stand mixer fitted with the paddle attachment. Whip on medium-high speed for 2 to 3 minutes, until light and airy. Scrape down the bowl once or twice. The mixture should be fluffy and hold a soft peak.Look for The ricotta should be pale, smooth, and aerated, with a mousse-like texture.Tip Use cold ricotta for best results; warm ricotta can become runny.
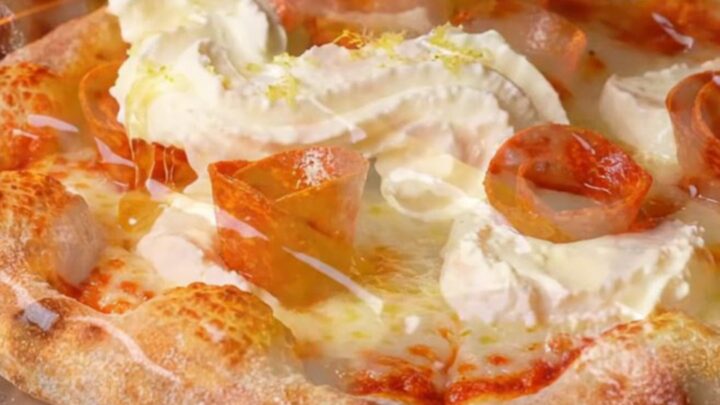
- Finish with Ricotta and HoneyRemove the pizza from the oven and let it rest for 2 minutes. Pipe or spoon dollops of the whipped ricotta over the hot pizza. Drizzle with hot honey. Slice and serve immediately, folding the slices if desired.Look for The ricotta should be creamy and cool against the hot, crisp pizza, with honey pooling in the pepperoni cups.Tip Use a piping bag for neat ricotta clouds, or drop spoonfuls for a rustic look.
The whipped ricotta is light and airy, with a bright lemon aroma. Dollops are piped over the hot pizza, and hot honey is drizzled generously. The pizza is sliced and served immediately, with the ricotta staying cool and creamy against the hot crust.
Common mistakes
A common mistake is not heating the steel long enough, which leads to a pale, soggy crust. Another is overloading the pizza with too much cheese or sauce, which can make it heavy and prevent the crust from crisping.
Stretching the dough too thin can cause tears, while too thick leaves the center doughy. Also, avoid opening the oven door frequently, as that lets out heat and slows the cooking.
How to tell it’s done
The pizza is done when the crust is deep golden brown and puffed, the cheese is bubbling and blistered in spots, and the pepperoni cups are dark and crispy at the edges.
The bottom should be crisp and browned when lifted with a spatula. If you’re using a meat thermometer, the pepperoni and cheese should register at least 160°F (71°C) to ensure the pepperoni is fully cooked.
- Ground meat: 160°F (71°C) in the thickest part
Up next · Part 3 of 3
4 variations · storage & make-ahead · 5 answers · printable card
Tips, FAQ & printable recipe (Part 3)← Back to the ingredients (Part 1)