Desserts · Part 2 of 3: Instructions
Cashew Brittle Chocolate Bark with Salted Caramel Step-by-step instructions
- Prep
- Cook
- Total
- Serves
- 16
Before you start
Gather everything before you start, because the bark moves quickly once the chocolate is on the sheet. Set the roasted cashews and coconut brittle on a wooden cutting board with a sharp chef's knife beside them, and pull out a box grater, a bowl for the grated chocolate, a metal baking sheet about 13 by 18 inches and a roll of parchment paper.
Line the sheet with parchment and smooth it flat so it lies without wrinkles. Fill a squeeze bottle with the amber salted caramel sauce, and have a spoon ready for spreading. Keep a metal scoop nearby for the nut and brittle mix. Set aside a few whole cashews for pressing into the top. Work in a cool room, away from the stove, so the chocolate sets smoothly and the caramel stays glossy while you assemble the bark.
Ingredients at a glance (5)
- 1 cup roasted salted cashews
- 1/2 cup coconut brittle pieces, roughly chopped
- 8 oz milk chocolate bar, grated into fine curls and shavings
- 1/2 cup amber salted caramel sauce, in a squeeze bottle
- flaky sea salt, for sprinkling, to taste
Instructions
Build the chocolate and caramel base
- Chop the cashews and brittlePlace the roasted cashews and coconut brittle pieces on a wooden cutting board. Chop them with a chef's knife into a mix of coarse pieces and small chunks, keeping some whole cashews aside for pressing into the top of the bark later.Look for The mix shows a range of chunk sizes, with cashew halves and brittle shards visible.Tip Wear cut-resistant gloves if you prefer, and keep the knife angled away from your fingers while chopping.
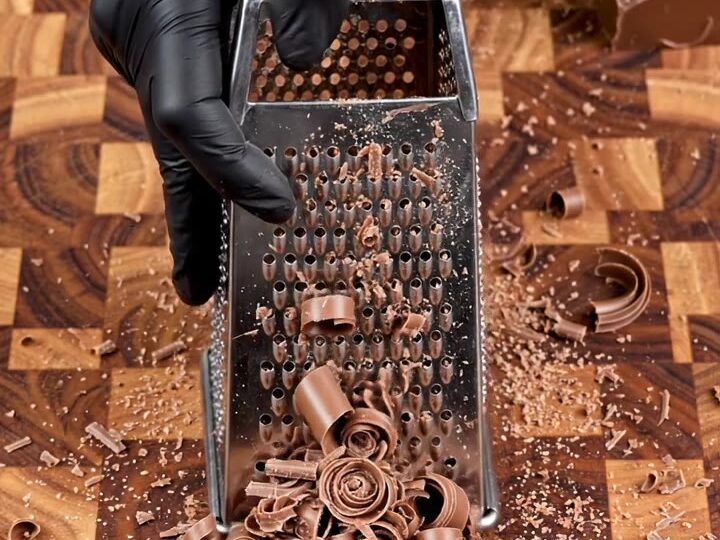
- Grate the milk chocolateGrate the milk chocolate bar over a box grater, using the fine side, until you have a pile of soft chocolate curls and shavings. Set the chocolate aside in a bowl so it stays ready for spreading.Look for The grated chocolate forms thin curls and fine shavings that pile up loosely.Tip Chill the chocolate bar for 10 minutes first so it grates cleanly without softening.
- Line the baking sheetLine a metal baking sheet with parchment paper, pressing it flat so it lies smooth across the surface. The parchment keeps the bark from sticking and lets you lift the finished slab off easily.Look for The parchment lies flat with no wrinkles across the whole sheet.Tip Tape the corners of the parchment down so it does not slide while you spread the chocolate.
The cashews and brittle are chopped into mixed sizes, the milk chocolate has become fine curls and shavings, and the parchment lies flat on the sheet. The chocolate spreads into an even layer with no bare patches. Before moving on, check that the chocolate covers the whole sheet at an even thickness, because thin spots set first and create brittle edges.
Also confirm the squeeze bottle is filled and the caramel flows freely, since thick caramel will not form clean swirls. If the chocolate has softened from the warmth of your hands, chill the sheet for a few minutes so the layer firms before you add the caramel. This small pause keeps the layers distinct and the final slab easy to break cleanly along its lines.
Add the caramel and crunchy topping
- Spread the chocolate layerScatter the grated milk chocolate over the parchment and spread it into an even layer with the back of a spoon or your fingertips. Aim for a layer of uniform thickness so the bark breaks into pieces of similar size.Look for The chocolate covers the sheet in an even, unbroken layer.Tip Press the chocolate lightly so the curls stick together and hold their shape.
- Drizzle the salted caramelFill a squeeze bottle with the amber salted caramel sauce and drizzle it over the chocolate in zigzag lines. Spread the caramel gently with a spoon so the lines blend into swirls across the surface.Look for Glossy amber caramel lines run across the chocolate in visible swirls.Tip Warm the caramel slightly if it is too thick to squeeze smoothly.
- Add the cashews and brittleScatter the chopped cashews and brittle pieces over the caramel using a metal scoop. Press a few whole cashews into the top for visual effect, spacing them evenly across the sheet.Look for Chunks of nut and brittle sit across the caramel with whole cashews pressed on top.Tip Press the pieces in gently so they settle into the chocolate without sinking out of sight.
- Let the bark setLeave the sheet at cool room temperature until the chocolate and caramel are firm and the surface is smooth and glossy. Keep the sheet away from direct heat so the chocolate sets evenly.Look for The surface looks smooth and glossy, and the chocolate feels firm when touched lightly.Tip Refrigerate for about 30 minutes to speed up setting if your kitchen is warm.
The caramel forms glossy amber zigzag lines and swirls across the chocolate, and the cashew and brittle mix sits on top in visible chunks, with whole cashews pressed in for effect. Nothing should be sinking or pooling in one corner. Check that the chunks are spread evenly across the sheet, because clusters create thick, uneven pieces. Press the whole cashews gently into the caramel so they stay in place as the bark sets. The surface should look bright and even before it goes to set, and the caramel should still shine. If one area looks crowded, lift a few pieces and reposition them with the scoop before the caramel firms.
Set, break and finish with salt
- Break the bark into piecesLift the set slab off the baking sheet using the parchment. Cut it into rectangular pieces with a chef's knife, or break it along the lines by hand into irregular shards that show the cashews and brittle.Look for The slab cracks cleanly along its lines and each piece shows a crisp snap.Tip Warm the knife briefly under hot water and dry it, then cut for neat rectangles.
- Finish with flaky sea saltSprinkle the pieces with flaky sea salt while the surface is still cool and the caramel is set. Arrange the pieces on a serving plate or store them in an airtight container.Look for Flakes of salt sit on the glossy caramel and chocolate surface.Tip Add the salt just before serving so the flakes stay crisp and visible.
The bark sets at cool room temperature until the chocolate and caramel feel firm and the surface looks smooth and glossy. The slab lifts off the parchment as one sheet, then cuts or breaks into rectangles that show a crisp snap and visible cashews, brittle and caramel swirls.
Before serving, check that the flaky sea salt has been added to the cool, set pieces so the flakes stay crisp and visible. The pieces should release cleanly from the parchment without sticking. If the bark still gives under gentle pressure, return it to a cool place for a few more minutes before cutting, since cutting too early tears the surface and smears the caramel.
Common mistakes
The most common error is rushing the setting stage. If you cut or break the bark before the chocolate and caramel are firm, the pieces tear and the caramel smears across the chocolate, which leaves a soft, sticky edge instead of a crisp snap. Another frequent mistake is uneven chocolate.
Chocolate spread too thin in places sets fast and shatters, while thick patches stay soft longer, so the slab breaks into uneven pieces. Overfilling the caramel or squeezing it too fast makes heavy blobs rather than fine swirls, and those blobs can pull the chocolate apart when they cool. Finally, adding the salt too early, while the surface is still warm, lets the flakes dissolve or sink.
How to tell it’s done
The bark is done when the chocolate and caramel are fully firm and the surface looks smooth and glossy, with no tackiness when you touch it lightly with a fingertip. The slab should lift from the parchment as one piece and break along the lines with a clean, audible snap. There is no protein in this recipe and nothing to heat to a food-safety temperature, so the test is texture and appearance. If the caramel feels soft or leaves a mark on your finger, let the bark rest in a cool place for a little longer. Once it snaps cleanly and the cashews and brittle stay firmly embedded, the bark is ready to break into pieces and serve.
Up next · Part 3 of 3
4 variations · storage & make-ahead · 5 answers · printable card
Tips, FAQ & printable recipe (Part 3)← Back to the ingredients (Part 1)