Desserts · Part 2 of 3: Instructions
Caramelized Pear Tart with Honey Walnut Puff Pastry Step-by-step instructions
- Prep
- Cook
- Total
- Serves
- 8
Before you start
Gather everything before you open the pastry, because the sheet should stay cold until it goes into the oven. Set the oven rack to the middle position and heat the oven to 400°F (200°C). Line the rectangular baking tray with parchment paper so nothing sticks. Thaw the puff pastry in the refrigerator or on the counter just until it is pliable, not soft.
Core the pears and slice them thinly with a sharp knife, keeping the slices even so they bake at the same pace. Chop the walnuts coarsely and toast them lightly if you want a deeper flavor. Grate the hard cheese on the box grater and set it aside on a small plate. Melt the butter, warm the honey so it pours easily, and pick the rosemary leaves from their stems.
Ingredients at a glance (8)
- 1 sheet puff pastry, store-bought or made ahead, thawed
- 3 ripe pears, such as Bosc or Anjou, cored and thinly sliced
- 1/2 cup walnut halves, plus extra for scattering, lightly toasted and roughly chopped
- 1 oz hard cheese, such as Parmesan, for grating over the pastry
- 3 tbsp honey, for drizzling
- 2 sprigs fresh rosemary, leaves picked for garnish
- 1 tbsp unsalted butter, melted, to brush the pastry edges
- 1 tbsp granulated sugar, for sprinkling over the pears
Instructions
Base and walnut layer ready
- Prepare the pastry baseThaw the puff pastry sheet on the counter until pliable. Lay it on the parchment-lined baking tray and score a border about 1/2 inch in from the edge. Brush the border lightly with melted butter so it puffs and turns golden.Look for The pastry is cool, flexible and unfolds without cracking along its creases.Tip Keep the sheet cold until you are ready to bake so the layers stay distinct and puff well.
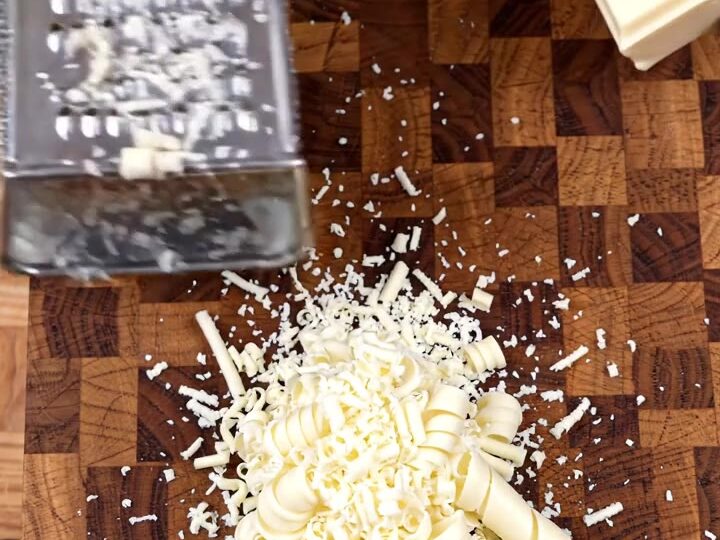
- Scatter walnuts and cheeseScatter the chopped walnuts evenly over the center of the pastry, inside the scored border. Using the box grater, grate the hard cheese over the walnuts and pastry so the shavings settle across the surface.Look for Walnut pieces and fine cheese shavings cover the pastry in an even layer.Tip Grate the cheese over a plate first if you want to catch the shavings neatly before scattering.
At the end of this phase the pastry sheet should lie flat on the parchment, with a neat border scored about half an inch from the edge and brushed with melted butter. The walnut pieces and the grated hard cheese should cover the center in an even layer, with no thick clumps. The pastry should still feel cool and firm to the touch, and it should not have stretched or torn when you handled it.
Before you go on, check that the border is intact and that no walnut pieces sit on the scored line, because those can block the edges from rising properly in the oven. If the pastry has softened, return the tray to the refrigerator for a few minutes before adding the fruit, so the layers keep their structure and puff evenly once baked.
Pears fanned and glazed
- Fan the pear slicesSlice the pears thinly and arrange them in overlapping rows or a radial pattern over the walnuts, starting from the outer edge. Sprinkle the pears with sugar so they caramelize while baking, then scatter a few more walnut pieces over the fruit.Look for Pear slices overlap neatly in curved rows with no bare patches of pastry showing.Tip Toss the slices in a little lemon juice first to keep them from browning before baking.
- Drizzle with honeyWarm the honey slightly so it pours easily. Drizzle it in thin lines across the pears and walnuts, letting some pool in the gaps between the slices so the glaze caramelizes into the fruit.Look for Honey coats the fruit in glossy streaks and sits in the spaces between the slices.Tip Use a spoon to pour the honey in a zigzag rather than a single puddle for even coverage.
- Bake until puffed and goldenBake the tart on the middle rack until the pastry has puffed and turned deep golden at the edges and the pears are tender and caramelized at the tips. Keep an eye on the walnuts so they do not darken too far.Look for The crust rises high at the border and the pear edges look bronzed and glossy.Tip Rotate the tray halfway through baking if your oven heats unevenly.
At the end of this phase the pear slices should be fanned in overlapping rows or a radial pattern across the walnuts, covering most of the center without leaving bare pastry. Each slice should look even in thickness, and the sugar should be scattered evenly over the fruit. The honey should be drizzled in thin lines so it pools in the gaps between the slices and glistens on top. Check that no slices are stacked too thickly, because thick areas bake slowly and stay firm in the middle. If the honey looks too thick to pour, warm it briefly and drizzle again. Once the fruit is covered and the glaze is spread, the tart is ready to go into the oven without further changes.
Puffed, golden and rested
- Rest, garnish and sliceLet the tart rest on the tray for about 10 minutes so the glaze sets slightly. Scatter fresh rosemary leaves over the top, then slice the tart into portions and serve warm or at room temperature.Look for The glaze looks set and glossy, and the crust stays crisp when cut.Tip Add the rosemary just before serving so the leaves stay bright and fragrant.
At the end of this phase the tart should have puffed up high along the border and turned a deep golden brown, with the pear edges bronzed and sticky. The walnuts should look toasted rather than dark, and the honey glaze should have set into a glossy shine. The pastry should sound crisp when you tap the border lightly and should hold its shape without sagging. Before slicing, let the tart rest on the tray for about ten minutes so the glaze firms slightly and the fruit settles. If the crust has browned too quickly, lower the heat slightly for the remaining minutes next time, and if the centre looks pale, return the tart to the oven for a few extra minutes until the pears show color.
Common mistakes
The most common problem is a soggy base, which usually comes from overripe pears that release too much juice during baking. Choose firm pears and slice them thinly but evenly, then blot any excess moisture with a clean towel before fanning them over the pastry. Another mistake is brushing the entire sheet with butter, which keeps the layers from separating and stops the pastry from puffing properly.
Brush only the border. Overloading the center with cheese or walnuts also weighs the pastry down, so scatter them in a single, light layer. Finally, avoid slicing the tart straight from the oven: the honey glaze is still soft, and cutting too early makes the fruit slide and the crust lose its shape.
How to tell it’s done
The tart is done when the pastry has risen high along the border and turned a deep, even golden brown, with no pale, doughy patches along the edges. The pear slices should look tender and caramelized at their tips, and the honey should have set into a glossy, slightly tacky glaze rather than running. The walnuts should look toasted and fragrant.
Tap the border lightly: it should sound crisp and feel firm, not soft. The tart has no protein, so it does not need a thermometer reading. If the center still looks pale or the pears feel firm when you press them gently with a spatula, return the tart to the oven for a few more minutes and check again every two minutes until the fruit is fully tender and the crust is set.
Up next · Part 3 of 3
4 variations · storage & make-ahead · 5 answers · printable card
Tips, FAQ & printable recipe (Part 3)← Back to the ingredients (Part 1)