Desserts · Part 2 of 3: Instructions
Caramel Macchiato Espresso Mascarpone Cheesecake with Chocolate Crust Step-by-step instructions
- Prep
- Cook
- Total
- Serves
- 12
Before you start
Set the oven rack to the center position and heat the oven to 325°F (163°C). Grease the inside of a 9-inch springform pan and wrap its outside with two layers of heavy foil to keep water out during baking. Bring the mascarpone, cream cheese and eggs to room temperature, about 1 hour before you start. Brew a shot of espresso and let it cool completely.
Chop the caramel candies and roasted coffee beans and set them within reach, along with a box grater, a piping bag and a star tip. Set a kettle of hot water ready for the water bath. Having each component measured and close by keeps the batter moving smoothly, so the filling goes into the pan at the right consistency.
Ingredients at a glance (13)
- 1 1/2 cups chocolate sandwich cookie crumbs
- 5 tbsp unsalted butter, melted
- 30 soft caramel candies, chopped
- 1/4 cup heavy cream
- 2 tbsp roasted coffee beans, chopped
- 2 tbsp espresso, cooled
- 16 oz mascarpone cheese, at room temperature
- 16 oz cream cheese, at room temperature
- 3/4 cup granulated sugar
- 3 large eggs, at room temperature
- 2 oz dark chocolate, for grating into fine shavings
- 1 cup chilled heavy cream, whipped to stiff peaks
- 2 tbsp confectioners' sugar, for the whipped cream
Instructions
Crust, caramel and filling
- Make the cookie crustCrush the chocolate cookies into fine crumbs. Stir in the melted butter until the mixture looks like wet sand. Press it firmly into the base and about 1 inch up the sides of a greased 9-inch springform pan, then chill while you prepare the filling.Look for The crumbs hold together when pinched and leave no dry patches.Tip Press the crust with the flat bottom of a glass for an even, firm base.
- Chop caramel and coffee beansChop the caramel candies into small pieces and combine them with the heavy cream in a small pan. Warm gently over low heat, stirring, until smooth and pourable. Chop the roasted coffee beans and set them aside for the garnish.Look for The caramel is smooth, glossy and thick enough to drizzle.Tip Keep the heat low so the caramel does not scorch.
The crust is firm and pressed evenly into the pan, the caramel is smooth and pourable, and the filling is smooth, glossy and free of lumps. Before moving on, check that the espresso is fully cooled and that the eggs were added one at a time with minimal mixing. The batter should pour slowly from the bowl and look uniform in color. Any streaks of cheese or grainy spots mean the cheeses need more beating. Stop here and fix the texture before the batter goes into the pan, because it is hard to correct once baked. The chilled crust and warm caramel should also be ready to assemble without delay.
Bake and swirl the cheesecake
- Beat the mascarpone fillingBeat the mascarpone and cream cheese until smooth. Add the sugar and beat until fully combined. Mix in the cooled espresso, then add the eggs one at a time, beating only until each is blended.Look for The batter is smooth, pale and glossy with no lumps.Safe temperature 160°F (71°C) internal temperature (egg dishes)Tip Beat on low speed after adding eggs to limit air bubbles.
- Layer and swirl the caramelPour the batter over the crust. Drizzle the caramel in a zigzag across the surface, then run a spoon through it in a few swirls. Set the pan in a water bath and bake at 325°F (163°C) for 50 to 60 minutes, until the edges are set and the center has only a slight wobble.Look for The top is golden and even, and the center jiggles only slightly.Safe temperature 160°F (71°C) internal temperature (egg dishes)Tip Wrap the outside of the pan in foil to keep water from seeping in.
- Cool and chill completelyTurn off the oven and leave the cheesecake inside with the door cracked for 1 hour. Remove it, cool to room temperature, then refrigerate uncovered until fully chilled.Look for The cheesecake feels firm when the pan is gently pressed.Tip Chill overnight for the cleanest slices.
The caramel zigzag sits on the surface and the spoon swirls have blended into soft, marbled lines. After baking, the edges look set and the top is golden and even, while the center moves only slightly when the pan is gently nudged. Check the surface and the wobble before turning off the oven.
The sides should pull slightly from the pan. If the center is still very loose, bake a few minutes longer and check again. Avoid opening the oven door during the first part of baking, since sudden temperature changes can crack the top. The cheesecake should look calm and even when you move on to chilling.
Chill, unmold and finish
- Unmold and decorateRelease the springform pan and slide the cheesecake onto a serving plate. Whip the chilled cream with the confectioners' sugar until stiff peaks form. Pipe rosettes around the edge, then spoon the remaining caramel over the center.Look for The cream holds a firm peak and the rosettes keep their shape.Tip Warm the caramel slightly for a looser, glossier drizzle.
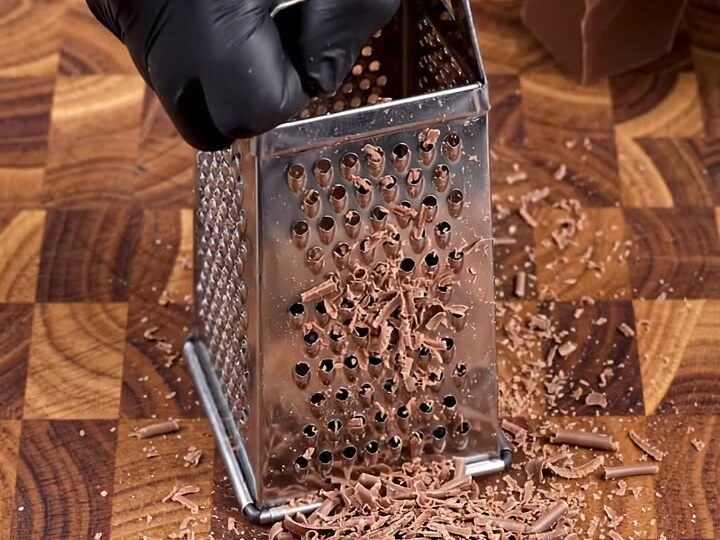
- Grate chocolate and serveGrate the dark chocolate with a box grater over the top to create fine shavings. Slide a cake lifter underneath to serve, cutting with a warm knife wiped clean between slices.Look for Fine shavings cover the center and the slices lift cleanly.Tip Chill the chocolate briefly so it grates into finer shavings.
The cheesecake is fully chilled, firm to a gentle press, and releases cleanly from the sides of the pan. The whipped cream holds stiff peaks and the rosettes keep their shape on the cool surface. Before serving, check that the caramel drizzle has a glossy, spoonable consistency and that the grated chocolate covers the center evenly. The slices should lift without breaking when a cake lifter slides underneath. If the top looks soft after unmolding, return the cheesecake to the refrigerator for 20 minutes and finish with the cream then. Keep the cheesecake cold until the moment it is served.
Common mistakes
The most common mistake is overbeating the filling after adding the eggs, which introduces too much air and can cause cracks and a puffed top during baking. Adding the espresso while it is still warm can soften the cheeses and thin the batter, leading to a loose center that takes much longer to set. Skipping the foil around the pan lets water seep into the crust and turns the base soggy.
Opening the oven door too often causes temperature swings that crack the surface. Cutting the cheesecake before it is fully chilled results in smearing and a ragged edge. Finally, piping the whipped cream on a warm cheesecake makes the rosettes slump, so keep the cream cold and pipe only after chilling is complete for the cleanest finish.
How to tell it’s done
The cheesecake is done when the edges look set and the top is golden and even, while the center has only a slight wobble when the pan is gently nudged. This is the point where the filling is cooked through but still tender and creamy. The eggs in the batter should reach 160°F (71°C) in the center to be fully cooked, which is the standard safe temperature for egg-based fillings.
Use an instant-read thermometer if you want certainty, checking near the center without touching the pan base. Once baked, turn off the oven, leave the cheesecake inside with the door cracked for an hour, then chill it completely. A fully chilled cheesecake feels firm when pressed and slices cleanly without sagging.
- Egg dishes: 160°F (71°C) in the thickest part
Up next · Part 3 of 3
4 variations · storage & make-ahead · 5 answers · printable card
Tips, FAQ & printable recipe (Part 3)← Back to the ingredients (Part 1)