Desserts · Part 2 of 3: Instructions
Caramel Macchiato Espresso Mascarpone Cheesecake with Biscuit Crust Step-by-step instructions
- Prep
- Cook
- Total
- Serves
- 12
Before you start
Set the oven rack to the lower-middle position and heat the oven to 325°F (163°C). Bring the cream cheese, mascarpone and eggs to room temperature so the batter blends smoothly without lumps. Wrap the outside of the springform pan in two layers of heavy foil, and have a larger roasting pan and a kettle of hot water ready.
Crush the graham crackers, chop the roasted coffee beans and melt the caramel candies into sauce so the filling can come together without interruption. Keep the whipped cream cold until you are ready to pipe, and set out a box grater, a piping bag with a star tip and a skewer. Preheating the oven and organizing every component first makes the final assembly calm and quick.
Ingredients at a glance (14)
- 1 1/2 cups graham cracker crumbs (about 10 full sheets)
- 6 tbsp unsalted butter, melted
- 2 tbsp granulated sugar
- 2 tbsp roasted coffee beans, chopped
- 2 tbsp espresso, cooled
- 24 oz cream cheese, softened
- 8 oz mascarpone cheese
- 3/4 cup granulated sugar
- 3 large eggs, at room temperature
- 1 tsp vanilla extract
- 1/4 cup sour cream
- 1/2 cup soft caramel candies, melted into warm caramel sauce (store-bought or made ahead)
- 1 cup cold heavy cream, whipped to stiff peaks with 1 tbsp sugar
- 1 oz dark chocolate bar, for grating into shavings
Instructions
Build the crust and filling
- Crush and chill the crustCrush the graham crackers finely with a food processor or rolling pin. Stir in the melted butter and sugar until the crumbs look like damp sand. Press firmly into the bottom and 1 inch up the sides of the springform pan, then chill while you prepare the filling.Look for Crumbs clump when squeezed and hold their shape.Tip Press the crust with the bottom of a flat glass for an even, firm base.
- Chop the coffee beansFinely chop the roasted coffee beans with a long, heavy knife on a cutting board, until they form a coarse, fragrant grit. Set aside with the espresso so the coffee flavor blooms through the batter.Look for Beans break into small, dark, aromatic pieces.Tip Chop in short rocking motions to keep the pieces even.
- Beat the cream cheese baseBeat the softened cream cheese, mascarpone and sugar in a large bowl on medium speed until completely smooth, scraping the bowl often. Add the vanilla, sour cream and cooled espresso, mixing until the color is an even light coffee brown.Look for The batter is smooth, glossy and free of lumps.Tip Beat only until combined; overmixing adds air that can crack the top.
The crust should be firm and evenly packed, with no loose crumbs left in the pan. The filling should be smooth, glossy and an even light coffee brown, with no streaks of cream cheese or mascarpone. Give the batter a final check with a spatula, lifting it to confirm that it falls in slow, thick ribbons. If you see lumps, beat for another 30 seconds on low speed. Pour into the crust only when the texture is uniform, because any grit at this stage will remain in the baked cheesecake. Chill the crust while the filling comes together so it stays firm when the batter goes on top.
Bake, cool and chill
- Add eggs and chopped coffeeAdd the eggs one at a time on low speed, mixing just until each is incorporated. Fold in the chopped coffee beans. Pour the filling over the crust in the springform pan and smooth the top with an offset spatula.Look for Filling is thick, creamy and evenly flecked with coffee.Safe temperature 160°F (71°C) internal temperature (egg dishes)Tip Tap the pan on the counter to release trapped air bubbles.
- Bake the cheesecakeSet the springform pan in a larger pan and pour hot water around it to halfway up the sides. Bake at 325°F (163°C) for 50 to 60 minutes, until the edges are set and the center still jiggles slightly. Turn off the oven, crack the door and cool inside for 1 hour, then refrigerate at least 6 hours.Look for Edges look matte and set while the center barely moves.Safe temperature 160°F (71°C) internal temperature (egg dishes)Tip A water bath keeps the surface smooth and prevents cracks.
- Warm the caramel sauceMelt the soft caramel candies with 1 to 2 tablespoons of water in a small saucepan over low heat, stirring until smooth and pourable. Transfer to a piping bag and let it cool just enough to hold its shape.Look for Sauce is smooth, glossy and flows slowly from the bag.Tip Add water one teaspoon at a time if the sauce is too thick.
After baking, the edges should look set and matte while the center still moves gently when the pan is tapped. Turn off the oven, crack the door and let the cheesecake cool inside for about an hour, which prevents sudden temperature changes that cause cracks.
Move it to the refrigerator uncovered for a short time, then cover it loosely. Chill for at least six hours, until the center feels firm to a light touch and the surface looks dry. Only then should you release the sides and move on to the caramel, because a fully chilled cheesecake holds the swirl and rosettes without slumping.
Finish and garnish the cheesecake
- Pipe and swirl the caramelRemove the chilled cheesecake from the pan. Squeeze the warm caramel from the piping bag in zigzag lines across the top, then drag a skewer through them to swirl the caramel into the creamy surface.Look for Caramel forms soft, marbled ribbons on the surface.Tip Work quickly while the caramel is still warm and easy to pull.
- Pipe the whipped creamWhip the cold heavy cream with the sugar until stiff peaks form. Fit the piping bag with a star tip and pipe rosettes in a ring around the edge of the cheesecake.Look for Cream holds firm peaks that keep their shape on a spoon.Tip Chill the bowl and beaters for faster, firmer whipped cream.
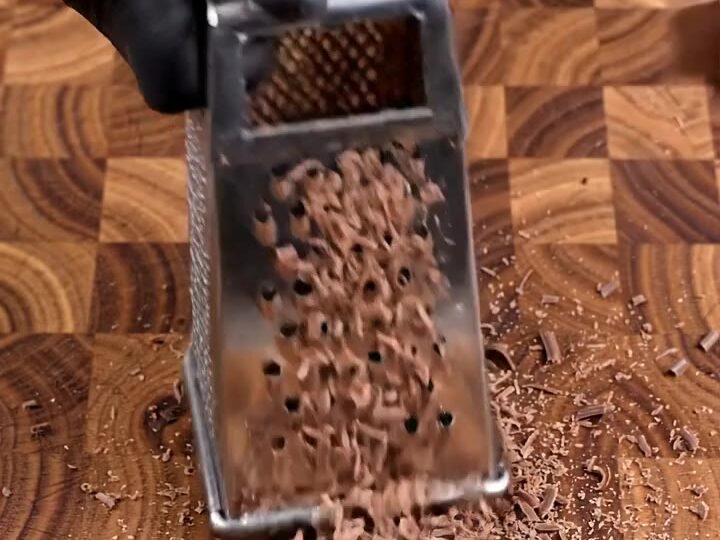
- Finish and sliceDrizzle the remaining caramel over the rosettes, grate the dark chocolate over the board and scatter shavings on top, then crumble the reserved biscuit pieces. Slice through the center with a long, warm knife, wiping it between cuts.Look for Wedges cut cleanly and reveal a set, caramel-coffee center.Tip Dip the knife in hot water and wipe it dry for neat slices.
The caramel should be warm, glossy and pourable, but thick enough to hold a ribbon on the surface. After swirling, the caramel should look marbled rather than pooled. The whipped cream should hold firm, stiff peaks that keep their shape when piped. Before serving, check that the rosettes are evenly spaced around the edge and the chocolate shavings are scattered lightly, not piled. Slice with a long, warm knife, wiping it clean between cuts, and check that each wedge holds its shape cleanly on the server.
Common mistakes
The most common mistake is overbaking. A cheesecake left in the oven until the center is completely firm will crack, dry out and taste grainy instead of creamy. Pull it out while the middle still wobbles, and let residual heat finish the set during cooling. Another common error is using cold cream cheese, which leaves small lumps that stay visible after baking.
Beating the batter too fast or too long can also whip in air, creating bubbles and cracks on the surface. Finally, do not pipe the whipped cream until the cheesecake is fully chilled, or the rosettes will soften and slide. Keep the caramel warm enough to pour but not so hot that it melts the cream it touches.
How to tell it’s done
A properly baked cheesecake looks set at the edges, with a matte surface and a center that trembles only slightly when the pan is nudged. Gently press the surface near the middle: it should feel softly firm, not wet or liquid. The eggs in the filling need to reach 160°F (71°C) internally to be cooked through, and the cheesecake should be chilled for at least six hours before slicing.
Test the center with an instant-read thermometer inserted near the middle, but keep the probe small to avoid leaving a visible hole. A finished cheesecake feels dense and creamy when sliced, and the wedge keeps its shape on the server without sagging.
- Egg dishes: 160°F (71°C) in the thickest part
Up next · Part 3 of 3
4 variations · storage & make-ahead · 5 answers · printable card
Tips, FAQ & printable recipe (Part 3)← Back to the ingredients (Part 1)