Desserts · Part 2 of 3: Instructions
Caramel Chocolate Cream Layered Dessert Step-by-step instructions
- Prep
- Cook
- Total
- Serves
- 4
Before you start
Before beginning, ensure all ingredients are properly measured and ready. The heavy cream must be taken directly from the refrigerator to ensure it whips effectively. Have your serving glasses lined up on a tray to streamline the assembly process.
Chop the dark chocolate into uniform, bite-sized chunks to ensure an even distribution in each layer. If the caramel is too thick to drizzle, warm it very slightly in a microwave-safe bowl for a few seconds to achieve a silky, pourable consistency.
Ingredients at a glance (4)
- 2 cups heavy whipping cream, chilled
- 1/2 cup caramel sauce
- 4 oz dark chocolate, chopped
- 1 cup crushed biscuits
Instructions
Whipping the cream
- Prepare the whipped creamIn a large chilled mixing bowl, whip the heavy whipping cream using an electric hand mixer until stiff peaks form, ensuring the cream is light and airy.Look for The cream holds its shape firmly on the beaters.Tip Ensure the cream is very cold before whipping to achieve the best volume.
The cream should be smooth, thick, and hold its shape perfectly on the beaters. It should look bright white and glossy, with a light, airy texture that is easy to spread or pipe into the glasses.
Layering the glass
- Layer the ingredientsPlace a layer of crushed biscuits at the bottom of each serving glass. Drizzle with a portion of the caramel sauce. Add a generous dollop of whipped cream, then top with a layer of chopped dark chocolate.Look for The layers are distinct and visually appealing through the glass.Tip Use a small spoon to spread the chocolate evenly without disturbing the cream layer.
Each layer should be visible through the glass, showing distinct bands of biscuit, caramel, cream, and chocolate. The layers should be relatively even in height to ensure a balanced flavor in every single spoonful.
Chilling the dessert
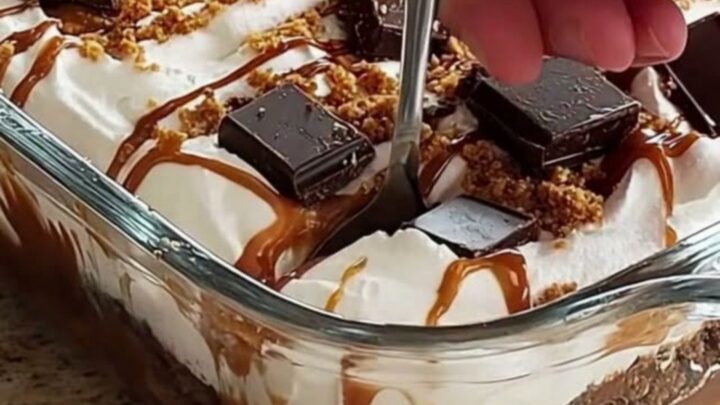
- Finish and chillRepeat the layers until the glasses are full, finishing with a final drizzle of caramel and a sprinkle of crushed biscuits and dark chocolate squares. Chill the assembled desserts in the refrigerator for at least one hour before serving.Look for The dessert looks set and chilled.Tip Allowing the dessert to chill helps the flavors meld together nicely.
After chilling, the entire dessert should feel cold to the touch. The whipped cream should remain stable and not show signs of weeping. The caramel should be slightly thickened, and the chocolate should be firm.
Common mistakes
A common mistake is over-whipping the cream, which can turn it grainy or even transform it into butter. Stop mixing the moment stiff peaks form.
Another error is using warm ingredients; if the caramel is too hot, it will melt the whipped cream layer, causing the dessert to lose its distinct layers.
Always allow the caramel to cool to room temperature before assembling. Avoid adding too many crumbs in one layer, as this can make the dessert difficult to eat with a spoon.
How to tell it’s done
The dessert is ready when the whipped cream is firm and the layers are clearly defined. There is no actual cooking required, so no internal temperature applies. The final visual check should show a stable structure that does not slump when the glass is tilted slightly.
The top layer of chocolate and biscuit crumbs should appear set and crisp, indicating that the dessert has had enough time in the refrigerator to reach the ideal serving temperature.
Up next · Part 3 of 3
2 variations · storage & make-ahead · 3 answers · printable card
Tips, FAQ & printable recipe (Part 3)← Back to the ingredients (Part 1)