Breakfast · Part 2 of 3: Instructions
Quick Korean Street Toast with Sweet Cabbage Omelet Step-by-step instructions
- Prep
- Cook
- Total
- Serves
- 2
Before you start
Before you start, make sure your griddle or largest skillet is large enough to hold both the omelet and the bread slices at the same time.
Prep all your ingredients: shred the cabbage, julienne the carrots, chop the scallions, and have the ham, cheese, and condiments within reach. Whisk the eggs and vegetables together just before cooking so the cabbage stays crisp and doesn't release too much water.
Ingredients at a glance (11)
- 4 slices thick milk bread
- 2 large eggs
- 100 g finely shredded cabbage
- 30 g julienned carrots
- 2 tbsp chopped scallions
- 2 tbsp butter, divided
- 4 slices smoked ham
- 4 slices cheddar cheese
- 1 tsp white sugar
- 2 tbsp ketchup
- 2 tbsp Kewpie mayonnaise
Instructions
Prep the Egg Mixture
- Whisk the Egg MixtureIn a medium bowl, crack the eggs and whisk until the yolks and whites are fully blended. Add the finely shredded cabbage, julienned carrots, and chopped scallions. Stir everything together until the vegetables are evenly coated with the egg.Look for The mixture should look like a loose, vegetable-packed omelet batter.Tip Use a fork or whisk to break up any clumps of cabbage so it's evenly distributed.
- Butter the GriddlePlace a flat-top griddle or large skillet over medium heat and add 1 tablespoon of the butter. Let it melt and sizzle until it foams but does not brown. Spread the butter evenly across the cooking surface.Look for The butter should be melted and shimmering but not smoking.Tip If using a skillet, make sure it's large enough to hold the omelet and the bread slices at the same time.
The egg mixture should be well combined, with every strand of cabbage and carrot coated in egg. The griddle should be hot and the butter melted and foaming. The aroma of butter heating up is the first sign that breakfast is on its way.
Cook the Omelet and Toast the Bread
- Cook the Cabbage OmeletPour the egg and vegetable mixture onto the buttered griddle. Spread it into an even rectangle, about the size of the bread slices. Cook without stirring for 2 minutes, until the bottom is golden and the top is just set.Look for The omelet should be golden underneath and the top should look moist but not runny.Safe temperature 160°F (71°C) internal temperature (egg dishes)Tip Resist the urge to flip too early; let the bottom develop a nice golden crust.
- Flip and Top the OmeletCarefully flip the omelet with a spatula. Immediately lay the ham slices and cheddar cheese on top of the cooked side. Sprinkle the white sugar evenly over the cheese. Let the cheese melt for about 1 minute.Look for The cheese should begin to melt and the ham should warm through.Safe temperature 160°F (71°C) internal temperature (egg dishes)Tip If the omelet is too large to flip cleanly, cut it in half first.
- Toast the BreadWhile the omelet cooks, add the remaining 1 tablespoon of butter to an empty spot on the griddle. Place the milk bread slices in the melted butter and toast for 1 to 2 minutes per side, until golden brown and crisp.Look for The bread should be golden and crisp on both sides, with a buttery sheen.Tip Use a spatula to press the bread down gently so it toasts evenly.
The omelet should be golden on the bottom, with the top just set and the cheese melting over the ham. The bread should be toasting in the butter, turning golden and crisp. The kitchen should smell of butter, toasted bread, and melting cheese.
Assemble and Serve
- Assemble the SandwichTransfer two toasted bread slices to a cutting board. Spread ketchup on one slice and Kewpie mayonnaise on the other. Place the cheesy ham omelet on top of the ketchup slice, then close the sandwich with the mayo slice.Look for The sandwich should be stacked evenly with the omelet slightly overhanging.Tip For a neater sandwich, trim the omelet to fit the bread before assembling.
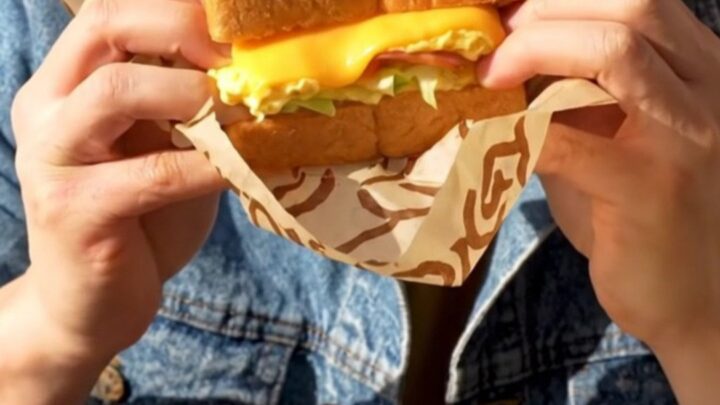
- Wrap and SliceWrap the sandwich tightly in wax paper, then slice it diagonally. The wax paper holds everything together while you cut and also makes it easy to eat on the go.Look for The sandwich should hold its shape when sliced, with the cheese slightly oozing.Tip Let the sandwich rest for 30 seconds before slicing to let the cheese set slightly.
The sandwich should be wrapped in wax paper and sliced diagonally, exposing the layers of bread, omelet, ham, and cheese.
The cheese should be slightly oozing, and the condiments should be visible. The first bite should crunch through the toast and give way to the soft, savory omelet.
Common mistakes
One common mistake is overcrowding the griddle, which lowers the heat and makes the omelet steam instead of sear. Another is flipping the omelet too early—wait until the bottom is golden and the top is just set.
Also, don't skip the sugar; it's what gives this toast its signature sweet-savory flavor. And be sure to toast the bread in the same butter for maximum flavor.
How to tell it’s done
The omelet is done when it's fully set and reaches an internal temperature of 160°F (71°C) to ensure the eggs are cooked through—no runny bits.
The bottom should be golden brown, and the cheese on top should be fully melted and bubbling slightly. The bread should be toasted to a deep golden color on both sides, crisp enough to hold the fillings without becoming soggy.
- Egg dishes: 160°F (71°C) in the thickest part
Up next · Part 3 of 3
4 variations · storage & make-ahead · 5 answers · printable card
Tips, FAQ & printable recipe (Part 3)← Back to the ingredients (Part 1)